A company that can't organize a coherent email system is not a good one. If you can't get your mail delivered by owls like in ‘Harry Potter’, set up a corporate mail system on your domain. With ispmanager this is easier than feeding an owl from your hand.
Rolling out a detailed guide on how to create corporate email on your domain and VPS with ispmanager or migrate from another email service and not get plucked like a Thanksgiving turkey. So, let's take off!
What is a corporate mail on your own domain
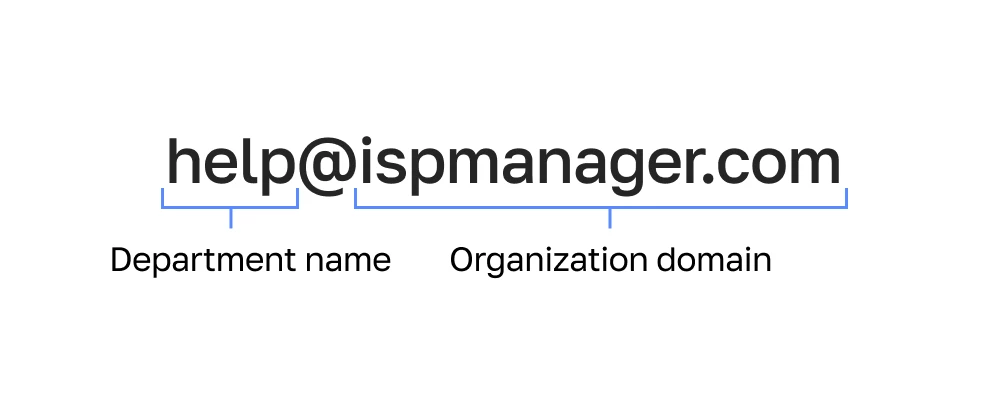
Corporate mail is a variant of e-mail installed on an organization's domain. It is used for work purposes only, and you may see an employee's name or the name of a company department in the name. Corporate mail does not use standard email domains like gmail.com or yahoo.com - those are for personal mailboxes only.
Why use corporate mail
Corporate mail is one of the essential attributes of a business, just like a logo or a website. It shows the status of the company, increases brand recognition and user loyalty. An email from a company is more likely to be opened and read than one from an unknown man's personal mailbox.
Corporate mail also offers business benefits:
- Simplifies and speeds up communication with customers;
- Provides a secure network for employee communications;
- Can be used as a file exchange;
- Helps control employee activities.
In addition, letters sent via corporate e-mail are less likely to to get into spam and are better protected from intruders thanks to the system of additional spam filters and antivirus protection. All in all, a plus, especially if you consider that corporate mail can be made conditionally free by placing it on your own server.
How to create a corporate e-mail on your domain and VPS with ispmanager
Now, let's figure out how to configure your corporate e-mail so that it doesn't go to spam and reaches its intended recipients. There are two options:
- Use of ready-made services: for example, Google Workspace. The advantage of such solutions is simplicity and ease of use. However, there are also limitations: an off-the-shelf service does not have the ability to fully manage the entire mail server. In addition, the rates offered by mail services are not always profitable for users and can change at any moment.
- How to create mail on your domain. Mail is deployed on a server that is already used for a website or web application. This option is more difficult to implement, but it involves more customization options. In addition, mail on your domain, as a rule, turns out to be cheaper.
We will show you how to deploy your corporate mail on a VPS server with ispmanager - without complex Linux configuration and cheaper than using off-the-shelf solutions.
Step 1. Create a mail server
After adding a domain, you can start creating a mail server that will receive and send emails. You can create a server in the "Settings" - "Software Configuration" menu. Then you need to select the mail server in the list and click "Edit".
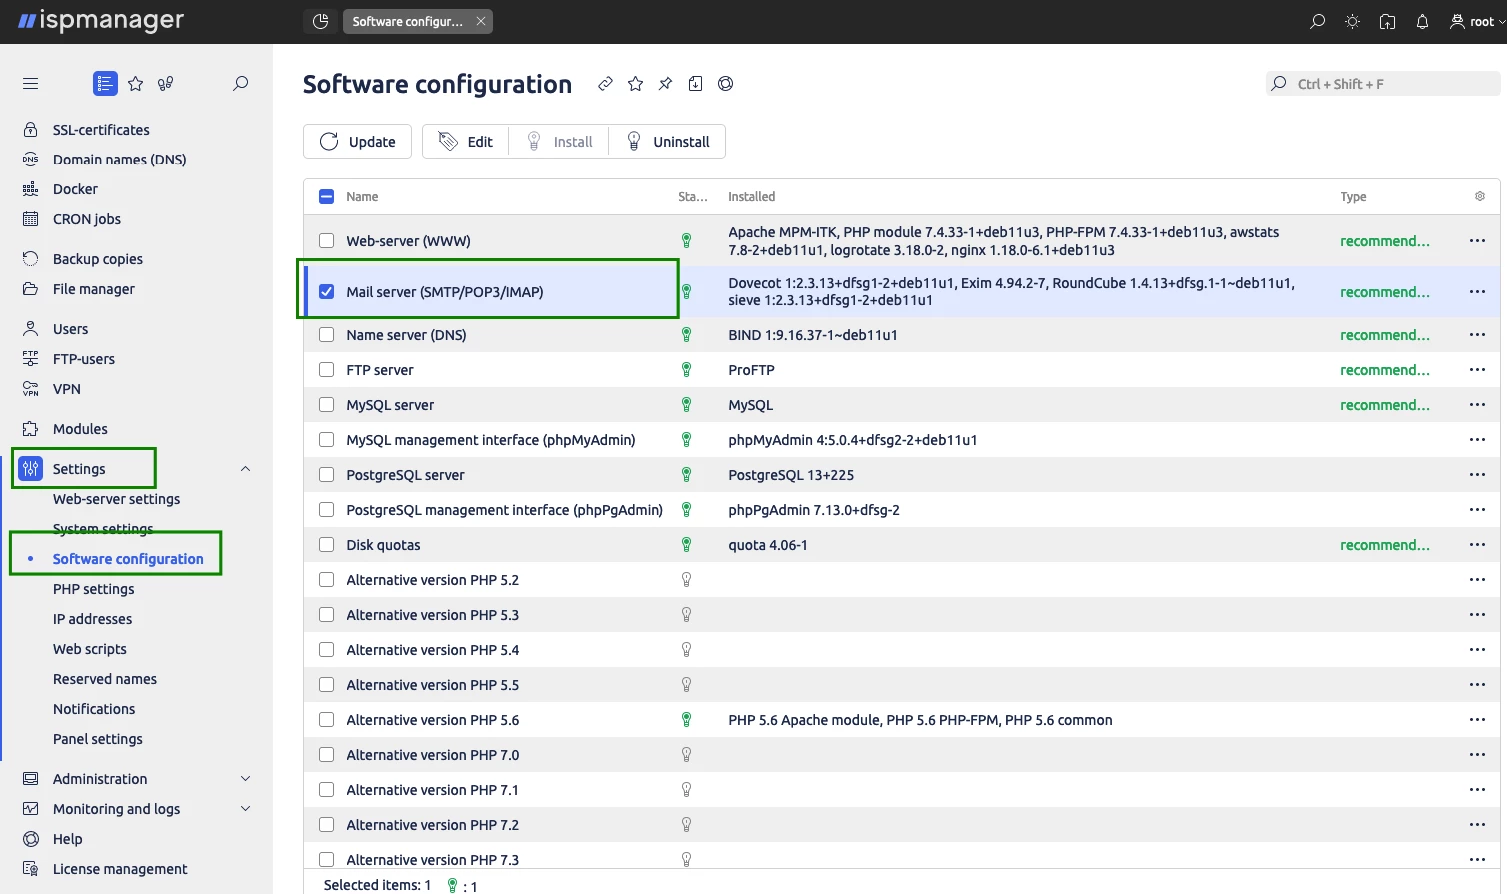
ispmanager works with two types of servers: Exim and Dovecot. The first is responsible for forwarding emails, the second takes quotas into account and forwards emails to mailboxes. It is important to install both mail servers for your corporate mail to work properly.
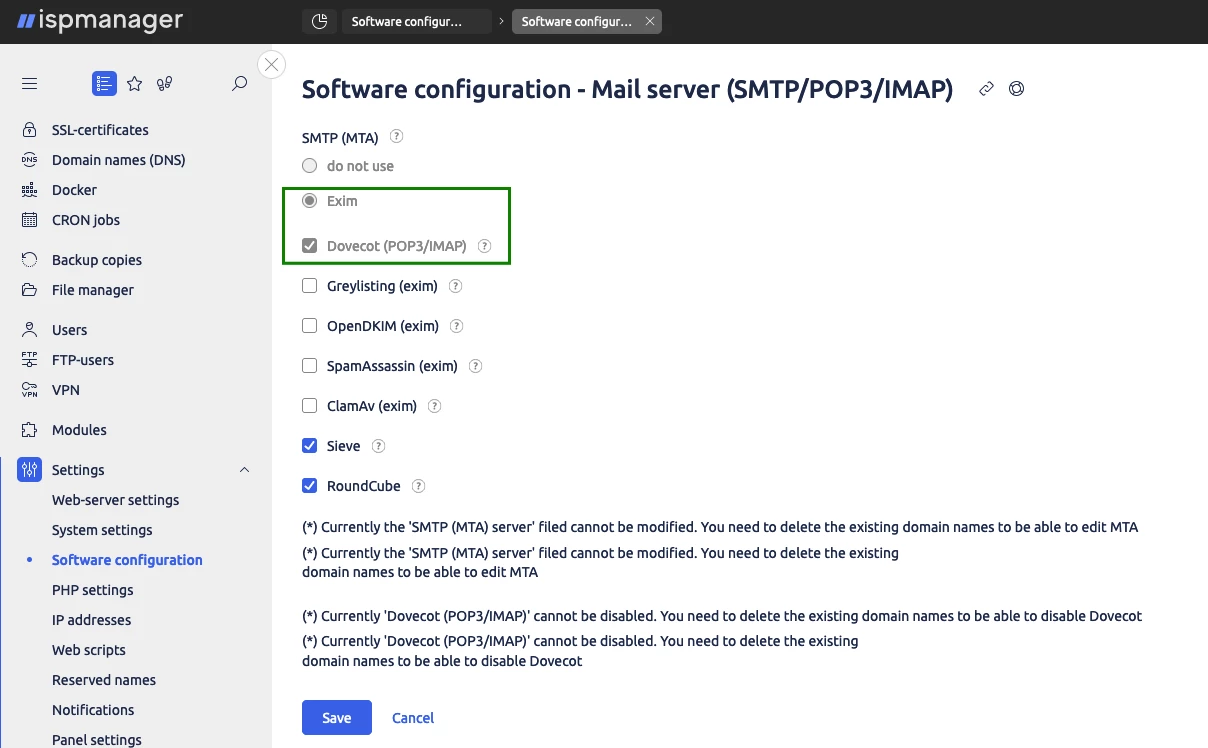
It is also possible to install all the tools available when you create a mail domain here. If you enable anti-virus, anti-spam, or phishing protection on the mail server, the tools will work on all connected mail domains.
Step 2: Create a mail domain
Mailboxes in corporate mail are united by a mail domain. To create a mail domain in ispmanager, go to the "Mail" section — "Mail domains" and select "Create mail domain".
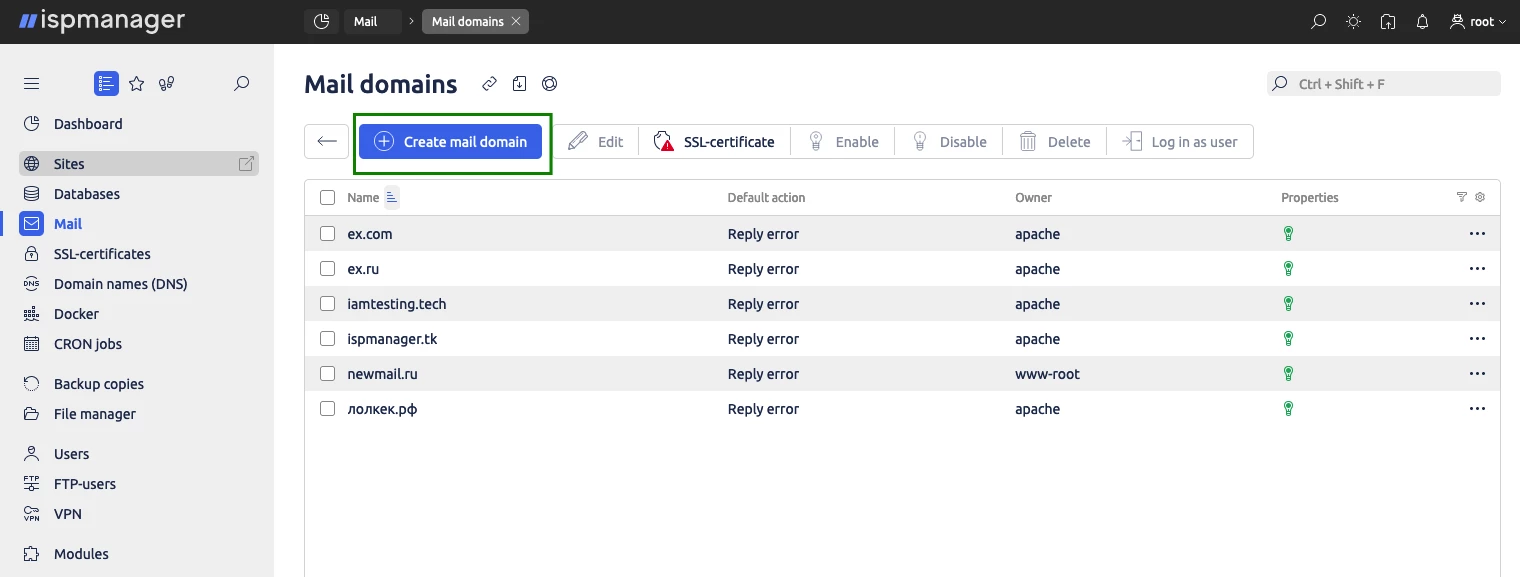
Next, it remains to enter the domain name for corporate mail, specify the owner of the mail domain and the IP address. If you leave the "get automatically" parameter in the IP settings, the domain is bound to the least loaded address.
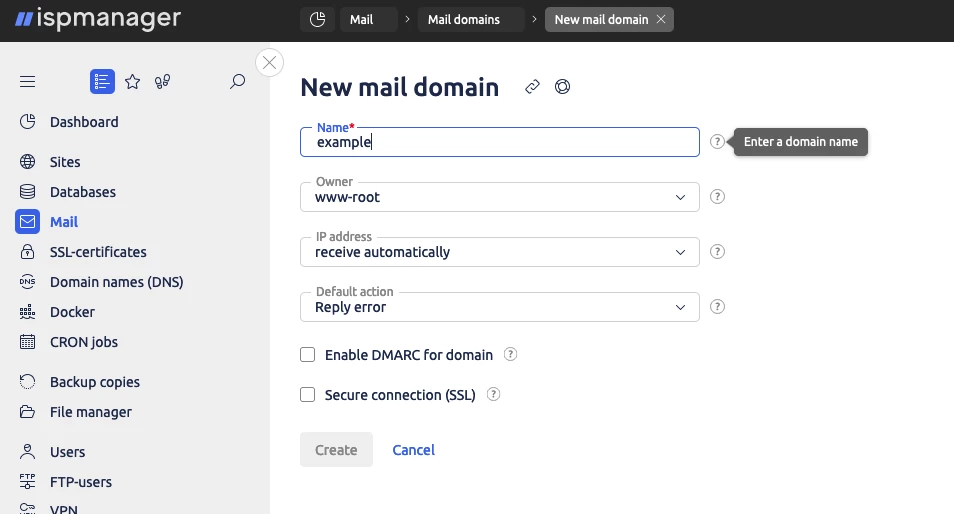
Finally, you can connect options to the mail domain that will increase the security of corporate mail. The following are available:
- SpamAssassin — SpamAssassin is a spam filtering tool that filters out emails by a template library and a list of transport agents.
- Virus scan is an antivirus software that checks files attached to an email.
- DMARC for domain — a phishing protection technology. Allows you to determine that the email really came from the specified address.
- Secure Connection (SSL) — SSL/TLS protocols that encrypt traffic between the client and the mail server.
You should also specify a default action that determines what the server will do if it receives an email to a mailbox that does not exist. The server can report an error, delete and ignore the mail, or redirect it to a specified address.
How to transfer mail from other services to ispmanager
You can transfer an existing mail server to the control panel. Let's look at how to import mail into ispmanager. There are three motley options to choose from but first things first.
The quota check first
Before migrating a mail server to ispmanager, it is important to prepare: check for restrictions and import settings. Only IMAP mailboxes can be migrated to the panel - it is important to check whether the protocol is enabled before migration. When importing into a mailbox with the same name, the content of files in the panel will be overwritten - you should also keep this in mind.
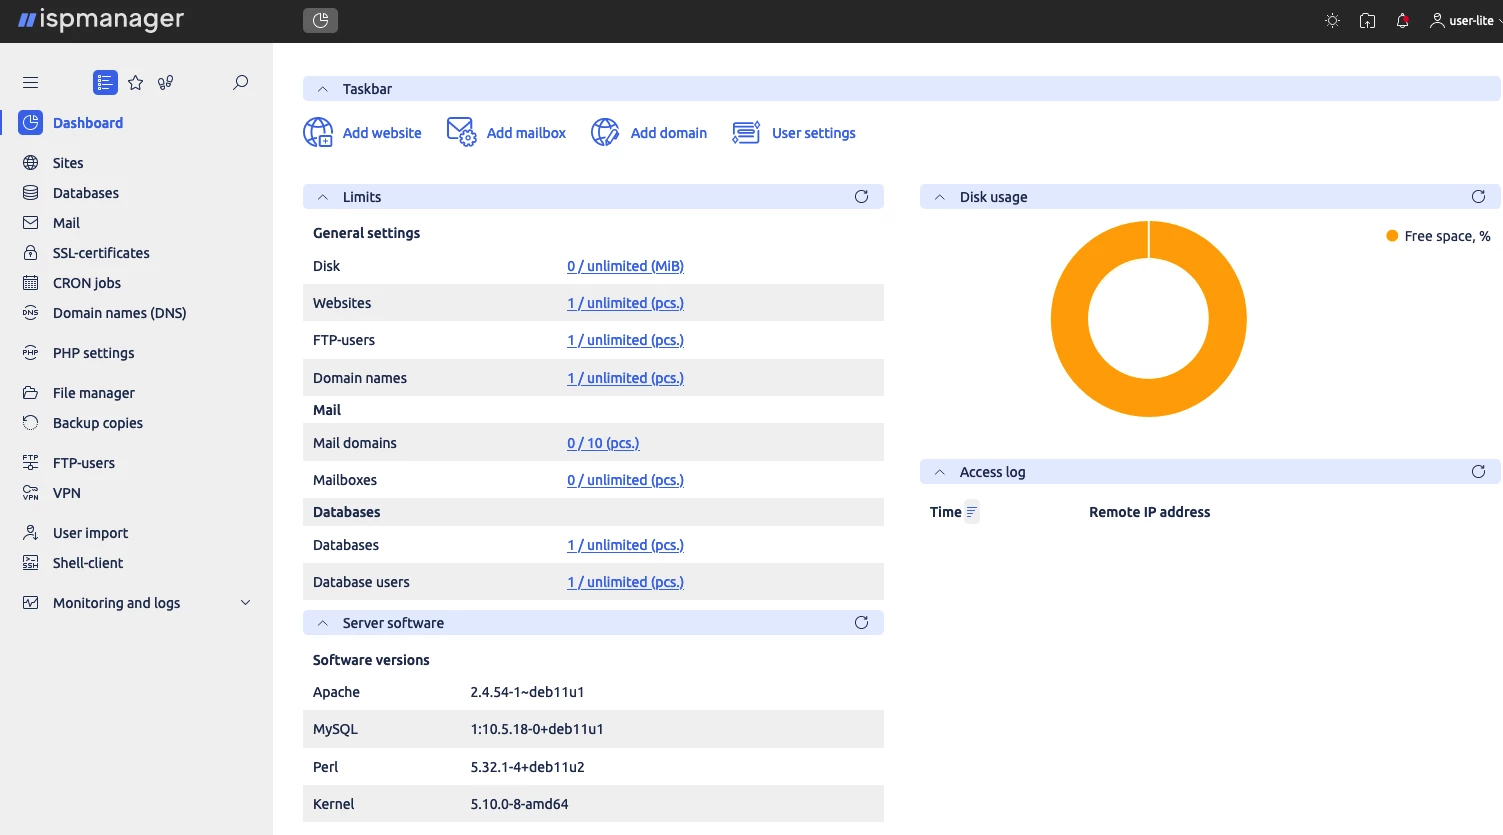
For users in ispmanager there are quotas for disk space, mail domains and mailboxes, which should be taken into account when transferring mail.
You can check the quotas from the dashboard, ‘Limits’ section.
The administrator of the control panel can expand the quotas for importing emails. To do this, go to the "Users" section, select the user and click "Edit". Then specify the limits for the user - the number of available mail domains and mailboxes.

You can also view the available disk space in the Server Resources section of the Dashboard.
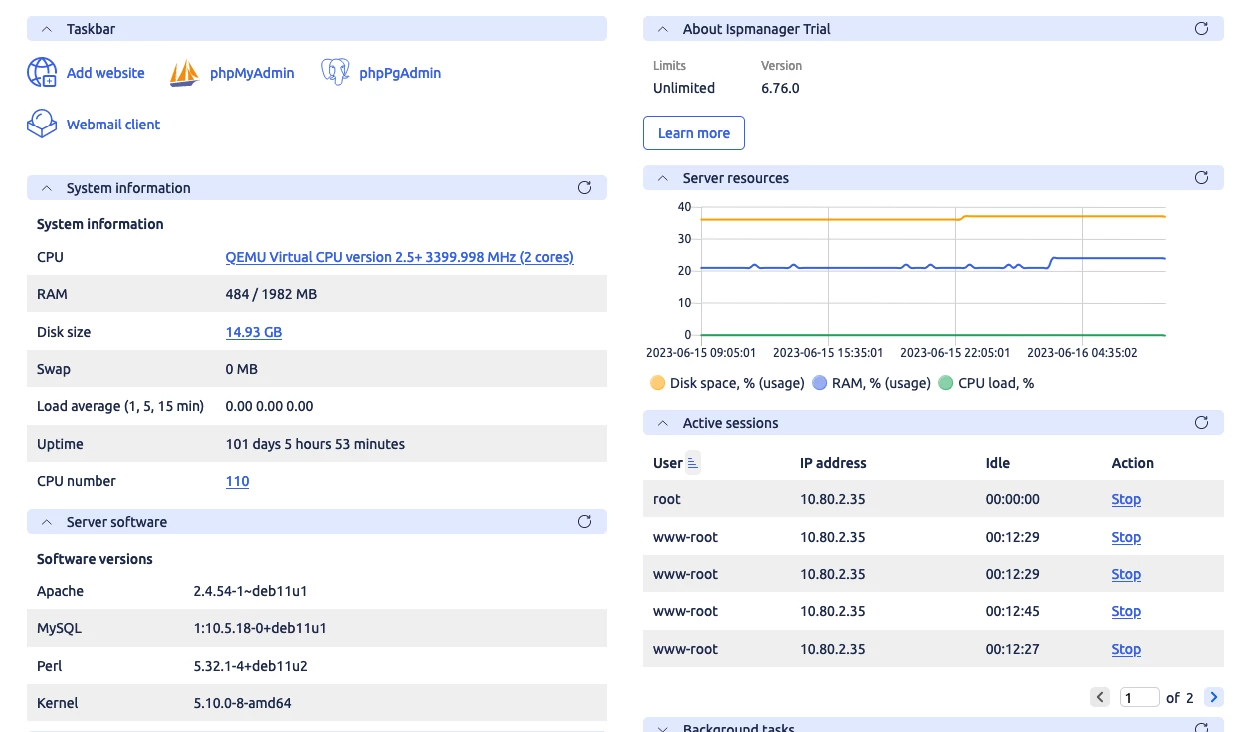
If there is not enough space after limits removal, you will have to contact the hosting provider and change the hosting plan.
Start importing mail into ispmanager
After checking the quotas, you can start importing mail. To start the migration, go to the "Mail" section and open "Import" in the toolbar.
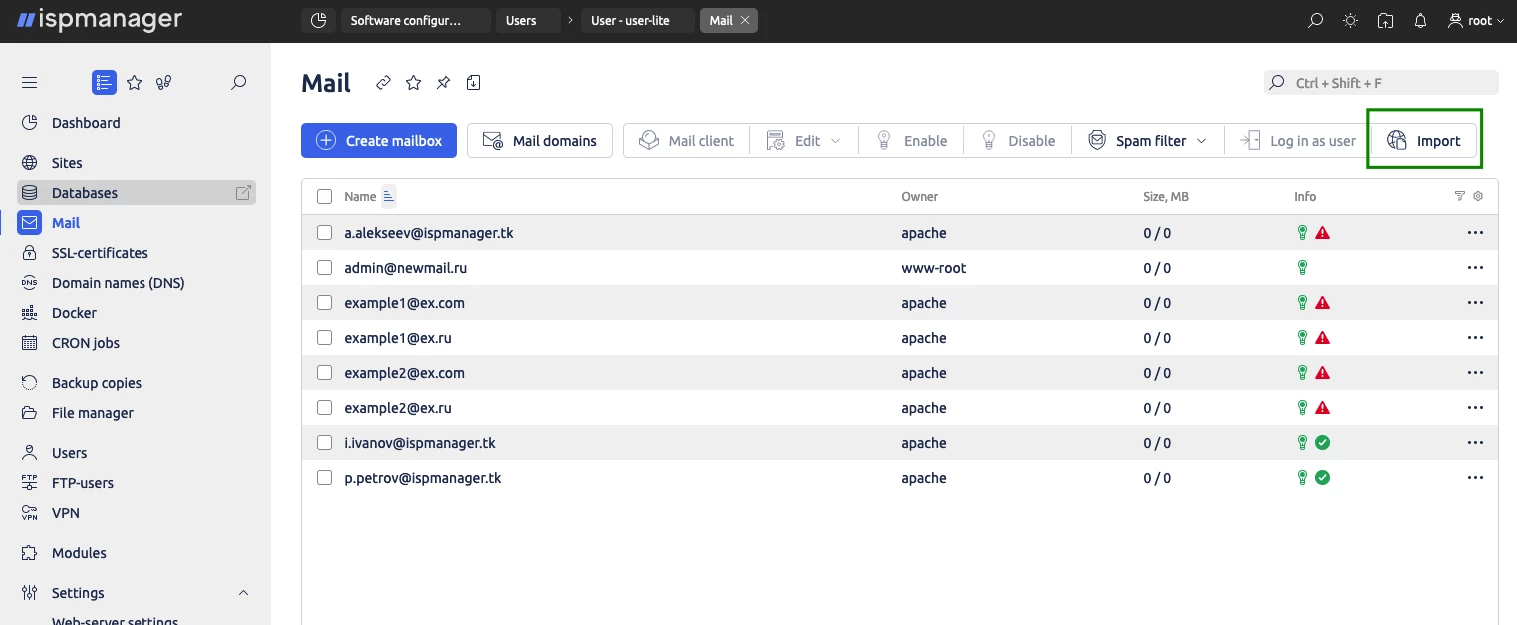
In the import form you should specify the parameters for accessing the copied mail.
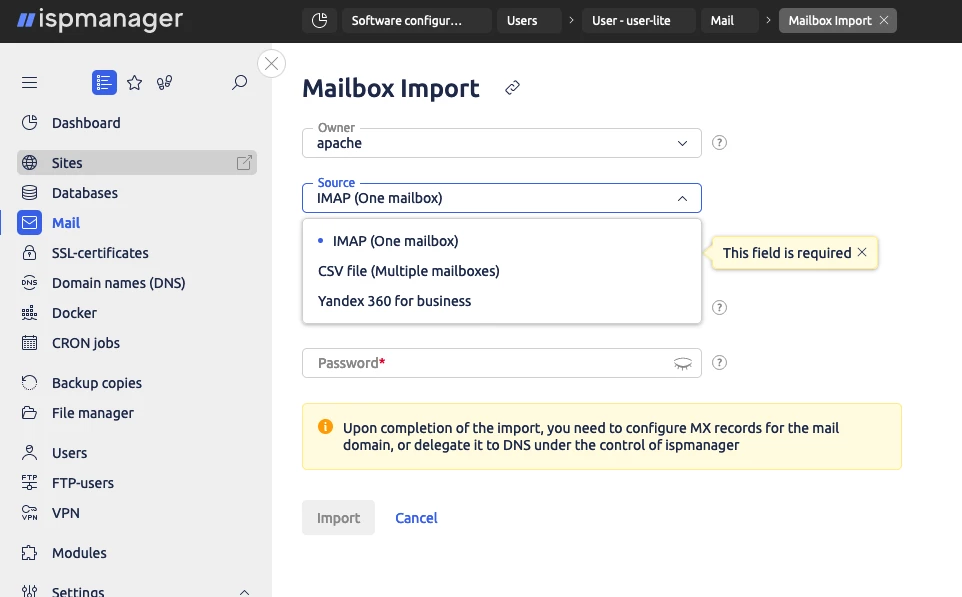
There are several options for transfer:
- IMAP. Suitable for transferring a single mailbox, you will need a mail password. When importing via IMAP, you must specify the mail server address, email, and mailbox password.
- CSV file. Allows you to copy mail from multiple mailboxes at once. For proper migration, the file must consist of "mail_address,password" records. For example, email@exampledomen.com,password1.
When copying multiple mailboxes, the option "Ignore existing boxes" is available. If this option is disabled, the migration will overwrite all mail and change the password.
After launching, the migration will run in the background and a notification will appear when the mail transfer is successful. After the import is complete, it is important to migrate the mail domain DNS under ispmanager management or manually configure MX records. More information about DNS migration is available in the panel documentation.
How to use mail in ispmanager
For convenient work with mail in ispmanager you can use the installed client - Roundcube. To get to the Roundcube interface, you need to select the necessary mailbox in the "Mail" section and click on "Mail client" in the toolbar.
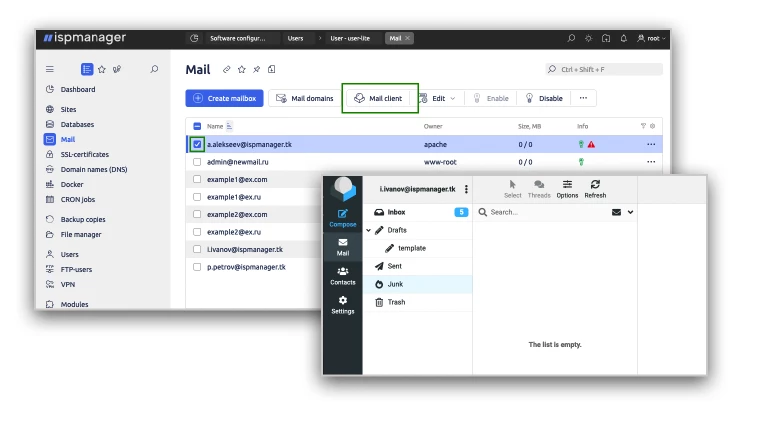
The service supports major languages and mail protocols, is able to sort folders and emails, and also supports integration with other software. For example, with cloud storages.
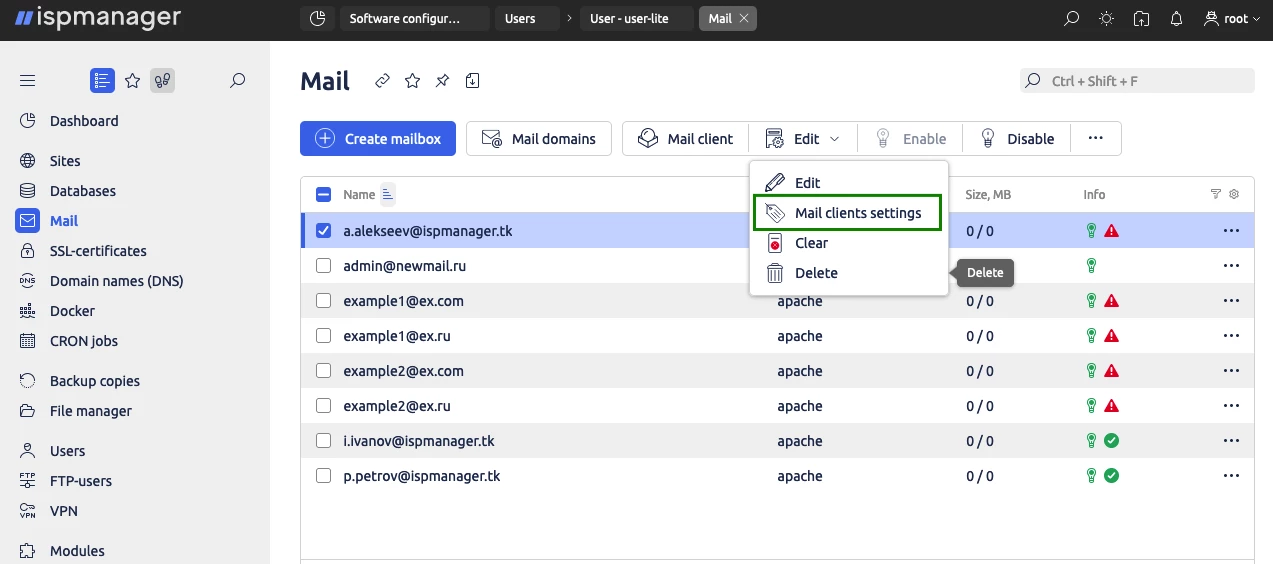
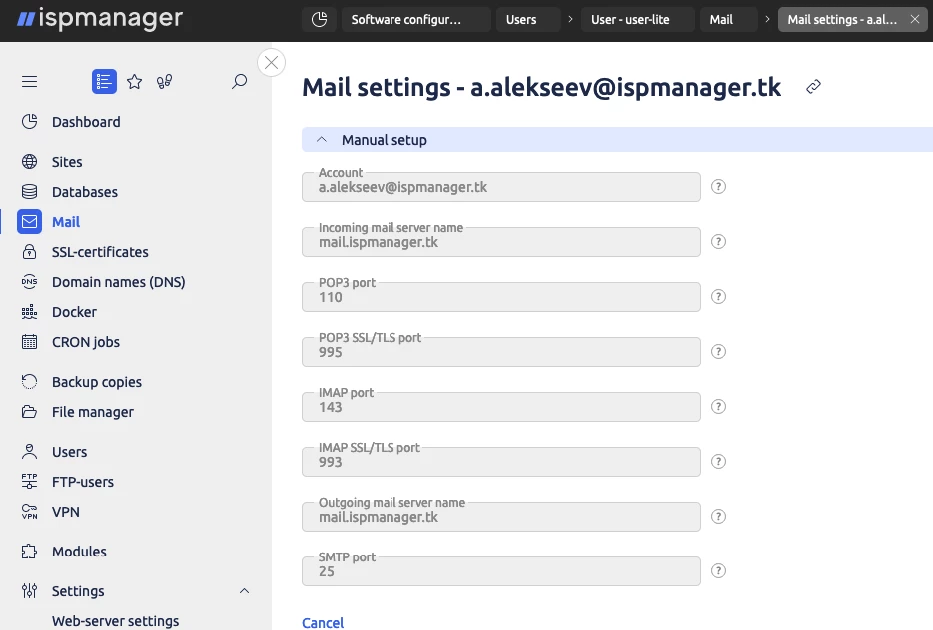
If necessary, you can connect another mail client to any mailbox. To do this, select the mailbox, click "Edit" - "Mail clients settings".
Which tools in ispmanager will help you protect your mail from spam?
A number of tools are available in the panel to protect mailboxes and check emails. Let's list the main ones:
- White and black lists. Basic filtering for Exim servers to help block or skip specific email or IP addresses.
- DNSBL Spam Address Library. The service contains a list of IP addresses and domains that were previously registered as spam. If DNSBL checking is enabled, the service will check for senders in the spam database. The service is enabled in the Exim settings.
- The Greylisting anti-spam system. When you receive an email, the server prompts you to resend it. If the sender is not a spammer, there will be a second sending, which will already pass through the spam filter.
- The free ClamAV antivirus. It is installed as an optional package and rejects all emails where infected files are found in attachments.

In addition, you can configure a secure connection via SSL/TLS for each email domain. You can also integrate DMARC, a spam filter and anti-phishing technology.
Try ispmanager with mail support
Even if you don't like mail owls, you can still try out all the features of corporate mail in ispmanager. Our dashboard's comprehensive set of features makes it easy to work with your mail even without a magic wand. Here you can get:
- mail and domain management in one system;
- tons of opportunities for personalized server setup with a powerful security system;
- ability to control sites, files, databases and web applications from a single panel;
And all this is not more expensive than a ticket to Hogwarts.
You can personally evaluate all the benefits by testing the trial version of the platform on your server.