How to install WordPress in ispmanager
A content management system (CMS) is a website engine that makes it easy to add and edit content on a website without having to hire developers. With a CMS, it’s easy to add new pages, upload images, edit text, and update the info on the site.
In this article, we’ll describe how to install a CMS in the ispmanager panel. We’ll use WordPress, one of the most popular CMS engines, as our example.
There are two ways to install a CMS in the ispmanager panel:
- initially when creating a site,
- through web scripts if you didn’t install a CMS when you start creating the site.
The easiest way to install a CMS in ispmanager is when you start creating your site
Here’s what the process of installing a CMS in ispmanager when first creating your site looks like in detail:
- Go to the "Sites" section in the left side menu and create a site.
- Fill in all fields and select WordPress in the CMS tab.
- Click the "Next" button and you’ve created your site.
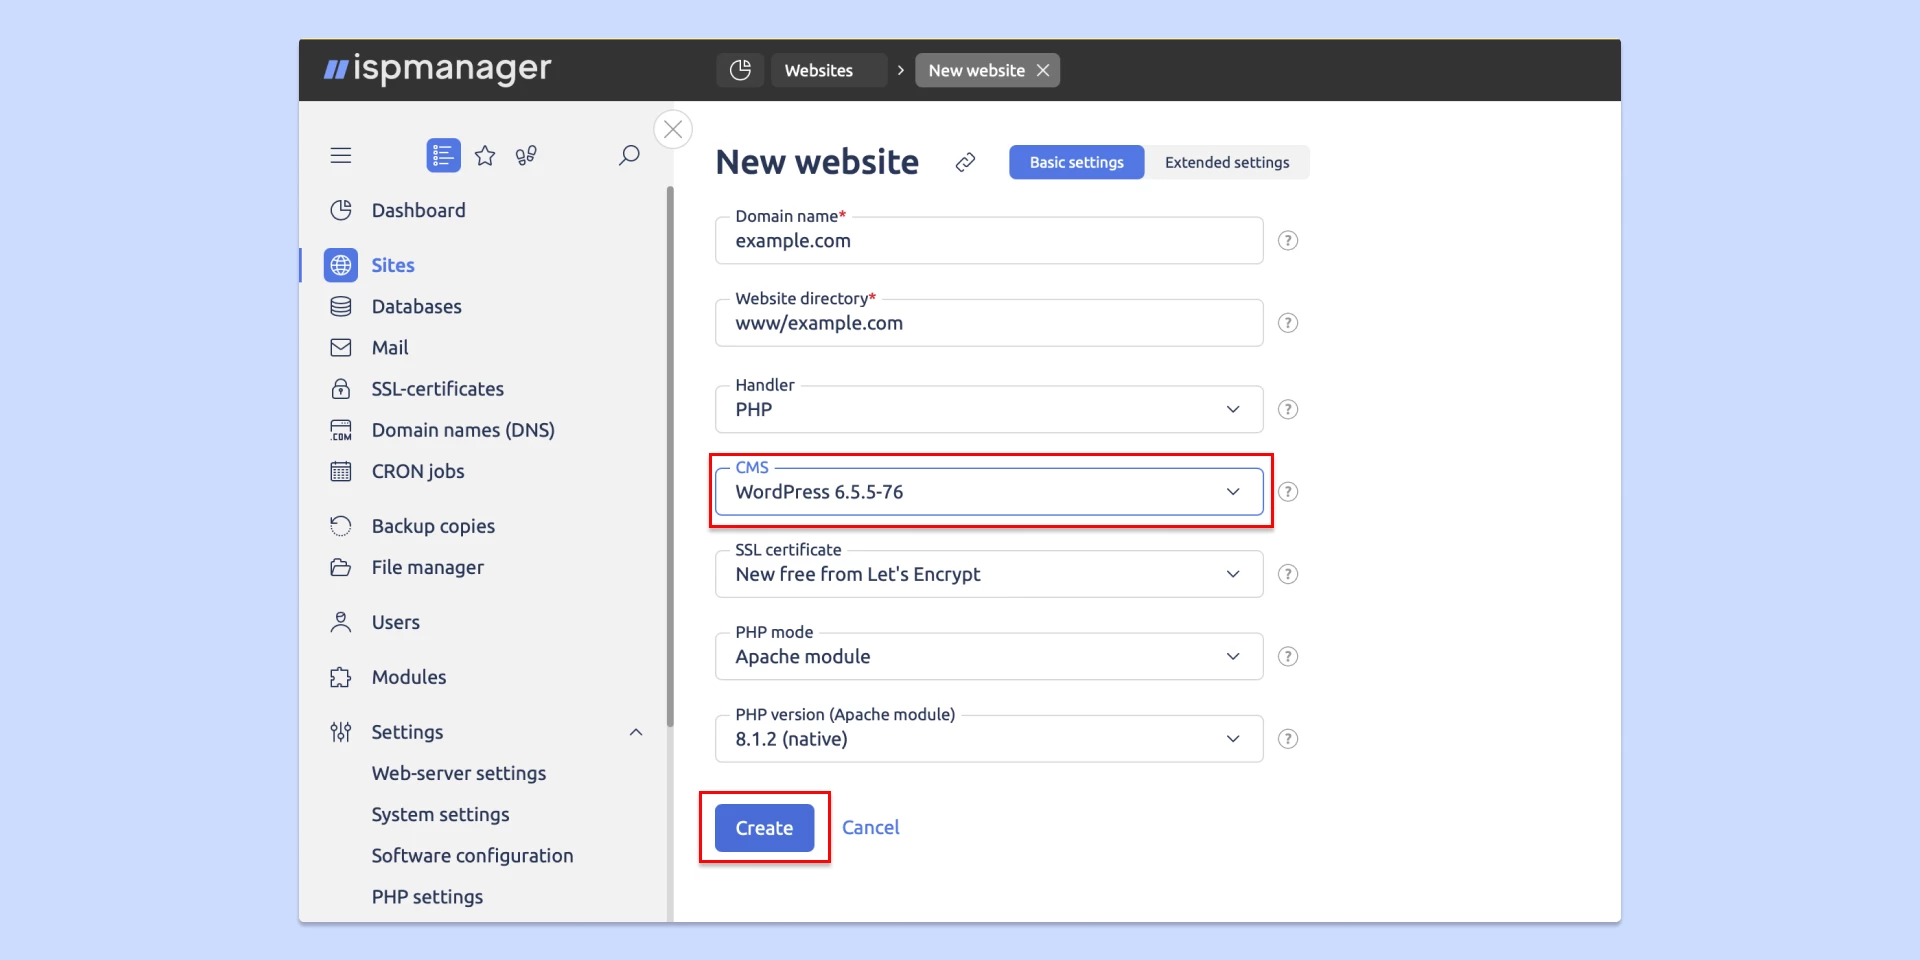
| Important. In the right corner, you will see a notification with the credentials needed to access your Wordpress admin area. Write them down and keep them safe. |
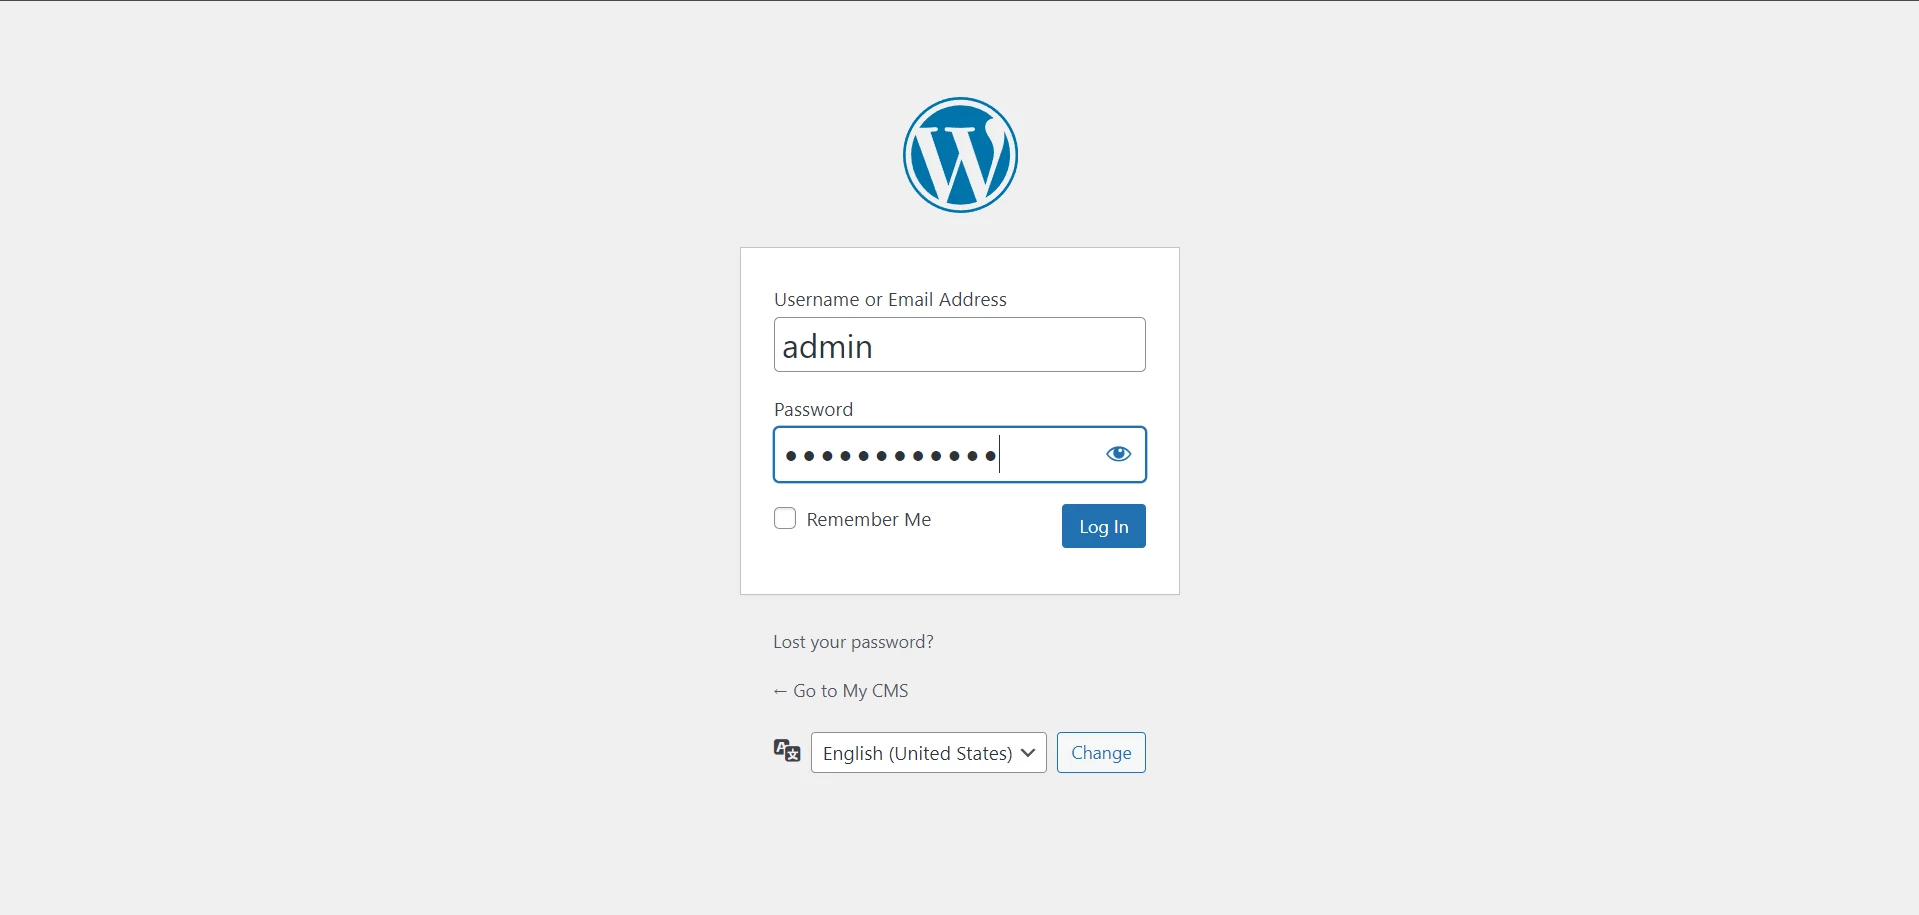
Go to the Wordpress admin area by adding /wp-admin (or /wp-login.php) to the domain in your browser’s address bar:
https://site.local/wp-admin or https://site.local/wp-login.php
This will open a log-in form for the Wordpress admin area.
Now you can start adding content to your site.
Installing a CMS in ispmanager through a web-script
Here’s how to install a CMS in ispmanager with a web script:
Go to "Sites" and select:
- The site in question.
- The rightmost section of the CMS top menu.
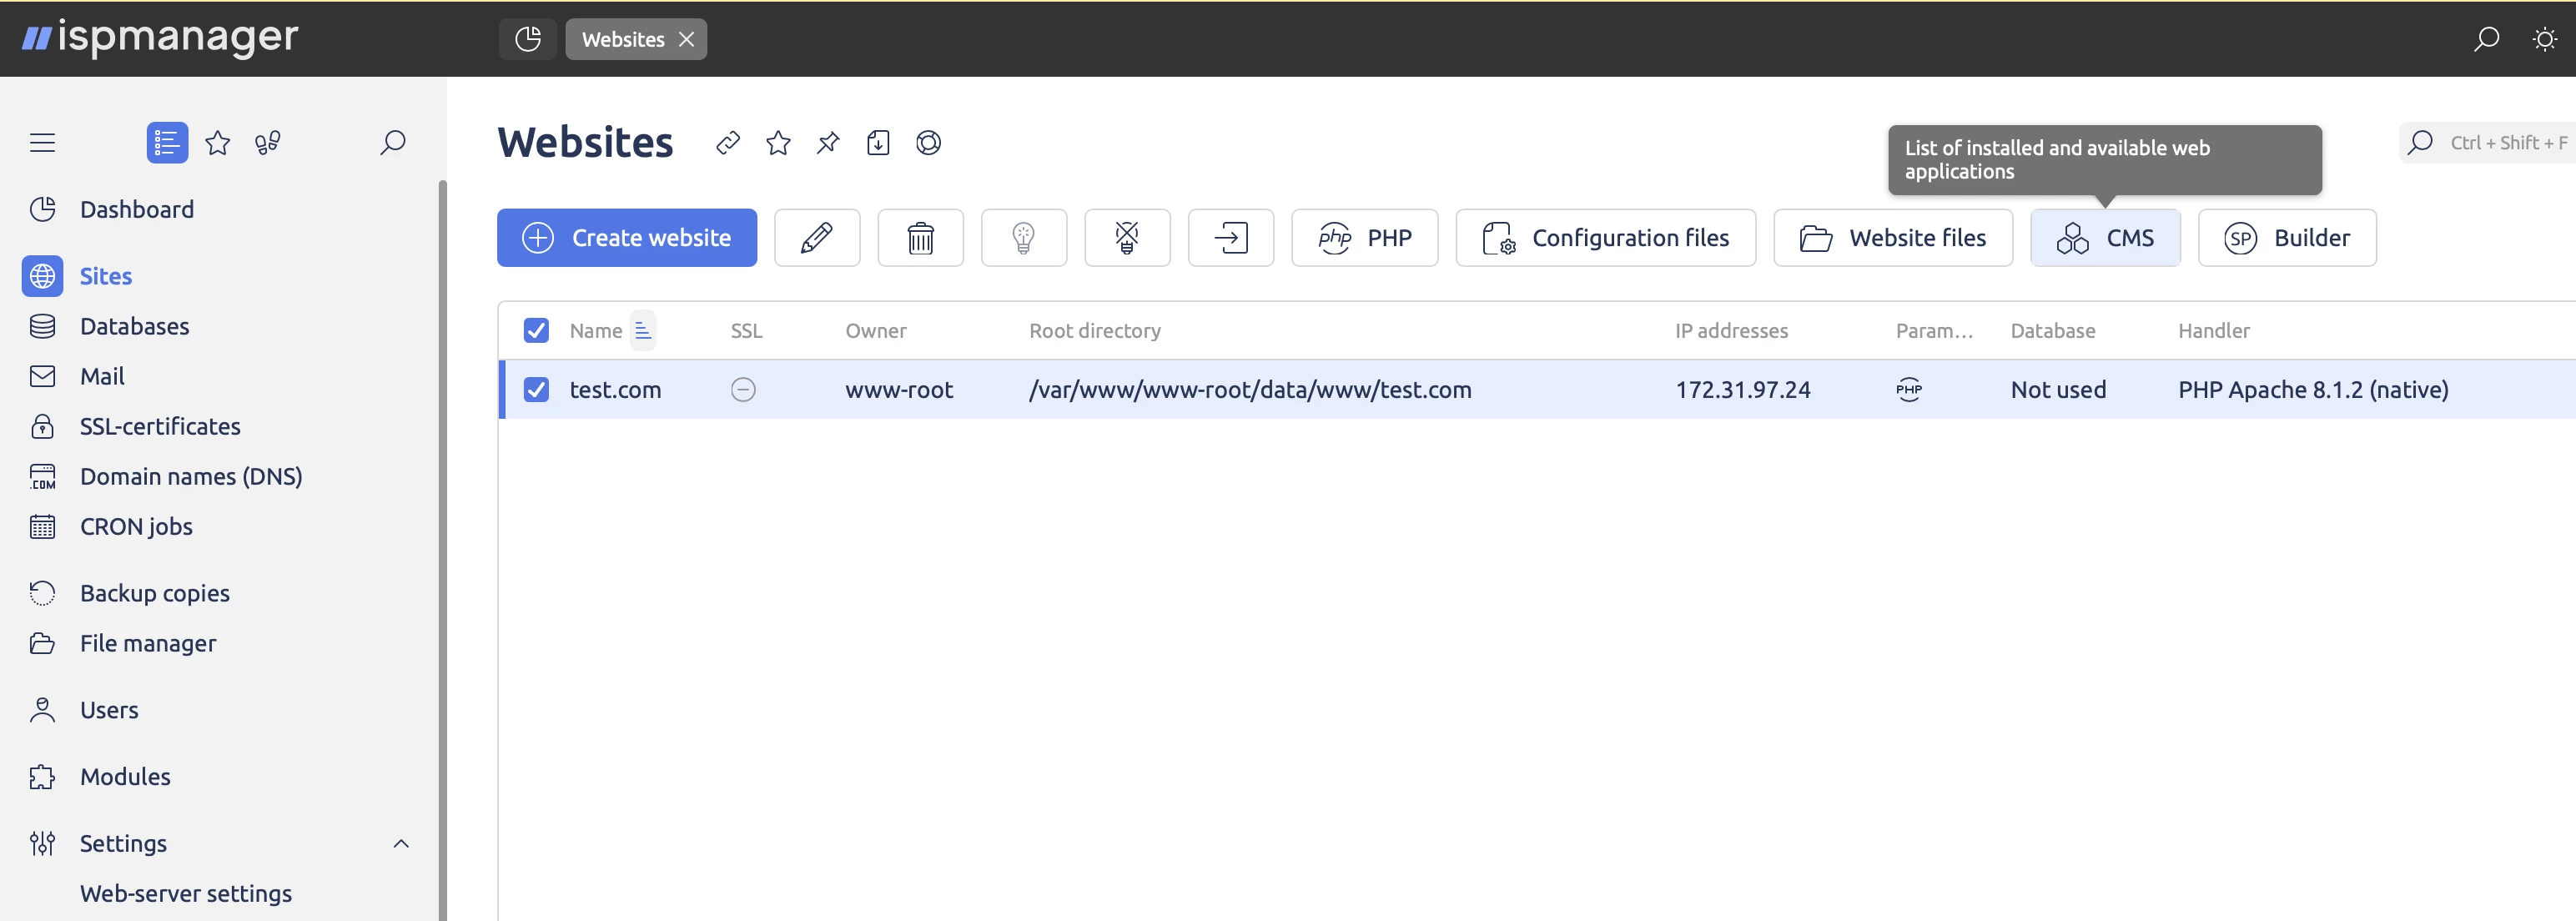
3. The WordPress line.
4. The install button. It is better to click it than Quick install because it will be easier to save your log-in credentials for the admin area.
| Important. Write down your log-in credentials for the WordPress admin area from the Application Settings section at the Installation Options stage. |
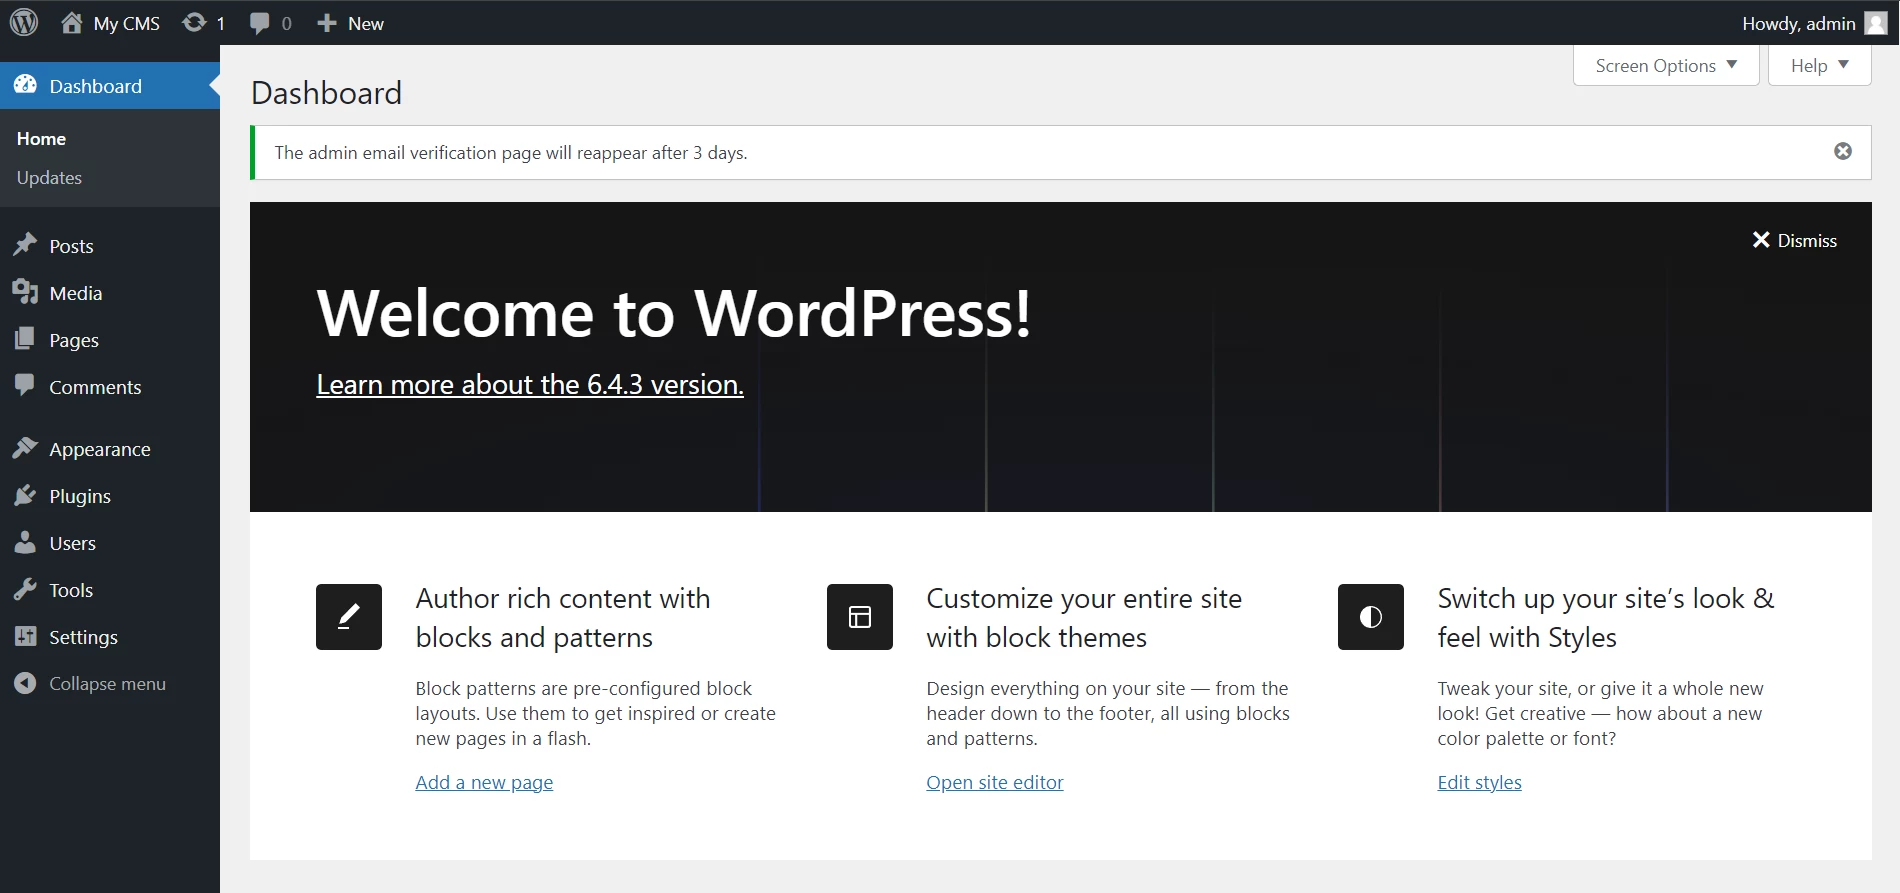
You have now installed Wordpress for your site. Log in at https://site.local/wp-admin using the credentials you saved from the Application Settings section.
Log in to the admin area and add content to your site.
For more on how to add your site to the panel, see the ispmanager documentation →