ispmanager supports Python, making it easier to manage websites, web servers, and environments directly from the panel. We'll show you how to add a Python site to the panel hassle-free, whether with or without Django, configure API operations, or work through the mgrctl utility.
- Python or PHP
- Configuring Python in ispmanager
- Adding a Python site without Django
- Adding a Python site with Django
- Using Python in the panel for scripts and bots
- Accessing another panel via API
- Accessing another panel using the mgrctl utility
- Useful materials on this topic
Python or PHP
PHP and Python are often considered to be the most popular programming languages. Some say that PHP is best for complex websites, while Python is for applications. Developers choose which language to use based on their knowledge and the objectives of their project.
Python is a universal programming language that requires a strict structure. It is best for developing websites and complex applications like games, web applications, and so on.
With Python, it’s easier to:
- find errors
- understand another developer's code
- work faster thanks to third-party libraries
PHP is mostly used for website development, for which it is the more convenient option.
PHP:
- allows you to embed code in HTML
- is better at handling a high volume of requests
- runs faster than Python on web servers
In ispmanager, you don't have to choose between PHP and Python, you can work with both in different projects on the same server.
Configuring Python in ispmanager
Customizing Python in the panel is intuitive and easy:
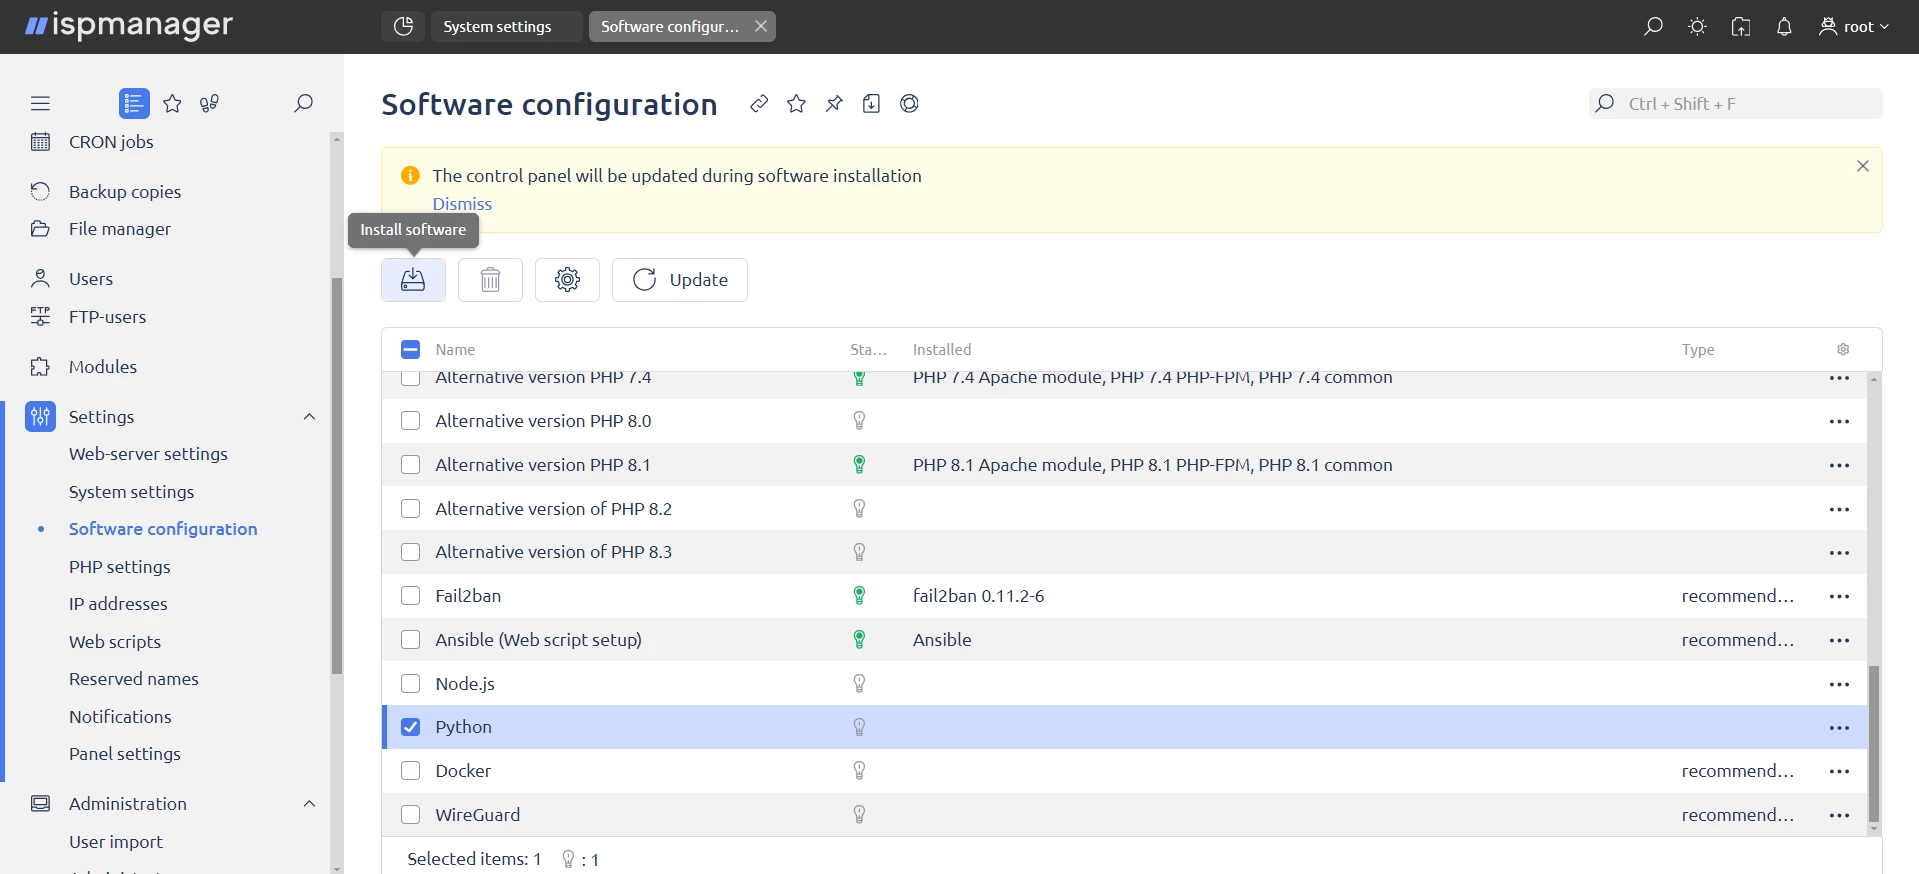
1. Turn on Python. Go to "Settings" → "Software Configuration" → select the "Python" line → "Install Software".
What customization looks like:
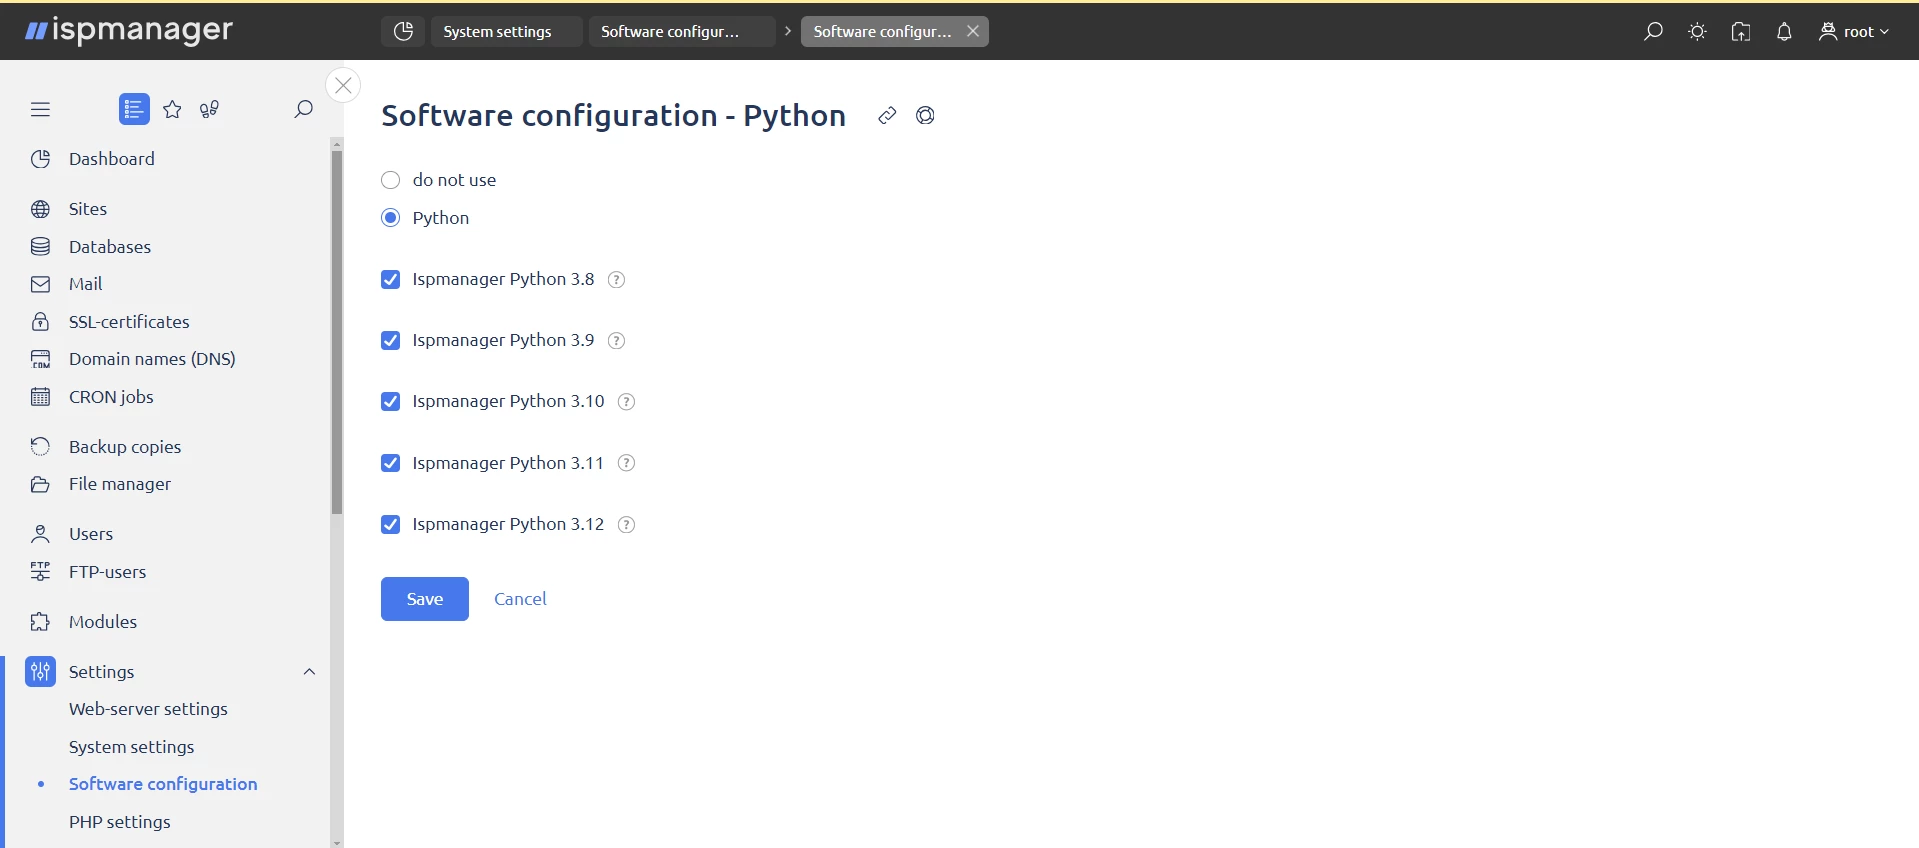
2. Choose the versions you need. Not all versions of Python are always needed and they take up a lot of space. To avoid deleting unnecessary versions after installation, select the versions you currently need.
Highlight the line with Python → "Software Settings" → select the desired software versions → "Save".
What installing Python versions looks like:
Important: you need nginx to install Python. If you don't have nginx, install it the same way as Python–through software configuration.
3. Change user rights. By default, the right to work with Python is turned off for users. If you plan to create websites, you’ll have to assign rights. For new users, permissions can be configured at the same time as the other settings.
How to change user rights:
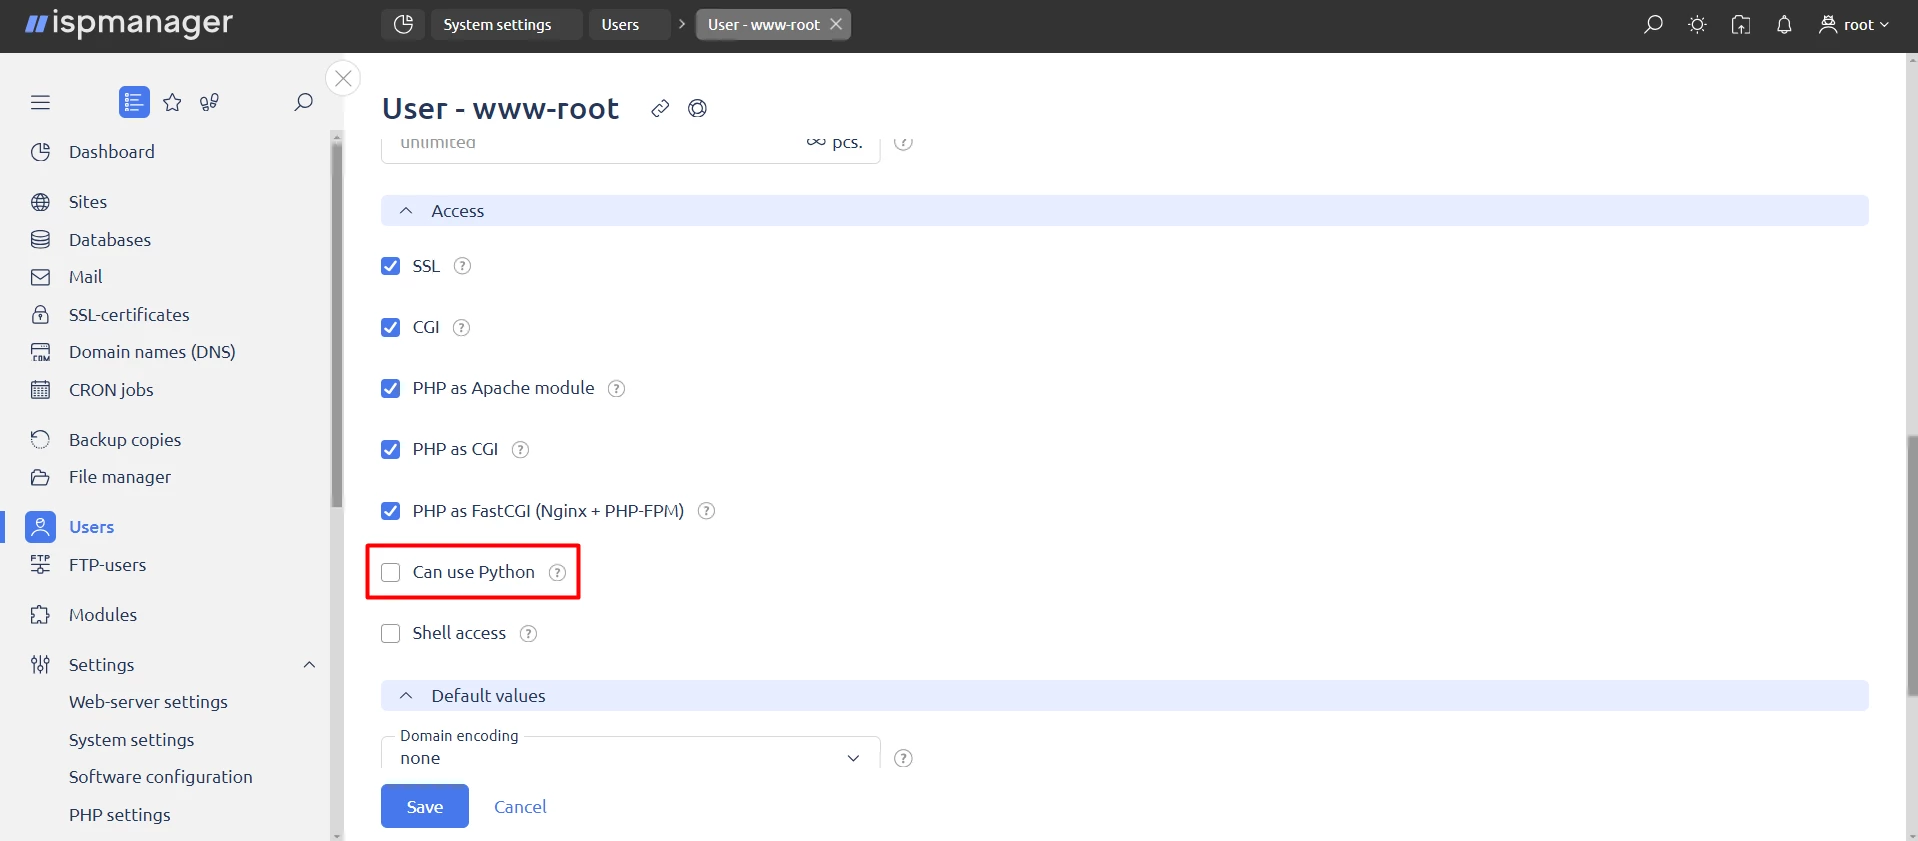
Recommendation: for security reasons, use a basic system user so that scripts do not run from root.
Adding a Python site without Django
How to add a Python site to your dashboard if you are not using the Django framework:
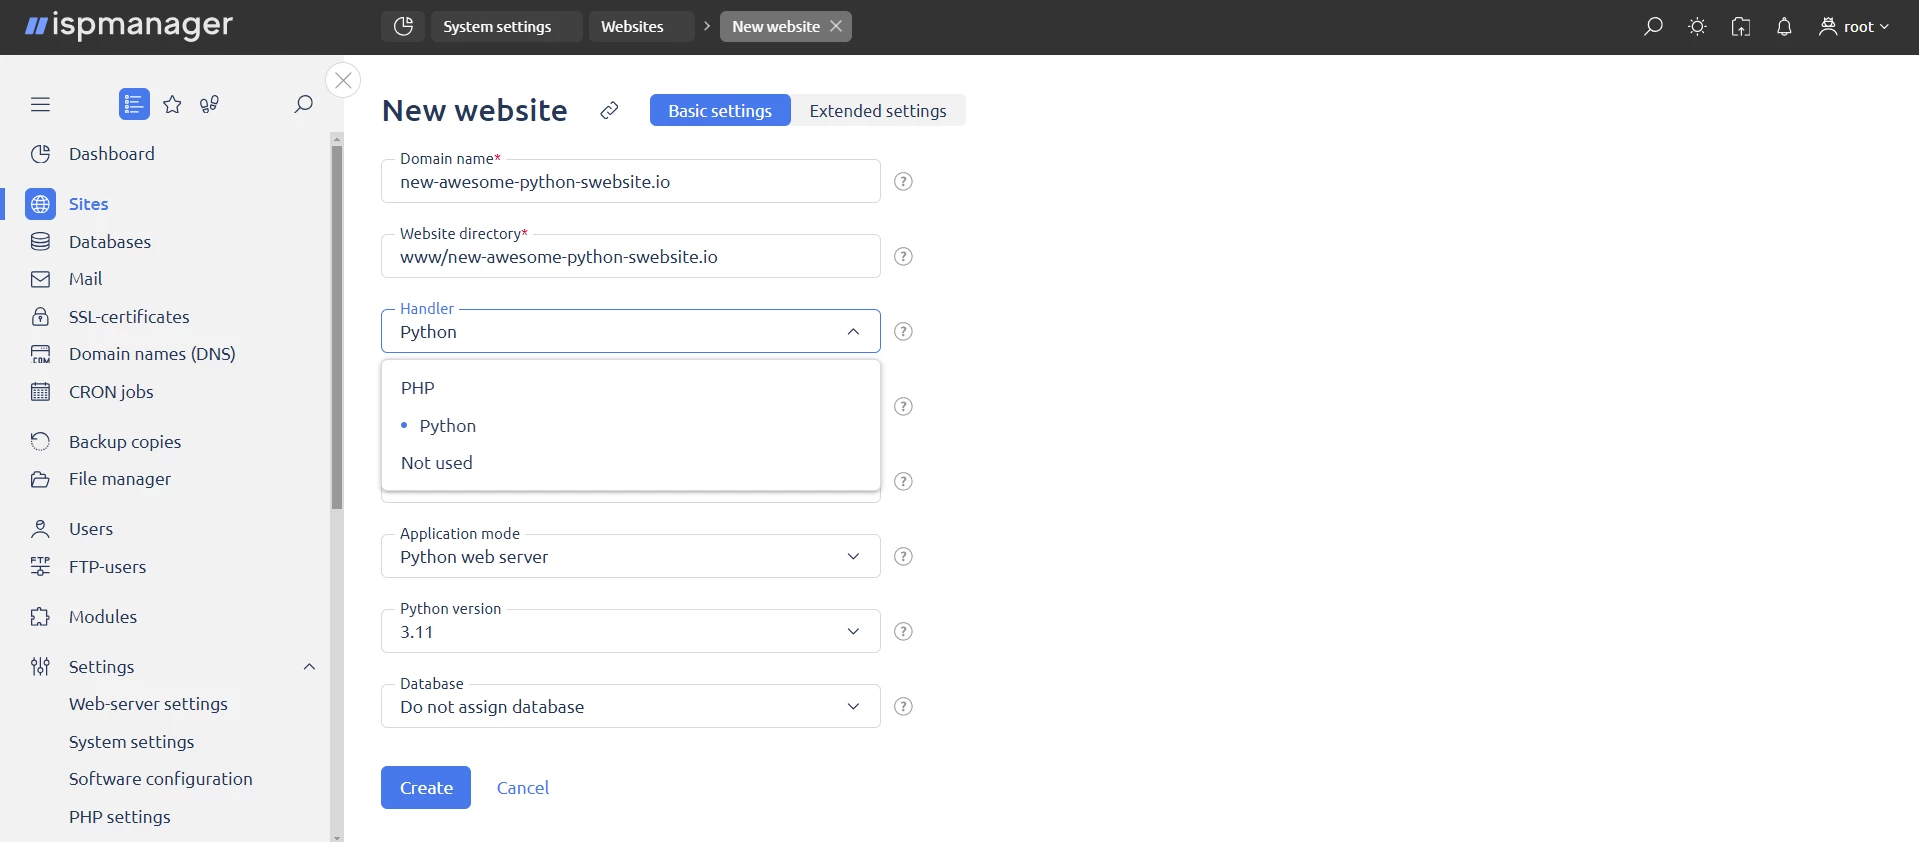
1. Create a website. Turn on Python → section "Sites” → "Create Site". Enter the data and select a Python handler. If there is no handler in the list, the user does not have access to Python.
2. Open the files and load the site:
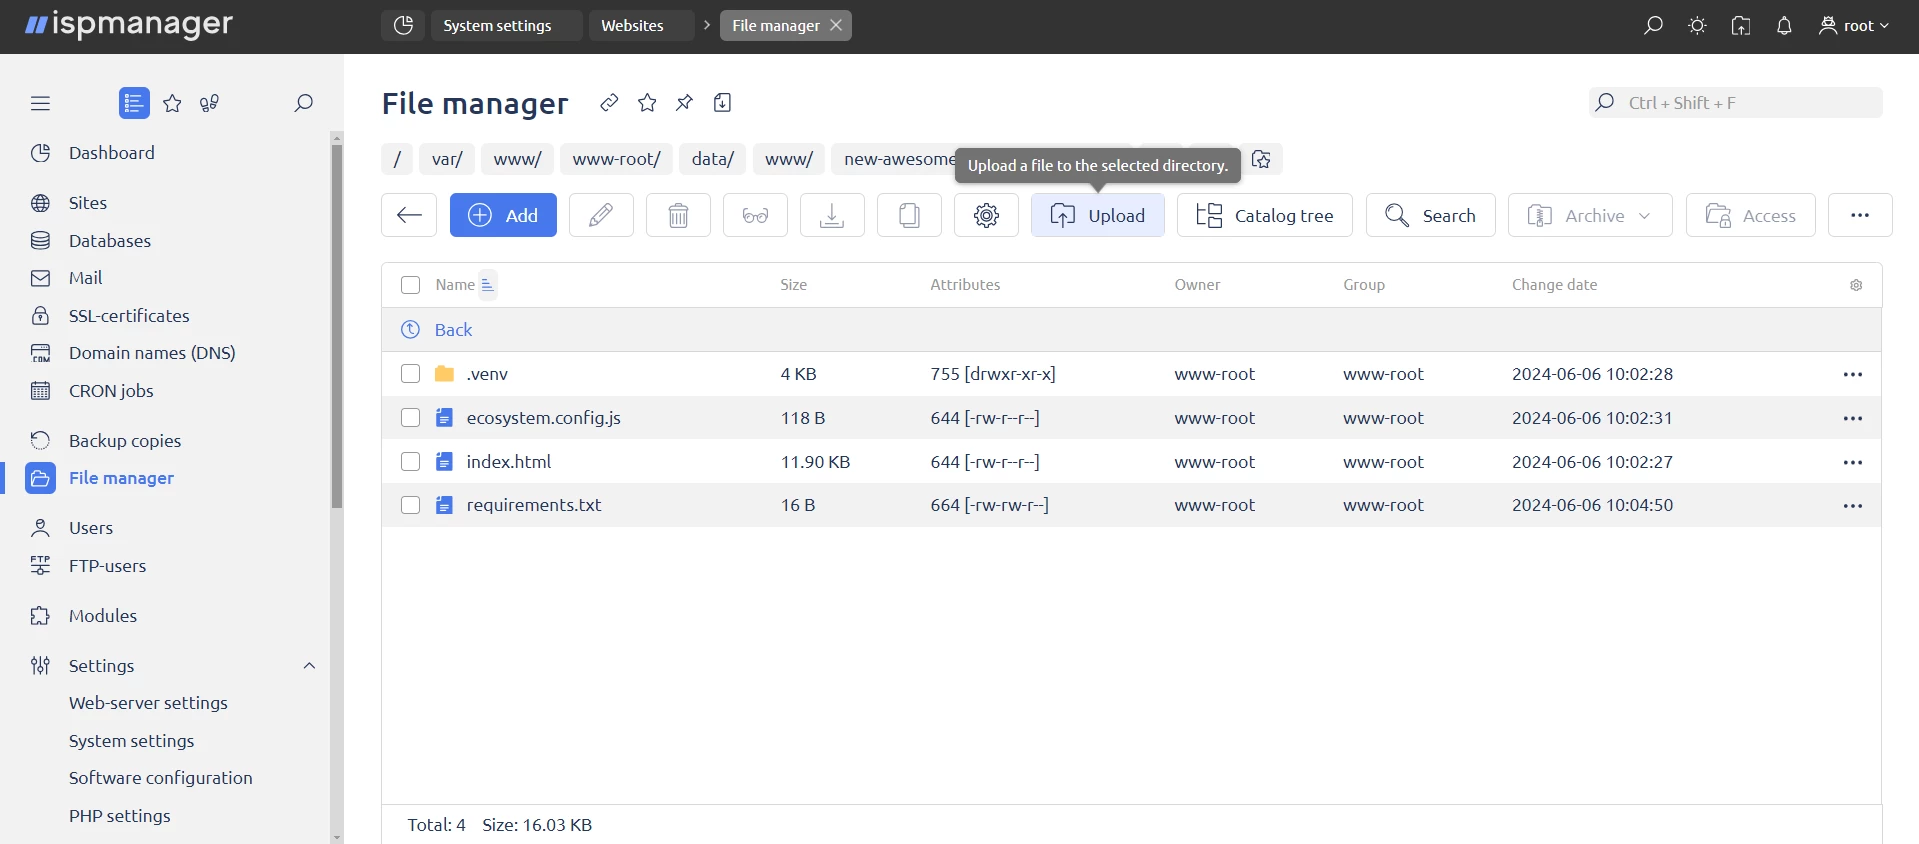
3. Specify the required packages in the requirements.txt file.
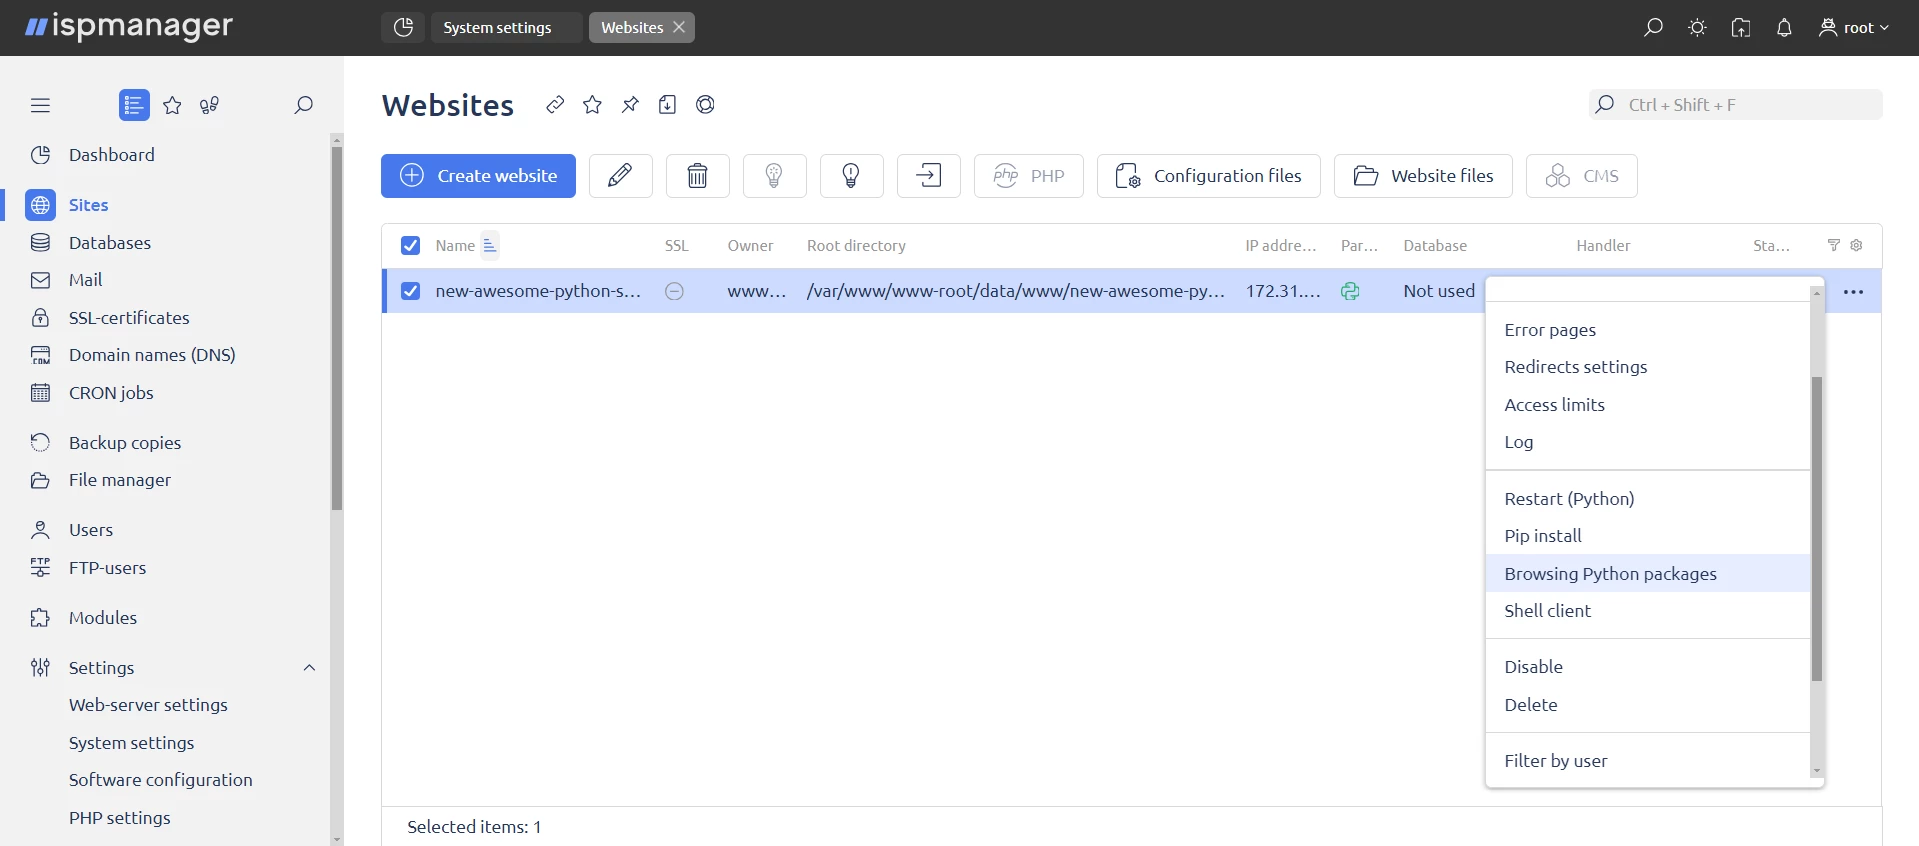
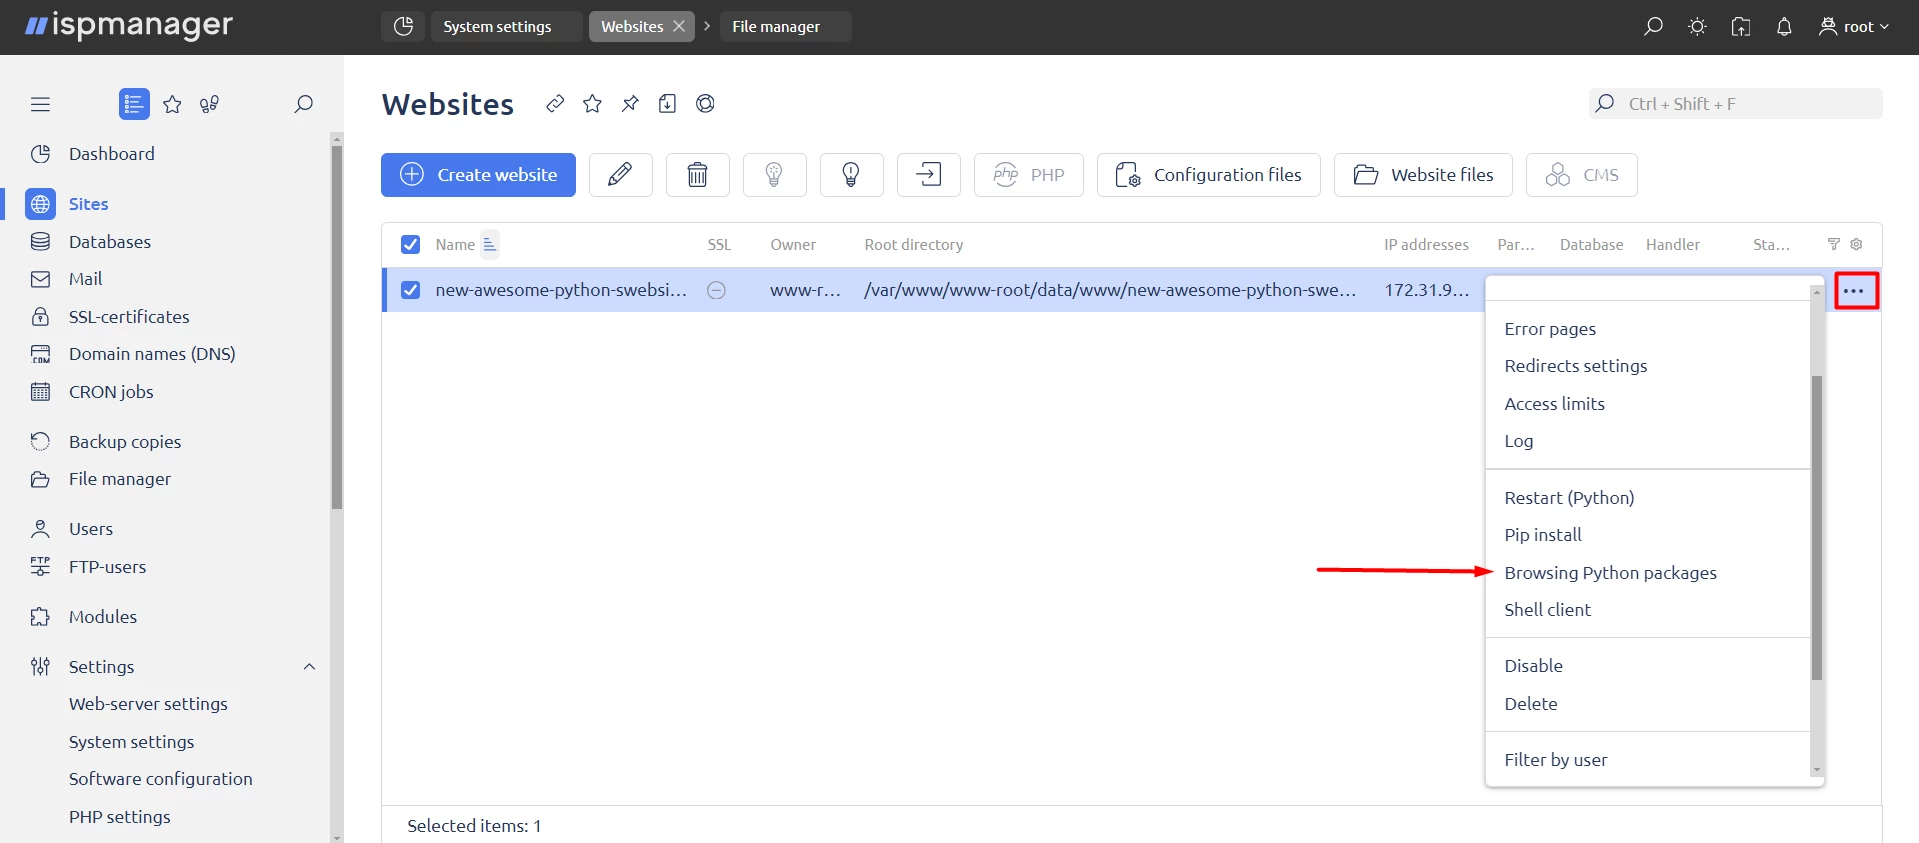
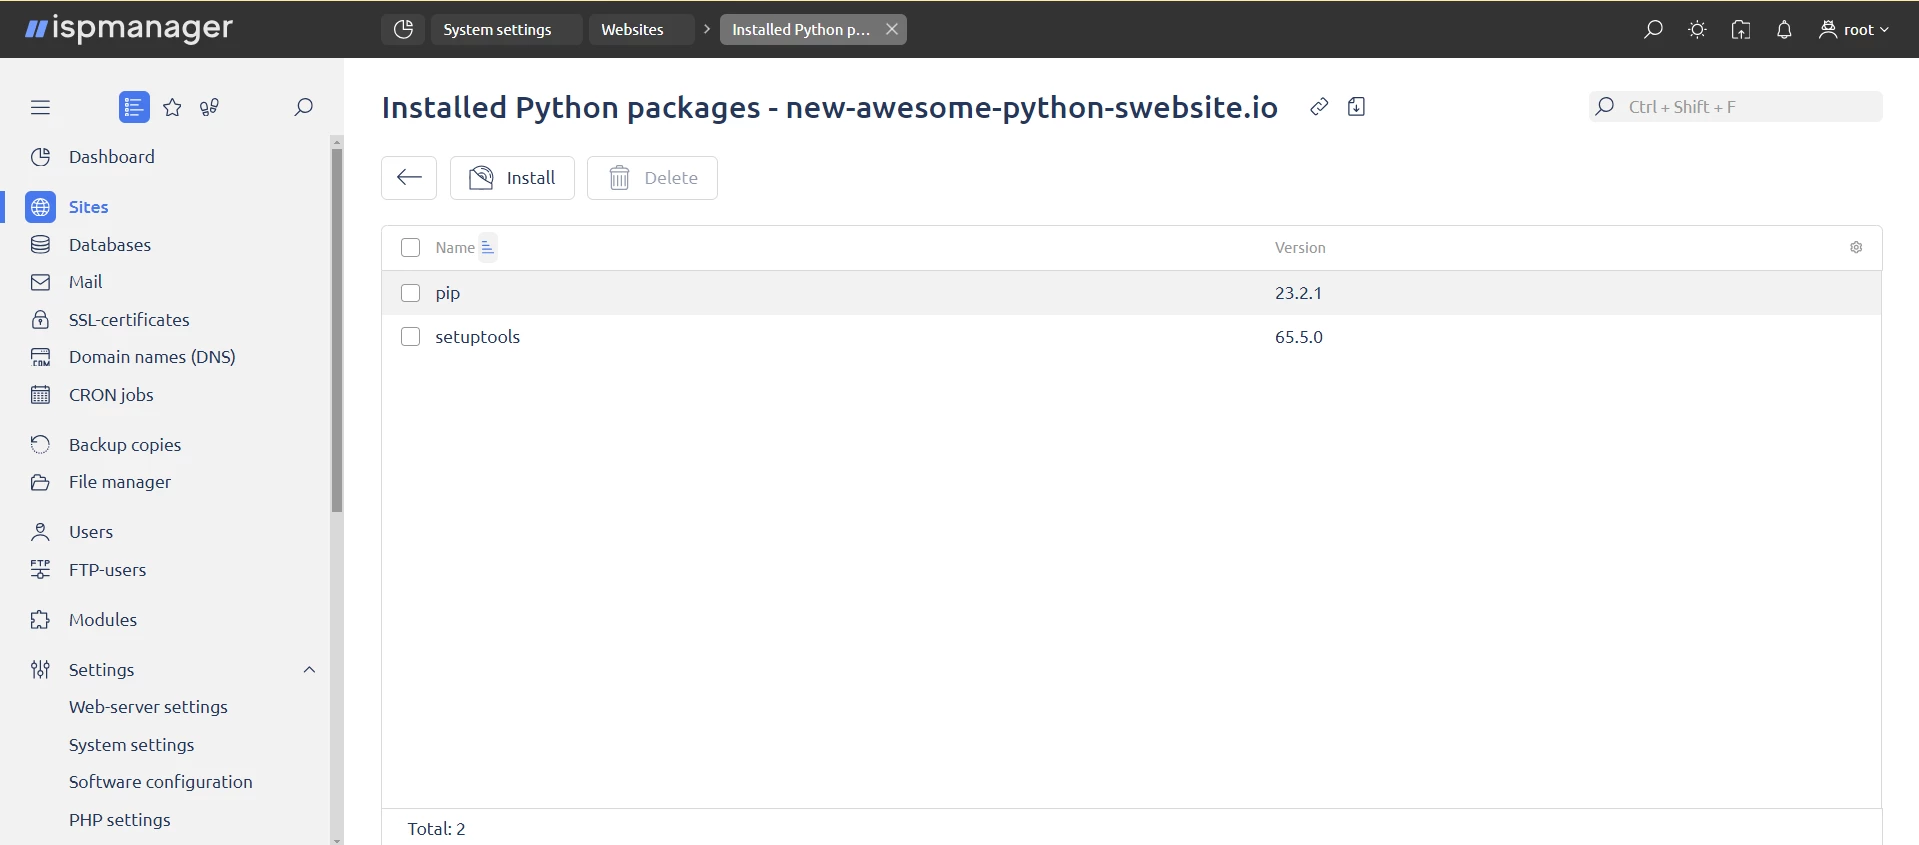
4. Install the libraries. After loading the site, click on the three dots at the end of the line and go to "View Python packages" then select and install the desired libraries.
You can also switch to the console with the Python environment activated using the "Shell client" option:
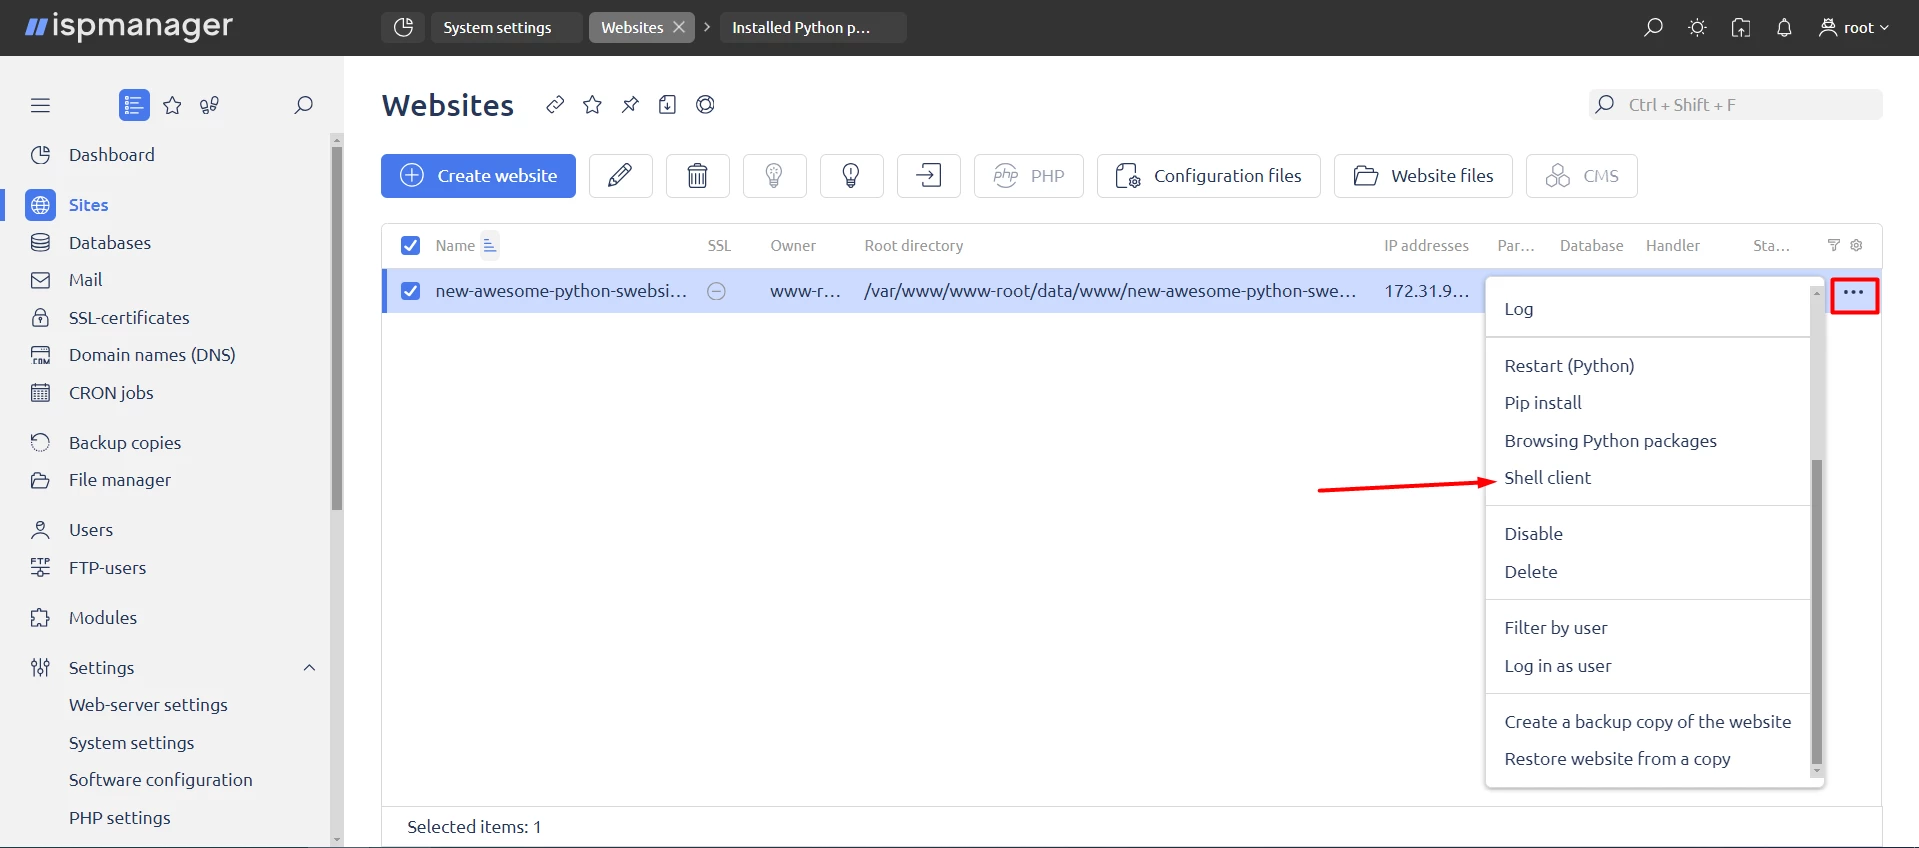
5. Restart Python. Click the three dots at the end of the line and select "Restart Python". The Python icon should turn green, which means the project is stable.
6. Check that everything works correctly. Add an IP example.com IP format entry to the hosts file.
IP— the IP address of your serverexample.com— the website address
For how to find the hosts file in a different OS, see the documentation →
Adding a Python site with Django
This process is slightly different from the above: you’ll need additional settings, and in the "Software Configuration" section, you need to enable Nginx, Python, and MySQL.
If you have any more questions, visit the ispmanager Facebook community →
Using Python in the panel for scripts and bots
To install a Python script in ispmanager and run it with cron →
- Use the "Site" entity — so you won’t forget the name of the Python environment thanks to the additional entries in the "Sites" section. These entries reduce the number of sites available. There will also be a visual interface for installing packages as an alternative to the console.
We install the script the same way as a Python site in ispmanager. The only difference is that you upload the script rather than the site files.
- Create the environment manually. The name of the Python environment might get forgotten, because it is only found somewhere in the file manager. There will be no additional entry in the "Sites" section so the number of sites in the ispmanager license will not be affected.
How to install the script manually:
1. Turn on Python → go to the shell client.
2. Create an environment using the command:
/opt/ispmanager/pythonVERSION/bin/pythonVERSION -m venvVERSION — the desired version of Python.
your-environment-name — is the name of the environment.
It is important to remember the name of the environment, otherwise you’ll only be able to find it in the file manager.
3. Activate the environment if you need to work within it.
Activate it with the command
source your-environment-name/bin/activate4. Install the libraries.
Use the commands:
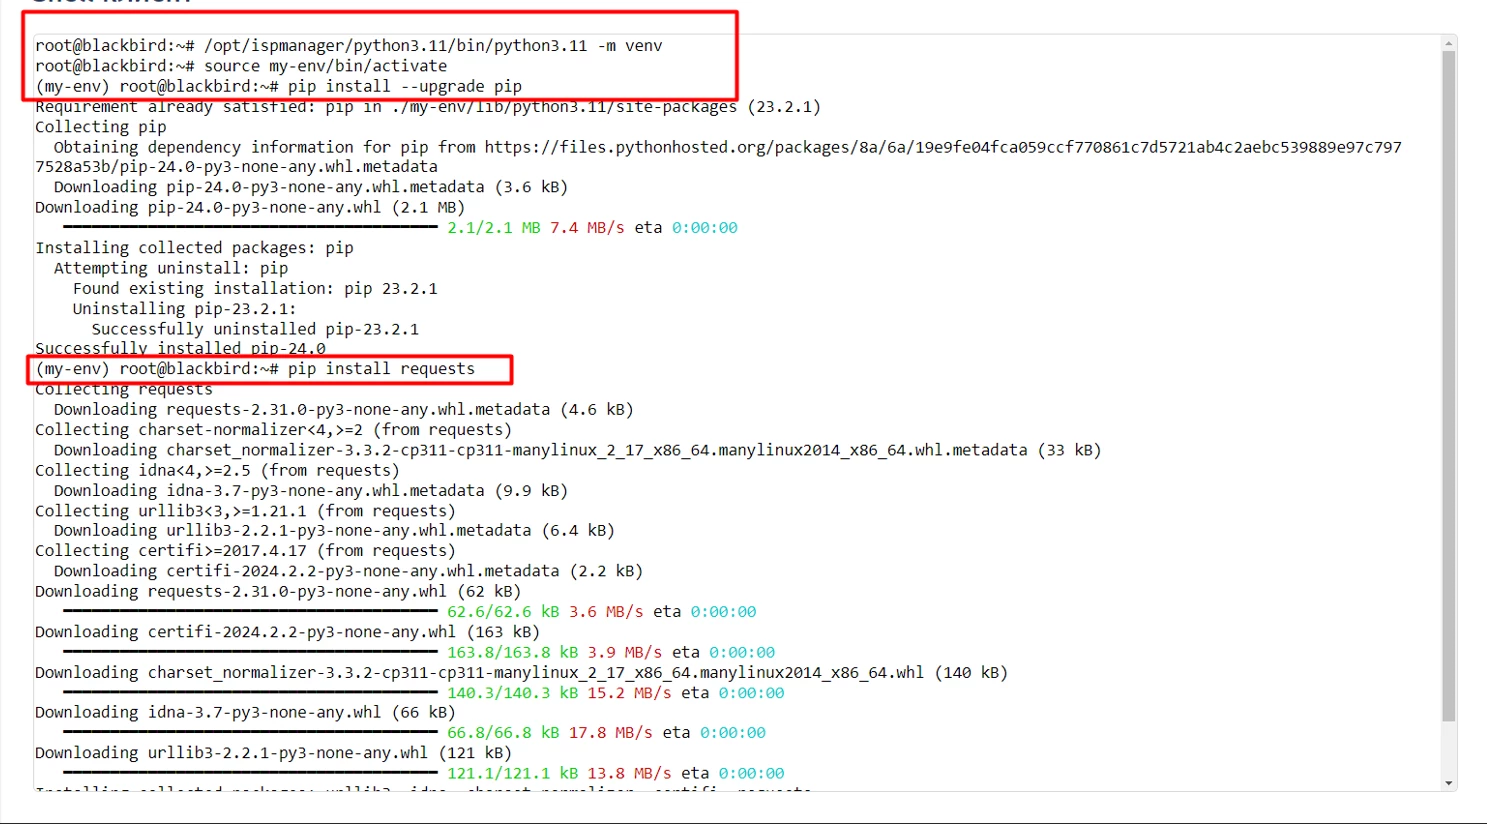
pip install name-libraries after environment activationor
pip3 install name-libraries after environment activationWhat the commands look like in a shell client:
5. Upload the files to the server. Save the path to the script so you can run it later.
6. Run the script with the command:
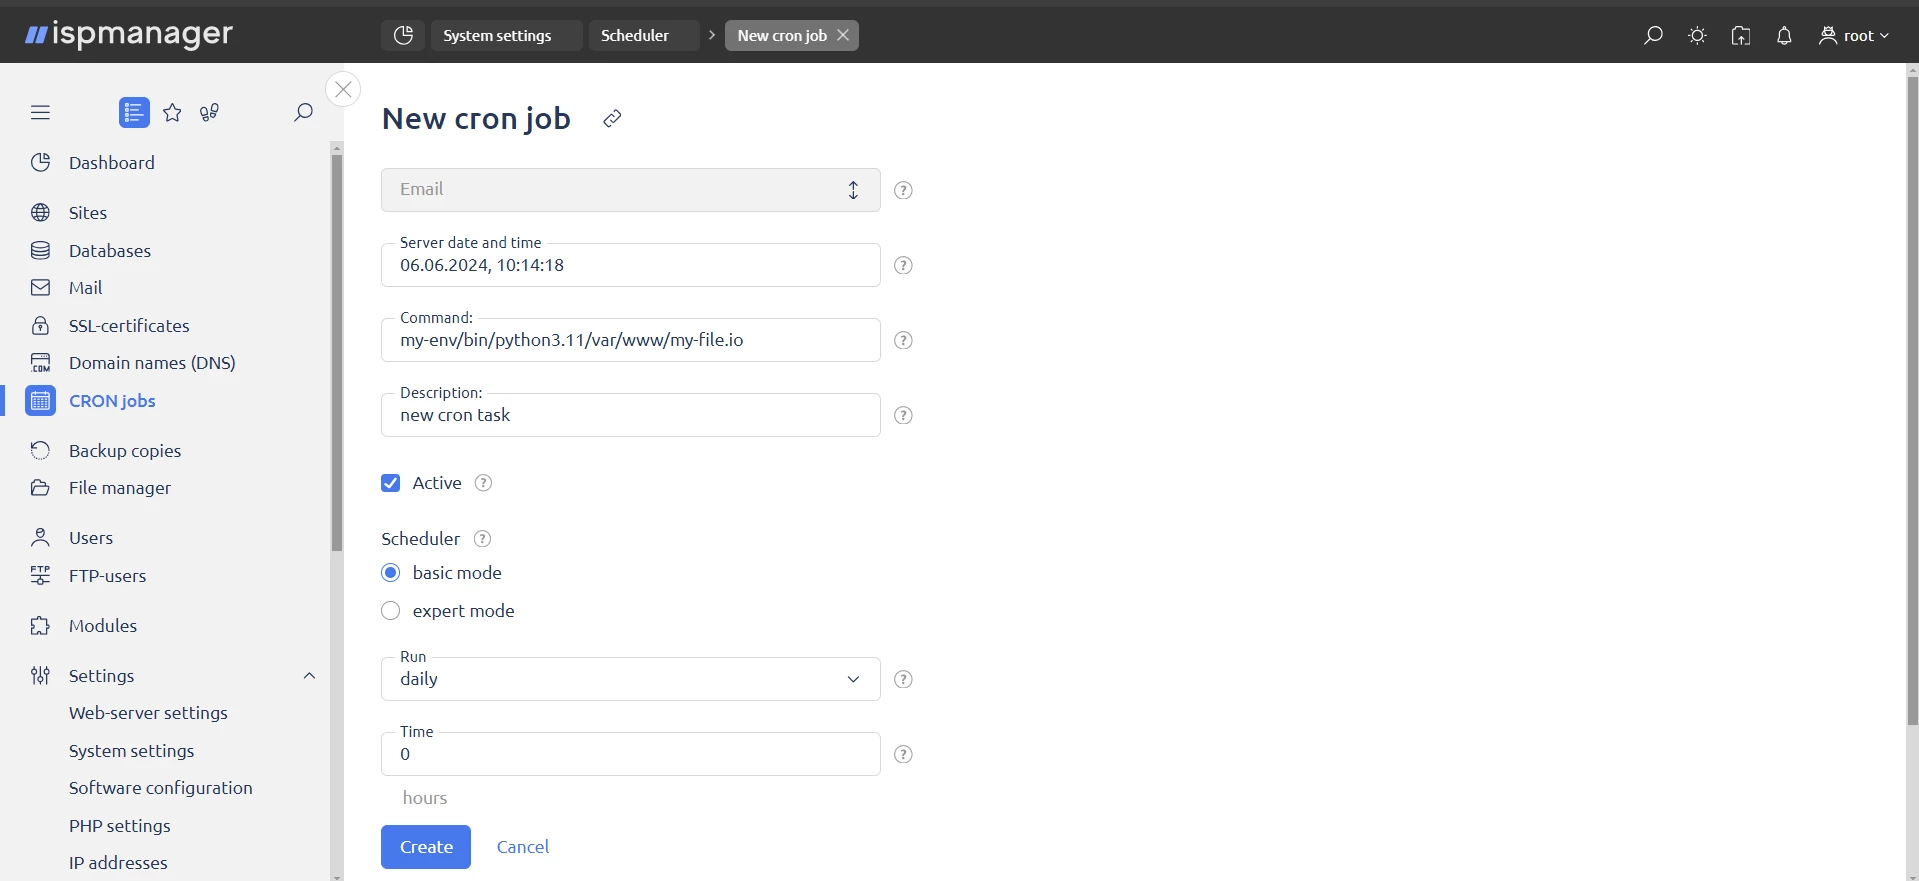
name-your-environment/bin/python3.11 path-to-fileUse the cron scheduler if you need to make it run automatically
What a new cron scheduler job looks like:
Accessing another panel via API
ispmanager supports APIs using Python. This is convenient for accessing scripts and applications on another server. The structure of the API requests is the same regardless of the language.
Query Structure:
http(s)://address:port/ispmgr?authorization&func=function¶meters&out=output typeWhich values to specify in the query →
"Authorization":
- authorization type, in case of API requests
- unique session number
authinfoparameter- authorization key — used to redirect a user from another system without an authorization screen.
For more about the authorization methods, see the documentation →
In this example we’ll use authinfo which is handy when you need to interact with the panel once because you have to enter your login and password.
"Func" is the function we need. Functions can be used to perform operations on entities such as: show list, edit, create, disable, or enable.
For a complete list of features:
- In the ispmanager documentation
- Enter the following command in the panel console:
/usr/local/mgr5/sbin/mgrctl -m ispmgr -iWhat to do if you can't find the function you want:
1. Enter the command in the shell client:
tail -f /usr/local/mgr5/var/ispmgr.log | grep Request2. Perform the desired task in the panel interface.
3. Go back to the shell client where you can find a list of functions called.
"Parameters" — the parameters of the function. Usually, the parameters specify which entity we are accessing. The list can be found in the documentation or it can be brought up with the command:
tail -f /usr/local/mgr5/var/ispmgr.log | grep Request"Out" — type of output. In most cases json or xml is used. For the full list of formats and their description, see the documentation
Important: ispmanager only supports the GET and POST methods.
To work with the ispmanager API using Python, any library that works with requests will do. For this example, we will use the standard requests library.
What the request looks like:
Import requestsApi_request = requests.request(‘get’, ‘https://domain.com:1500/ispmgr?authinfo=LOGIN:PASS&func=wireguard.user&out=xml’The output looks like this:
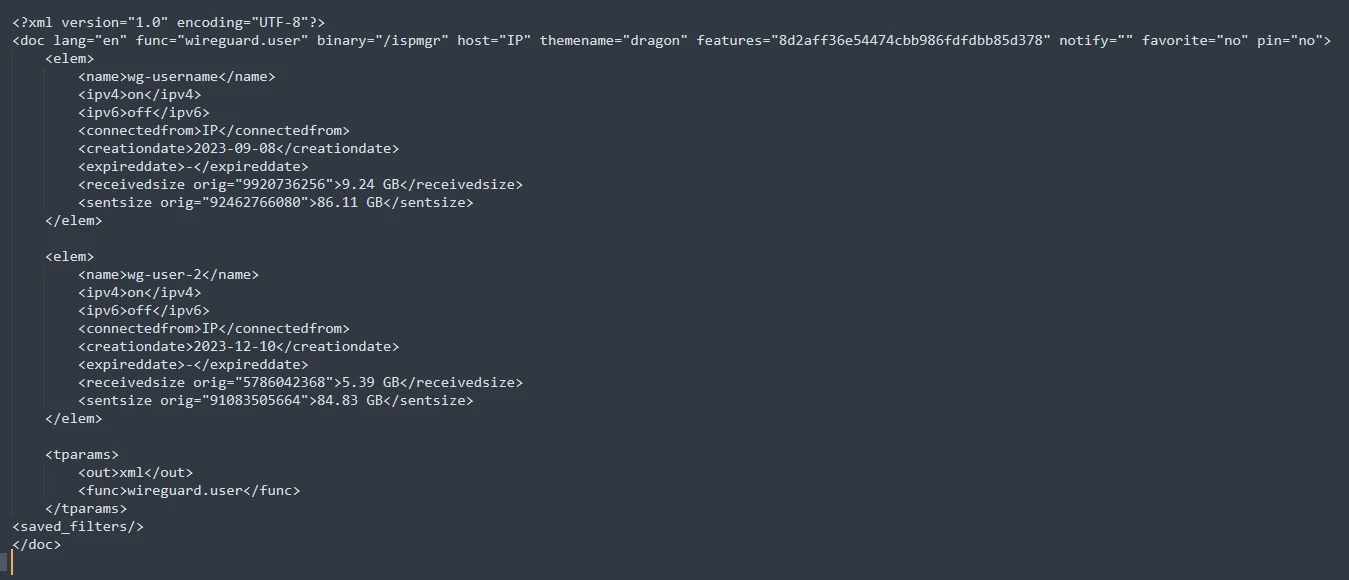
Queries to other functions are formed the same way.
Accessing another panel using the mgrctl utility
Accessing the panel directly through the utility is handy when the script is on the same server as the panel. A request through mgrctl is formed in the same way regardless of its content, as with the API.
Query Structure:
/usr/local/mgr5/sbin/mgrctl -m ispmgr [function] [parameters]- function — from the list of panel functions
- parameters — the parameters of the function
We don't need authorization for mgrctl ecause we are accessing the panel inside the server. We also need the library subprocess — just adding the line above in Python won't work.
What the request looks like:
Import subprocesssubprocess.run([url], shell=True)url— is the full command formgrctl, for example:
‘/usr/local/mgr5/sbin/mgrctl -m ispmgr wireguard.user.suspend elid=elid sok=ok’shell— is the parameter for using the shell. If the value is notTrue, the query will not work correctly.
Useful materials on this topic
If you have any questions on how to customize Python in the panel, visit the ispmanager Facebook community →