Working with the CRON Job Scheduler in the ispmanager 6
The Job Scheduler in the panel is managed from the CRON jobs section.
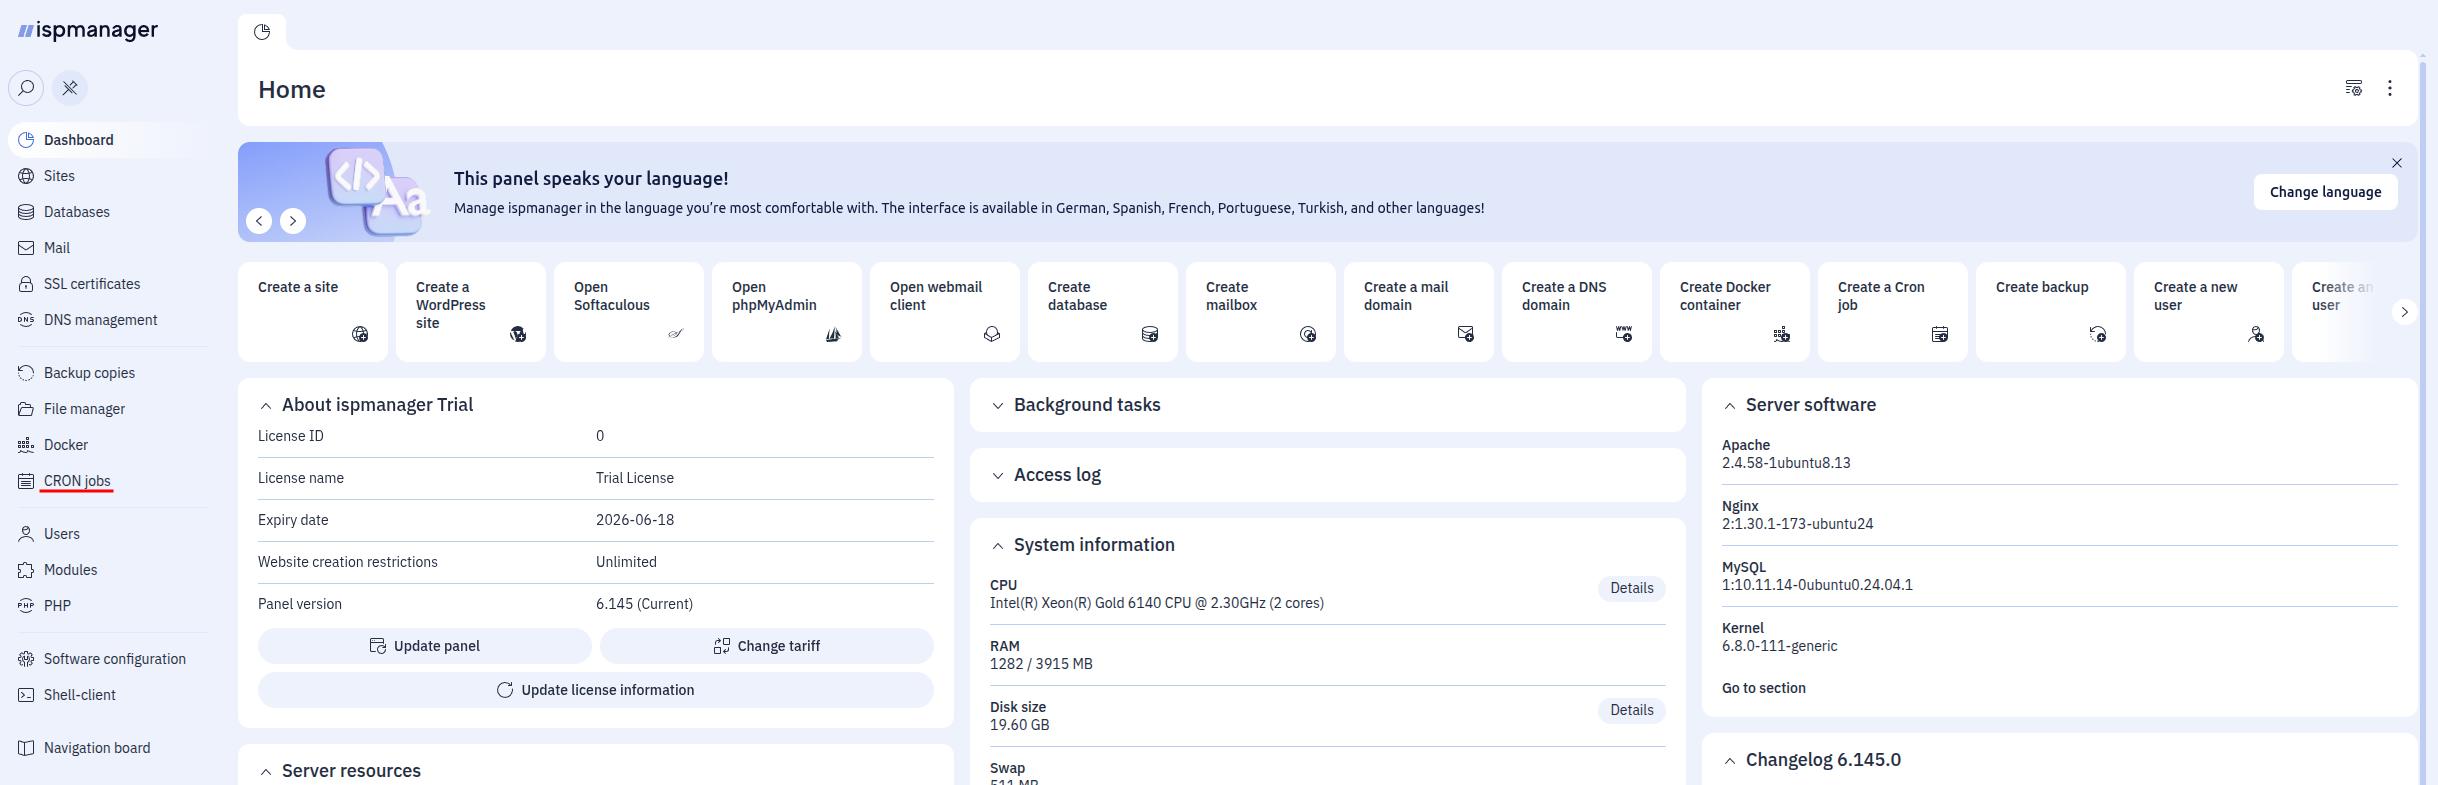
The CRON jobs section has the following options in the main menu:
- Create a job;
- Change job parameters;
- Delete job;
- Enable and disable a job;
- Scheduler Settings;
- Complete the job.
The scheduler settings have two parameters:
- E-mail address – the e-mail address to which the output of the scheduler commands will be sent. In the settings for each job, you can enable the "Do not send report by e-mail" option, if you don’t need a report on its execution;
- Path – the path to the directories of the executable files. A colon is used as a separator.
When you create or modify a job, you can specify the following parameters:
- Command – a command executed by the scheduler;
- Description – a description of the job;
- Schedule – the schedule according to which the job will be automatically executed.
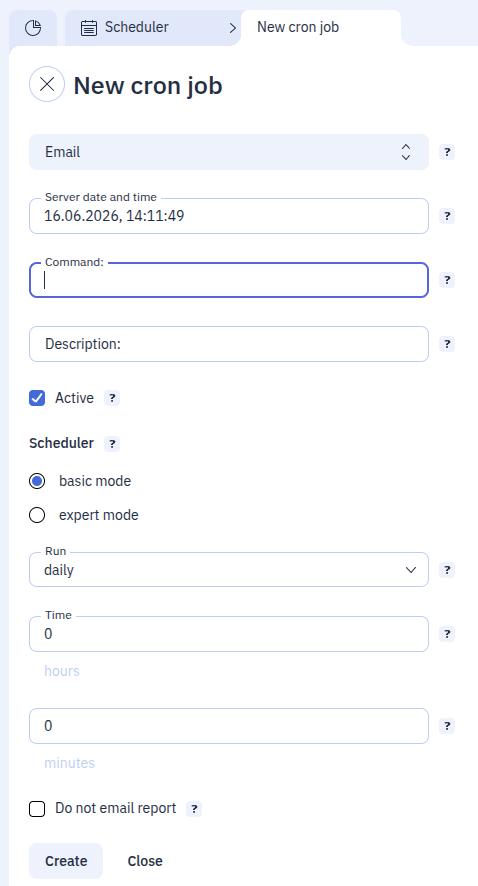
The execution schedule can be customized in basic and expert mode. The expert mode differs from the basic mode only in that it offers more options for customizing the job schedule.
In basic mode, graph setup offers only 3 parameters:
- Frequency;
- One hour to execute the job;
- One minute to execute the job.
In expert mode, the graph can be customized with special characters and numeric values just like through the console:
*represents each new value. For example, every minute, hour, or day;,is used to enumerate the values without spaces;*/represents each value in a specific increment;-represents a range of values.
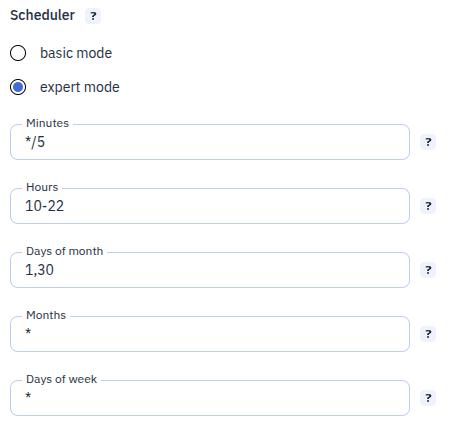
For example, to perform the job on the 1st and 30th days of each month from 10 am to 10 pm and every 5 minutes, set the parameters as shown in the screenshot below.
Example
As an example, let's create a job to write the system time to a file every 2 minutes.
Under File Manager, create the file srvtimetest, for this example, in the root directory. Enter the following lines in the file:
#! /bin/sh
date>> date-out.txt
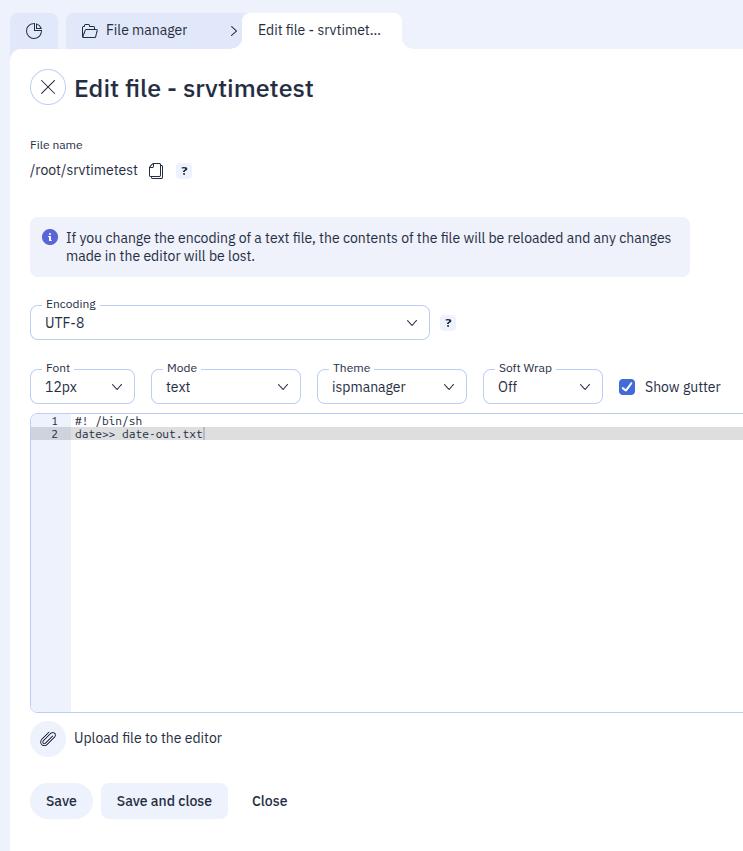
Save the changes and copy the path to the file from the File name field. This will be needed when specifying the path of the executable file in the job.
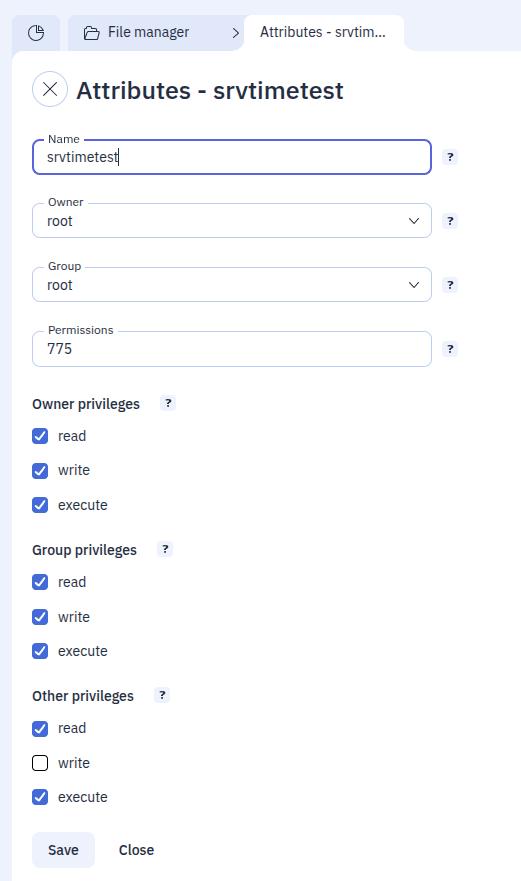
After creating and filling out the script, it needs to be assigned the correct permissions to be executable. In the File Manager section, select the file, click the Name and attributes button and specify the permissions as in the screenshot below.
After creating the script, go to the CRON jobs section to create the job. Click the Create plan button and in the new tab and in the Command field, specify the path to the script that was copied earlier.
Switch to expert schedule mode and specify */2 in the Minutes field and * in all others.
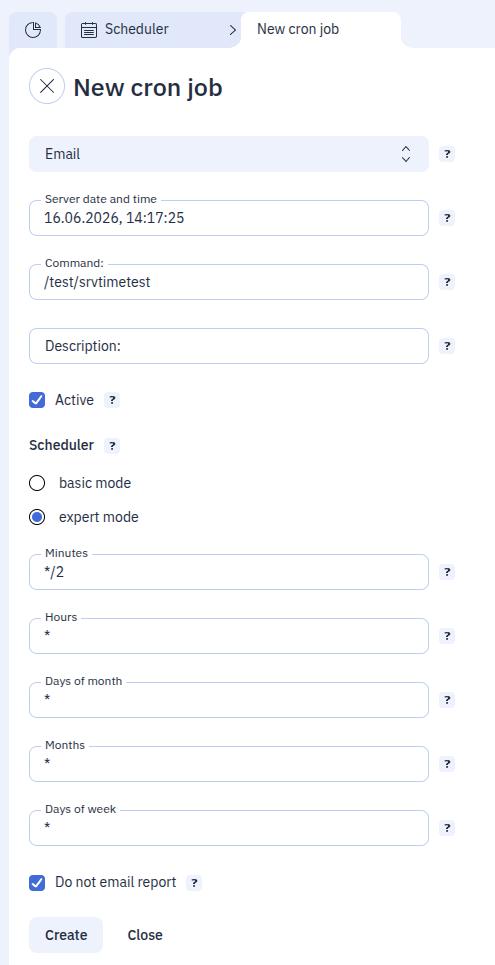
Once the job is saved, every two minutes, the server time will be recorded in the date-out.txt file that will appear next to the script.