How to change the license server
Due to the change of the license server address, which is also responsible for adding the ispmanager support SSH key, it is necessary to update the address in the ispmanager panel.
In the console
Connect to the server via SSH as a superuser and execute the following command:
sed -i 's/^License .*$/License license.ispmanager.com/' /usr/local/mgr5/etc/billing.settings
Next, update your license data and enable access for ispmanager support team so that the data is updated:
/usr/local/mgr5/sbin/licctl fetch ispmgr && /usr/local/mgr5/sbin/licctl enable ispmgr support access
If the ispmanager support team member has not previously requested access, disable access by running the command:
/usr/local/mgr5/sbin/licctl disable ispmgr support access
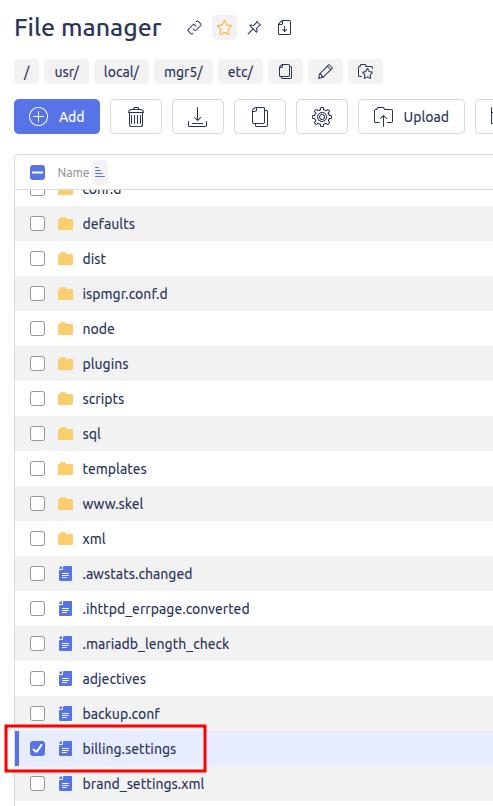
In the file manager
Open the File manager section, go to the /usr/local/mgr5/etc/ directory and double-click the billing.settings file.
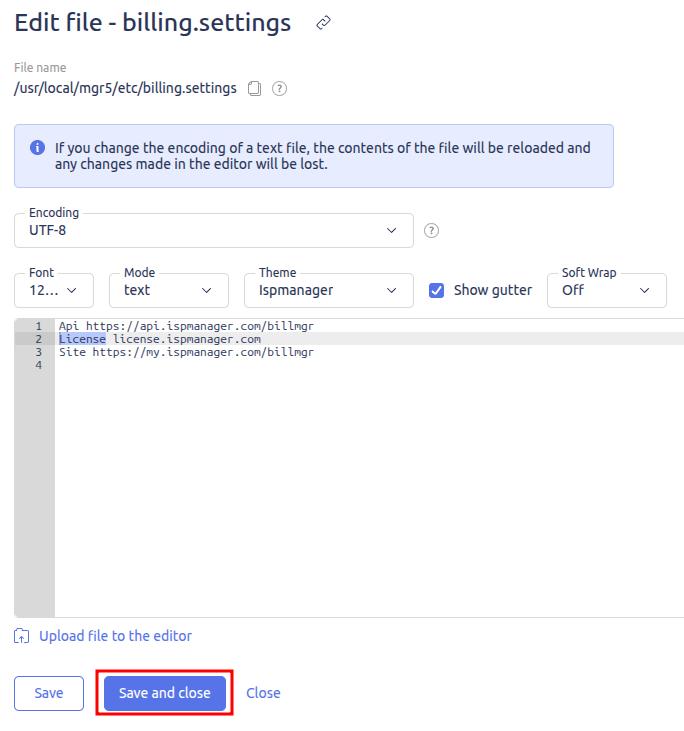
Change the value of the License directive to license.ispmanager.com and save the changes.
Now you need to update the data in the panel and on the license server. To do this:
- In the License management section, click Update license data;
- In the System settings section, enable the Allow access to ispmanager support option.
If the ispmanager support team member has not previously requested access, disable the Allow access to ispmanager support option.