New WordPress site
In ispmanager, you can create a website using WordPress without manual configuration.
WordPress requirements
When creating a site, a default version of WordPress is installed. To do that, the minimum required versions of PHP and DBMS must be installed and enabled for the site owner. WordPress software requirements are available on the WordPress website.
Creating a site
Once a site on WordPress is created, the following will happen automatically:
- WordPress will be installed.
- New database will be created (in the default DBMS).
- If possible, a Let's Encrypt certificate will be issued and HTTP requests will be redirected to HTTPS. If not, the site will be created without a certificate.
- PHP version and handling mode will be selected for the site.
The rest of the site parameters will be set to default values.
To create a site:
- Navigate to the Sites section.
Hover over the Create a site button → select WordPress.
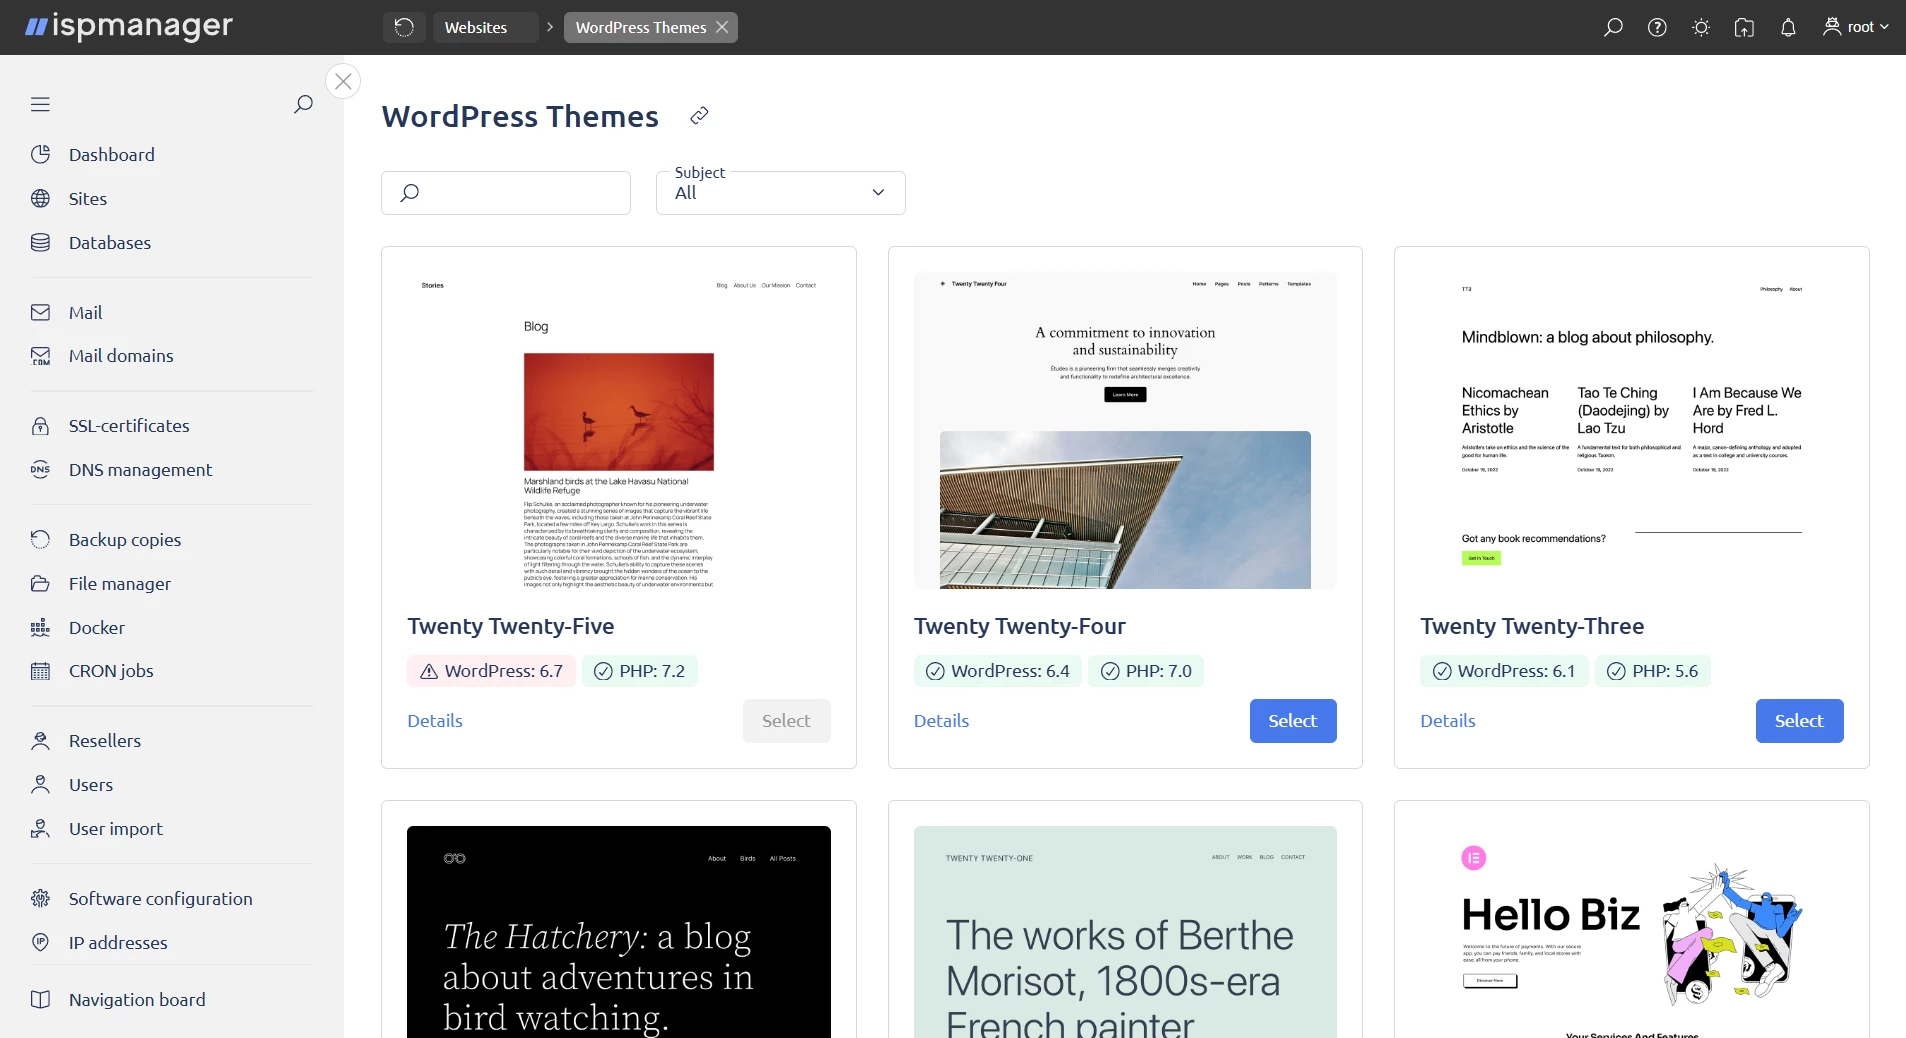
- Select a theme for the site. Themes can be searched by name and filtered by subject.
- click Details to be redirected to the Themes page on the official WordPress site or
Select to create a site with the selected theme. The theme will be available for selection if the software required for the theme is enabled for the user.
 Details
The list of themes is based on the list from the official WordPress website, sorted by popularity. Themes are updated once a day. The list is stored in the
wordpress_list_cache.jsonfile in the/usr/local/mgr5/var/directory.
- Fill in the fields:
- Domain name — specify the domain name for the site
- Select a user (available for reseller-level accounts and above) — select the user that will be the owner of the site
- Click Create and wait for the site creation process to complete.
If the site is created successfully, you will get a notification in the panel saying that WordPress is installed, with login credentials for the WordPress admin panel and the database.
Creating a WordPress site using the API
Creating a WordPress site using the API, in addition to choosing a theme, also allows you to install WordPress plugins.
- Connect to the server with the ispmanager panel via SSH with a user-level account or above.
- Make a request to the
wordpress.site.editendpoint and pass the following parameters:- theme_slug — name of the theme (required)
- domain — name of the site (required)
- owner (available for reseller-level accounts and above) — owner of the site (required)
- plugin — list of the plugins (optional)
For example, the requests below will create a site called test.domain with the Twenty Twenty Five theme and the Ninja Forms and Content Slider Block plugins:
/usr/local/mgr5/sbin/mgrctl -m ispmgr wordpress.site.edit domain=test.domain theme_slug=twentytwentyfive plugin=ninja-forms,content-slider-blockcurl -X POST "https://IP_OR_DOMAIN:1500/ispmgr?func=wordpress.site.edit&domain=test.domain&theme_slug=twentytwentyfive&owner=www-root&plugin=ninja-forms,content-slider-block"Managing WordPress
Accessing the WordPress admin panel
- Navigate to the Sites section.
- Select a site and click
 .
. - Select WordPress in the context menu.
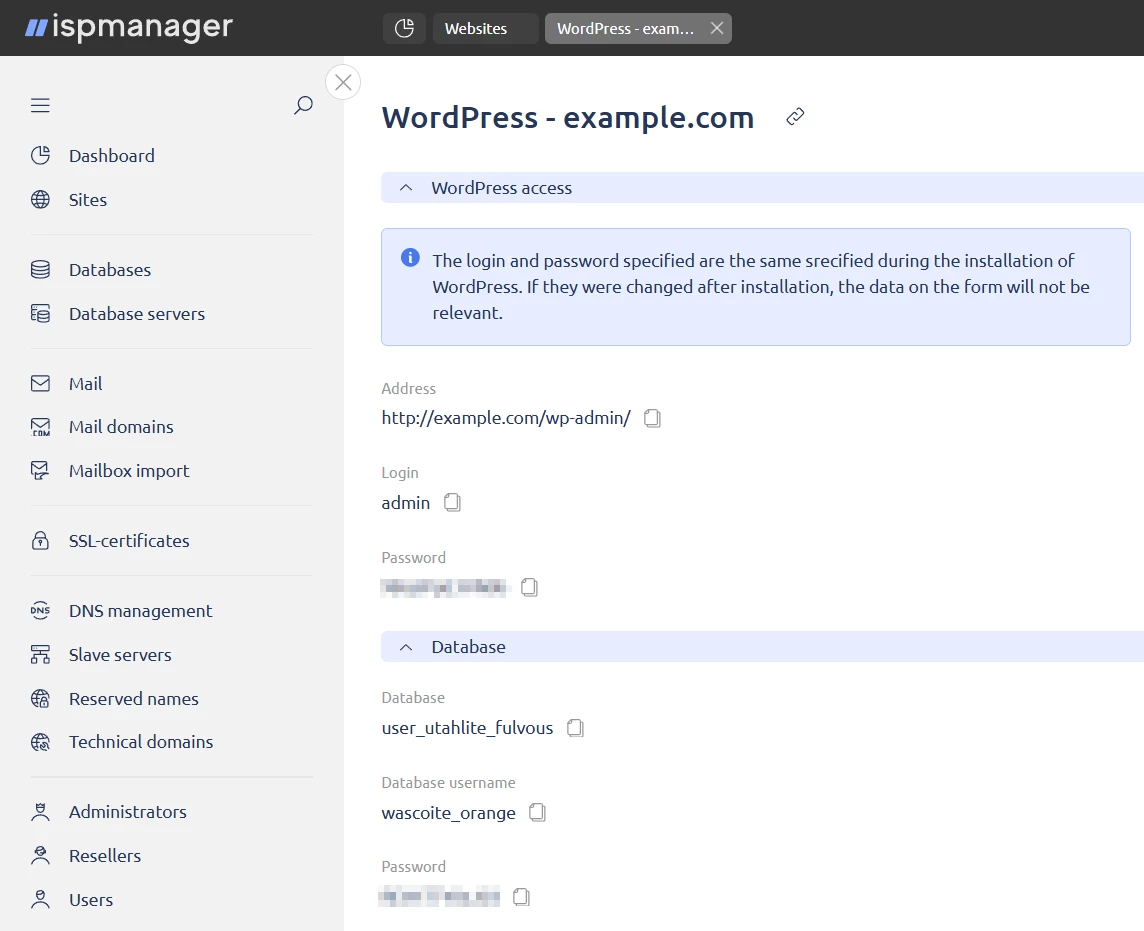
A form with login and password for the WordPress admin panel will open. If they were changed after WordPress was installed, the credentials in the form will no longer be valid.
Managing WordPress, theme and plugin versions
You can manage the installed versions of WordPress, themes and plugins from the ispmanager panel both for a particular website and for all the websites on the server.
If WordPress was installed multiple times in different website directories, managing will be available only for the last installation.
- Log in to ispmanager with a user-level account or above.
- Navigate to the Sites section.
- Select a site and click .
- Select WordPress in the context menu.
In the form that opens you will see the installed CMS, themes and plugins, as well as the following actions with them:- Update — updates the version to the latest one. The button is active if the version is outdated.
- Enable/Disable — activates/deactivates the version. The button is available only for plugins.
Managing is available:
- under a user account — for all of the user's websites
- under a reseller account — for all websites of all the reseller's users
- under an administrator account — for all websites of all users
- To manager WordPress:
- Log in to ispmanager with a user-level account or above.
- Navigate to the WordPress section. A table will open with a list of installed versions of WordPress, themes and plugins.
Select one or several entities in the list and click on the required action on the toolbar. Available actions:
 Update
Updates the version to the latest one.  Enable
Activates the version. The action is available only for plugins.  Disable
Deactivates the version. The action is available only for plugins.  Synchronize
Updates the list of installed versions. The button is available only for the administrator account with superuser permissions.

WordPress technical details
WordPress requirements check
WordPress software requirements are checked automatically based on the webscripts.xml file from the official ispmanager repository. Version requirements are checked in the following order:
- Requirements of the default WordPress version.
- If the default version is not in the file, the latest version specified in the file is checked.
- If the file is not available, the requirements of the latest available WordPress version are used.
PHP settings for the site
After a WordPress theme is selected and the site creation process is started, the panel:
- lists the PHP modes available to the user
- checks the PHP versions enabled for these modes, starting with the native one and then going from the latest to the earliest
Once a PHP version that meets WordPress requirements is found, this version and the corresponding PHP mode are installed for the site.
The modes are checked in the following order:
- Apache module
- FastCGI (Apache)
- FastCGI (Nginx)
- CGI
If a mode is not available, it is excluded from the list.
Apache + Nginx, native PHP 8.2 version, alternative PHP 8.2, 7.4 and 5.6 versions are installed on the server. All the PHP versions are enabled for all the PHP modes, and all the modes are enabled for the user.
→ Apache module and PHP 8.2 version (native) will be selected for the site.
WP CLI
Themes and plugins are installed using WP CLI. WP CLI is installed when you first create a WordPress site and is located in the /usr/local/bin/ directory.
WP CLI uses the same PHP version as the site. To ensure correct operation of WP CLI, the PHP version must be equal to or higher than the required one.
WordPress versions list synchronization
By default, the list of the installed versions of WordPress, themes and plugins in the WordPress section updates automatically once a day. To change this frequency, add the WordPressUpdateInfo parameter with a required value in minutes to the panel configuration file /usr/local/mgr5/etc/ispmgr.conf. For example, with the following parameter value, the list will update every 2 hours:
WordPressUpdateInfo 120Databases
Installed themes and plugins are written to the ispmanager database in the wordpress_theme_assign and wordpress_plugin_assign tables, respectively.
Columns of the wordpress_theme_assign table:
- name — the name (slug) of the theme
- installed_version — the installed version of the theme
- available_version — the version of the theme available for installation
- status — the state of the theme, possible values:
- active — enabled
- inactive — disabled
- repo — the repository the theme is installed from
- webdomain — the site the theme is installed for
Columns of the wordpress_plugin_assign table:
- name — the name (slug) of the plugin
- installed_version — the installed version of the plugin
- available_version — the version of the plugin available for installation
- status — the state of the plugin, possible values:
- active — enabled
- inactive — disabled
- repo — the repository the plugin is installed from
- webdomain — the site the plugin is installed for