Notifications setup
Notifications can be configured through the mail service or Telegram.
To configure alerts:
- Go to ispmanager panel
- In the Main Menu, click Settings.
- From the drop-down menu, select Notifications.
In the form:
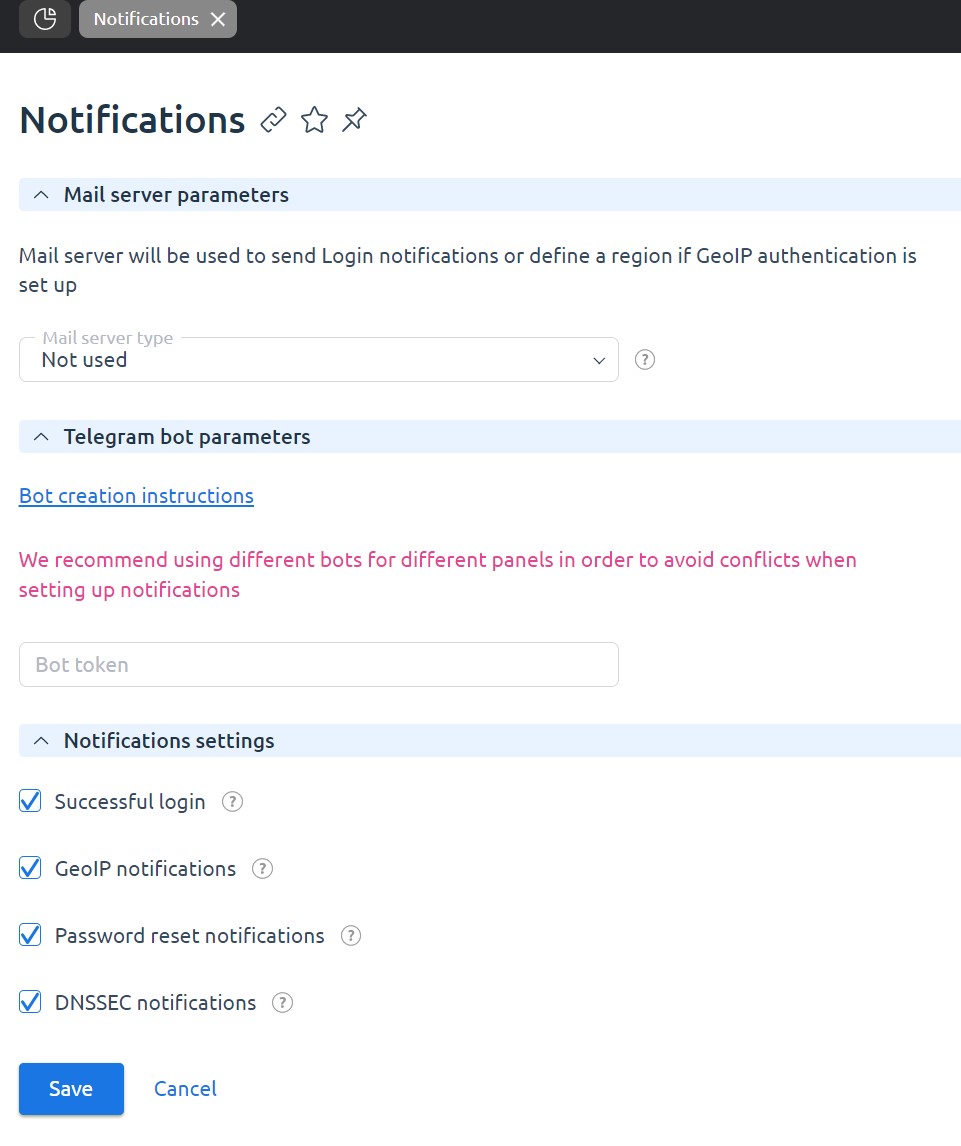
- Mail server parameters;
- Telegram bot parameters;
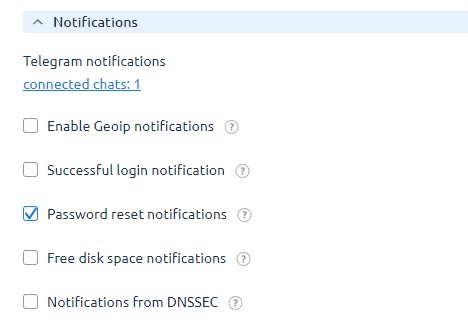
- Notifications settings - notifications available:
- Successful Authorization Notifications – the system sends messages about successful authoirizations to the control panel;
- GeoIP Module Notifications – the system sends notifications about tracking the region by IP address.;
- Password Recovery Module Notifications – allow users to recover their password;
- DNS Server DNSSEC Extension Notifications – to receive alerts about new DS records that need to be published. For more information, see the article Configuring DNSSEC.
Mail notifications
Configure a mail server to allow the control panel to send and receive emails:
- Go to Settings → Mail notifications
- Select the "External mail server" in Mail server type.

- Enter the SMTP-server address and SMTP-server port that will send notifications.
- In the Login field specify the email that will send mail notifications.
- Enter the Password. You can use upper and lower-case letters, and special symbols (@, ?, %) to create a strong password.
- Enter the Sender name and Server name that will be specified in notifications.
- Activate the notification types:
- Successful login notifications — send notifications about successful login attempts in the control panel.
- GeoIP notifications — send notifications from the GeoIP module. Disabling this option will also disable the GeoIP module.
- Password reset notifications — password reset notifications will be sent to this email address.
- Click on Ok.
Telegram Notifications
To receive notifications from the panel via Telegram, you need to configure the bot. Notifications can be configured to be sent individually or sent to a group.
To configure notifications in Telegram, the BotFather application is used. The administrator needs to create a bot and add a token.
Bot setup
To configure the bot:
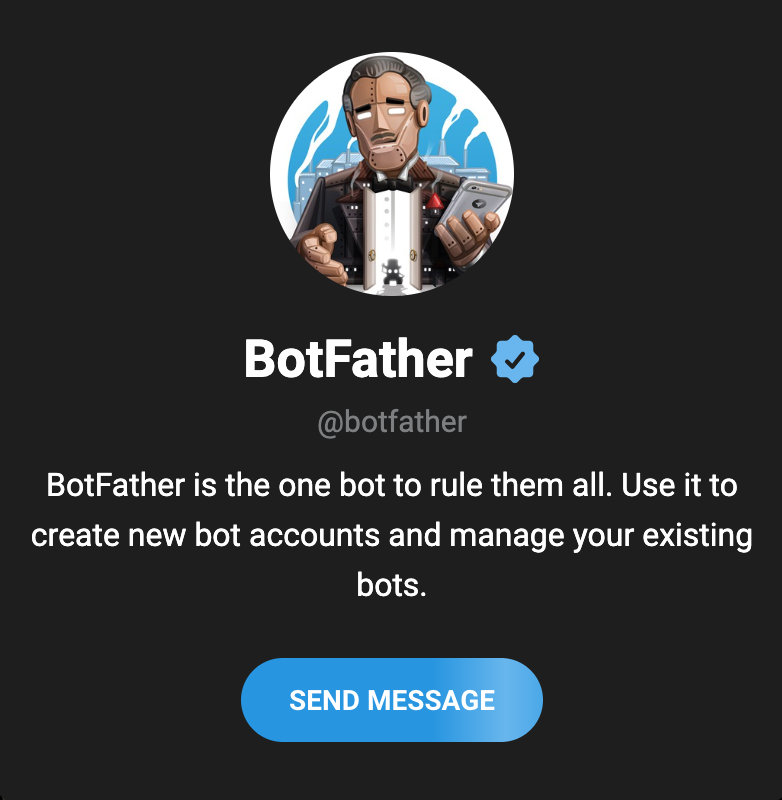
- Navigate to BotFather application.
- In the window that opens, click Send Message.
3. When connected, send the command
/start4. BotFather will publish the commands.
5. Send the command:
/newbot6. The process of creating a bot will be launched, where it will be necessary to enter one by one:
- name – the bot name;
- bot username – user bot name (should end with “bot”)
7. After that, a message will be displayed about successful creation, which will contain an access token.
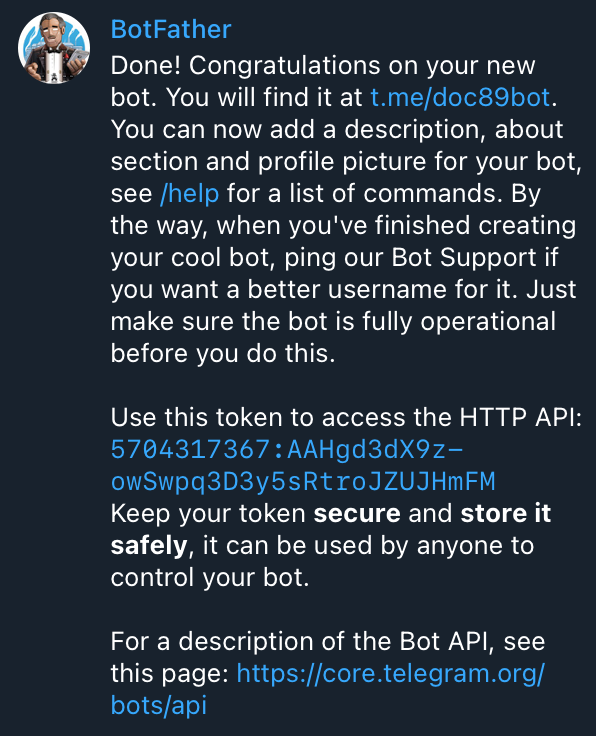
8. Copy the received token to the clipboard.
9. Log in to ispmanager.
10. In the Main Menu choose Settings.
11. In the drop-down list, select Notifications.
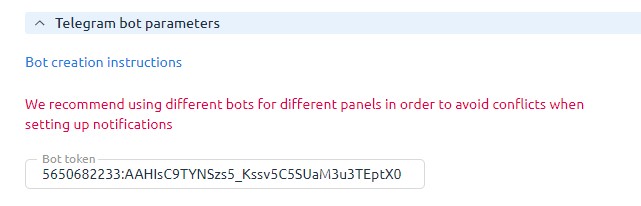
12. In the Telegram bot parameters section, in the Token bot field, paste the previously copied token.
13. Press Save button
Now the bot has been created and is ready for further usage.
BotFather commands
- /newbot — creates a new bot.
- /mybots — allows to see the list of existing bots and manage settings.
Telegram bot editing commands:
/setname— change your bot name./setdescription— change bot description ( text up to 512 characters). Users will see this text at the beginning of the conversation with the bot, entitled "What can this bot do?."/setabouttext— change bot info (shorter text up to 120 characters). Users will see this text on the bot profile page. When they share your bot with someone, this text is sent with the link./setuserpic— edit bot profile photo./setcommands— change the list of commands supported by the bot. Users will see a list of commands every time they type '/' in conversation with your bot. Each command has a name (must begin with a slash "/, "alphanumeric plus underscore, no more than 32 characters, case-insensitive), parameters and text description./deletebot— the command deletes the bot and releases its login
Commands to change Telegram bot settings.
- /token — displays the current token
- /revoke — generates a new token. This command should be treated carefully, since it instantly generates a new one, without additional confirmation.
- /setinline — option allows the bot to work in group chats if enabled. For example, a parameter can be used if you need to create a robot that will track obscene language and automatically block users for some time
- /setonlinegeo — if you enable this option, the robot will request permission to use geolocation in group chats;
- /setinlinefeedback — sets the ability to track the statistics of the most used commands from the Menu;
- /setjoingroups — enables or disables the ability to add bots to group chats and channels;
- /setprivacy — determines the privacy of messages for the bot. If disabled, all sent messages will be visible to the bot
Configuring notifications
To receive notifications (both when working under an administrator and when working under a user), make the appropriate settings:
- In the upper right corner, click on the user or administrator name.
- In the pop-up menu, select Settings.
- In Settings find Notifications section.
- Click on Not connected
- In the window that opens, select the preferred method for connecting bot notifications:
- manual connection – you need tomessage a bot from Telegram to connect;
- automatic connection:
- press Connect Telegram notifications –when clicking on the link, a private chat with a bot will open. To connect notifications, click on the button /start;
- press Connect notifications in the Telegram group – when clicking on the link, the group selection window will open. After selection, a bot will be automatically added to the group and notifications will be connected.
6. After successful bot connection, click on the Save button.
7. The Settings window opens, where the Notifications section now displays the number of chats connected and allows you to select the appropriate notification.