How to install Django
Django is a high-level Python web framework for quick and efficient web development, which includes many built-in components, such as an authentication system, admin interface and tools for working with databases.
Main areas of application:
- content management systems (CMS)
- e-commerce
- social networking apps
- corporate apps
- microservices and API
Supported OS
Django can be used on any operating system from the list of supported by ispmanager.
Django requirements
Before installing Django, please make sure that:
- Nginx, Python and MySQL are installed on the server. To successfully install Django, you may need some additional software components
- Python is enabled for the current logged in user in the panel settings
you may need to install the sqlite3 gcc utility and developer kits for the database server.
DetailsDebian 11
apt install sqlite3 gcc libmariadb-devAlmaLinux 8
yum install sqlite gcc mysql-develBefore installing packages for your database, check which database server is installed. After that, you can choose the desired package depending on the server name.
Django installation
Let's review how to install Django using Debian 11 and AlmaLinux 8 as examples.
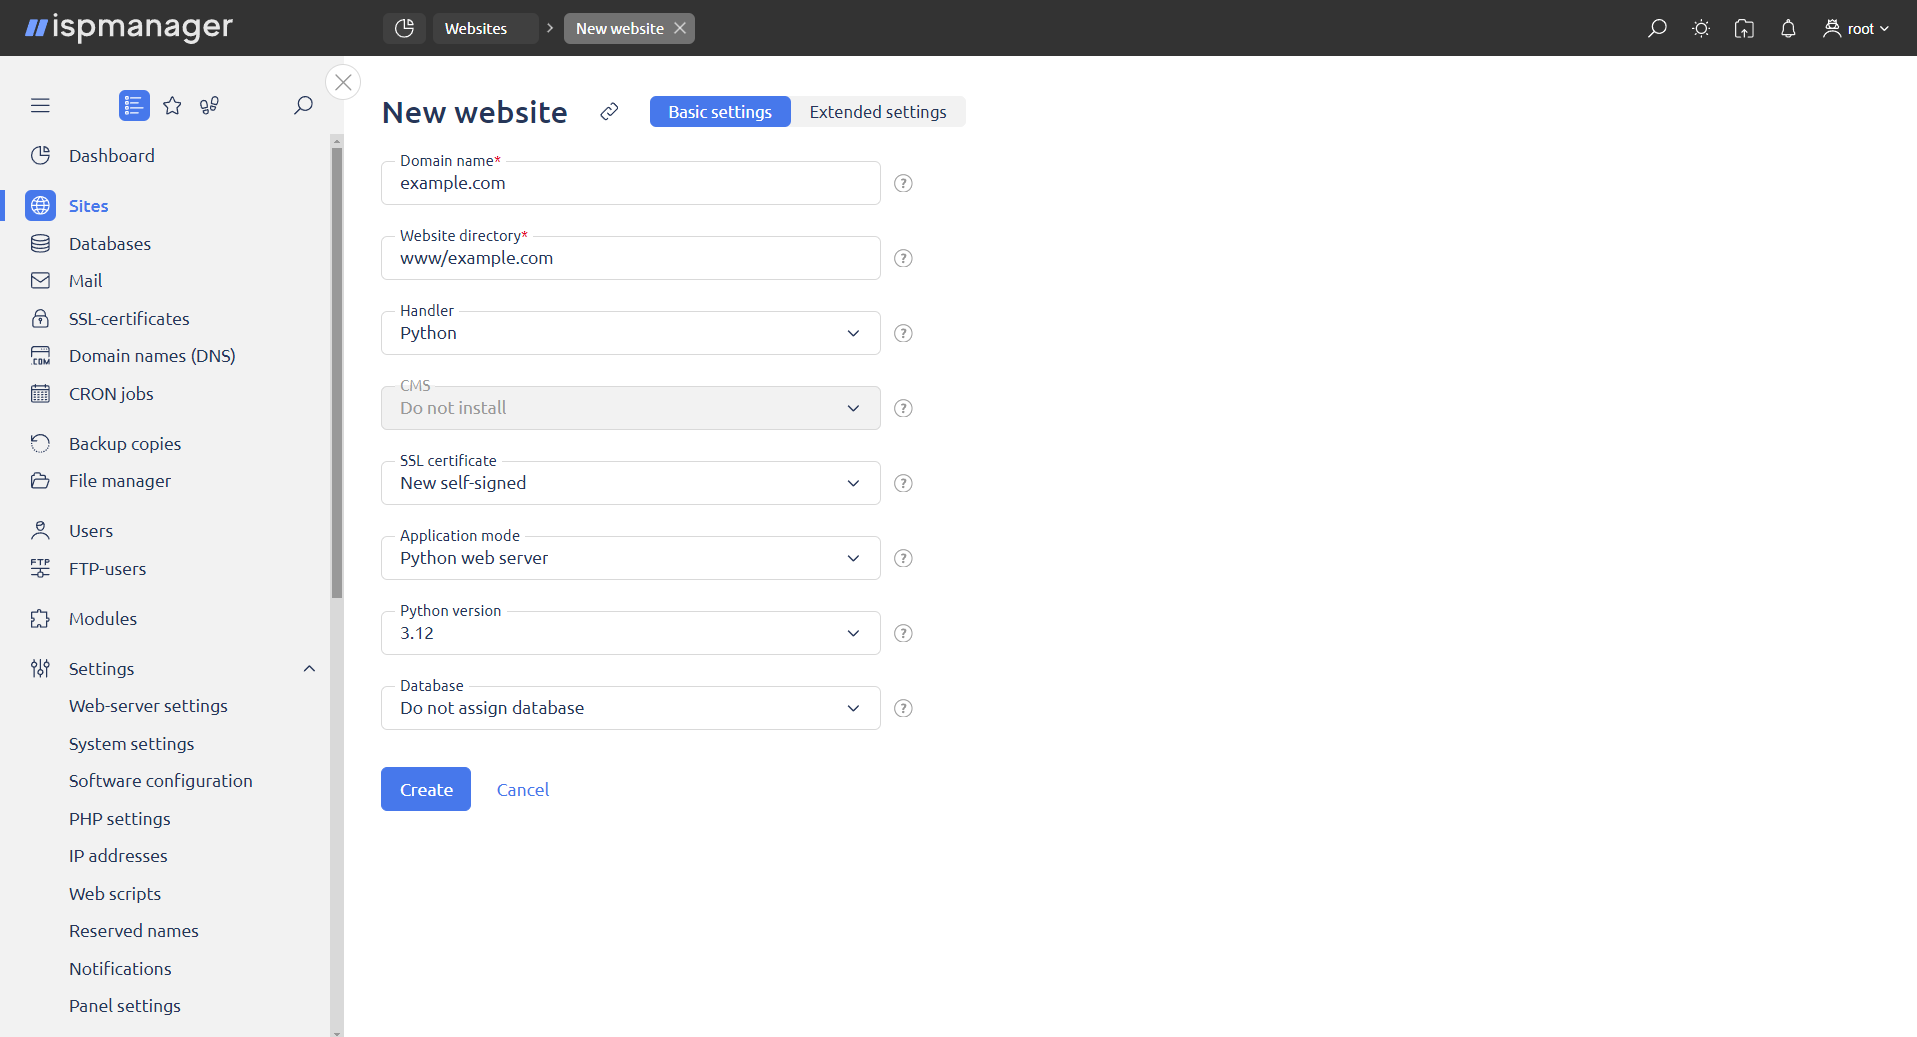
When creating/editing a site, specify:
- Handler — select Python
- Application mode — select the applicable mode for the current user
Python version — select the most recent version
DetailsWhy the most recent Python version?
Compatibility and performance:
- includes the latest language and standard library improvements
- faster than previous versions due to improvements in the interpreter
Long-term support:
- new Python versions receive updates for longer periods of time
Your choice of Python version will affect:
- new syntax constructs and improved features are only available in the mos recent versions
Recommendations
Use the most recent versoin of Python if:
- you are starting a new project
- you need new features and improved performance
- all dependencies are compatible with this version
Stay on the current Python version if:
- you use legacy libraries not supported by the most recent version
- the project is stable on an older Python version and there is no need to upgrade
Example
If the django-someplugin library only supports Python 3.10, it is better to wait until you update to a Python 3.11-compatible version
Go to the Extended settings tab.
Navigate to the Handler section. Fill in the fields:
- Application mode — Python web server
- Path to server — to start the server, you must specify the path to the project's
manage.pyfile. The path to the file has the following format, where project_name is the name of the Django project Server arguments — to start the server, use the runserver <port number> command. This parameter will be recognized after the site is created. If the value of runserver <port number> was not set in the site settings, an error will occur when starting the project
DetailsYou can use the command in one of the following formats.
Usage example:
- runserver <port>
- runserver 127.0.0.1:<port>
Starting the server on port 8000:
python project_name/manage.py runserver 8000Starting the server on a specific IP and port:
python project_name/manage.py runserver 127.0.0.1:8000- Connection method — port
Python version — select the most recent version
DetailsIt is also possible to select the same version that was previously selected in the settings.
Once all fields are filled in, click Add.
Next, edit the site:
- open the Handler (Python) tab
- specify the port in the Server arguments field
In this example, the Server arguments field should be set to runserver 20000.
Click Save.
Delete the automatically created directory:
- go to the Sites section
- select a site
- click the
 Site files button
 - select the project_name directory
- click the
 Edit button
 - click the
 Delete button
Next, follow the steps below:
- go to the Sites section
- select a site
- click the
 Configuration files button on the toolbar
Enter django and save the changes.
Next:
- go to the Sites section
- select a site
- click on the context menu

- select Shell client
- enter the following commands:
source .venv/bin/activatepip install --upgrade pippip install wheelpip install mysqlclientIf you experience issues installing mysqlclient, install a specific version, e.g. pip install mysqlclient==2.1.0.
django-admin startproject project_nameIn django-admin startproject project_name, project_name is the name of your Django project.
Next:
- go to the Sites section
- select a site
- click the Site files button
The File manager will open.
- before performing an operation, make sure that you are in the directory containing the current project
- after completing the above steps, a directory called project_name will reappear
- open the project_name directory
Next, follow the steps below:
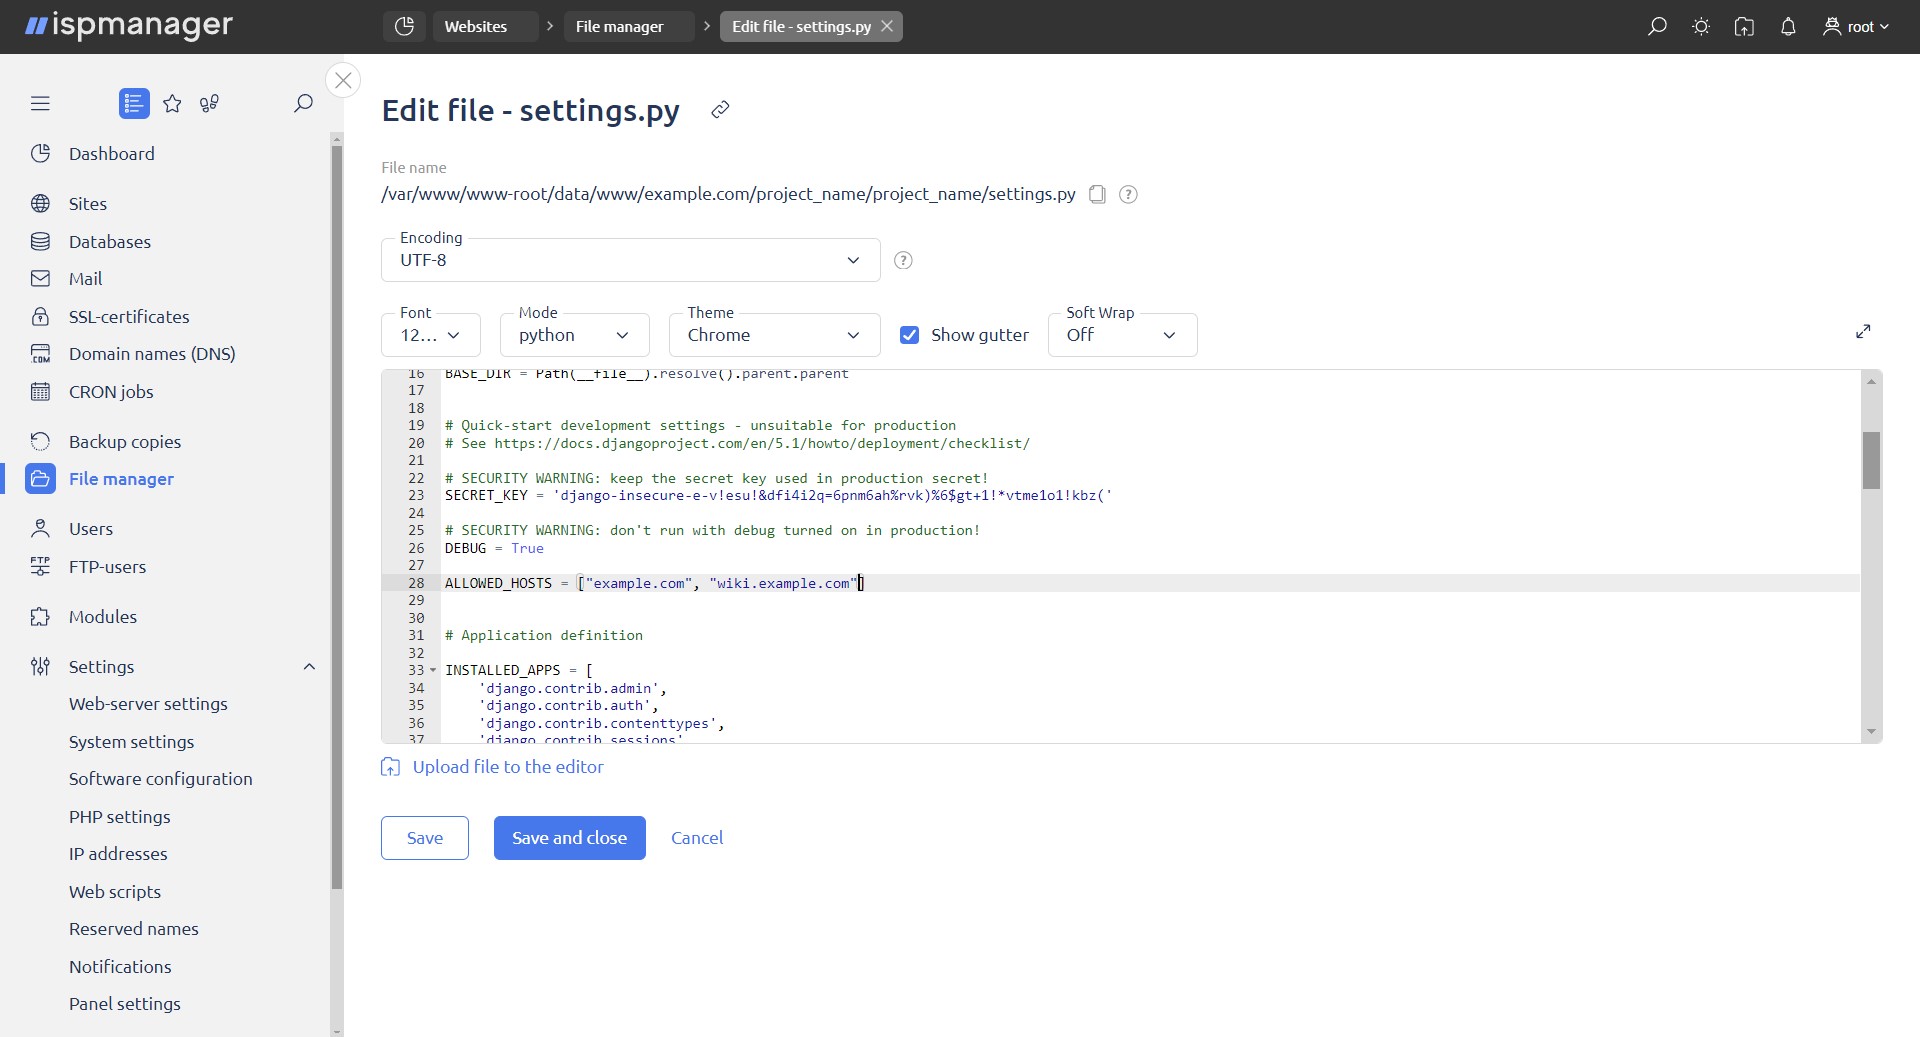
- select the settings.py file and edit it
- add the domain name and aliases in the ALLOWED_HOSTS = [] section
- domains must be in quotes. ALLOWED_HOSTS = ['site name as in the panel' , 'alias']
In DATABASES, specify the information required to connect to MySQL.
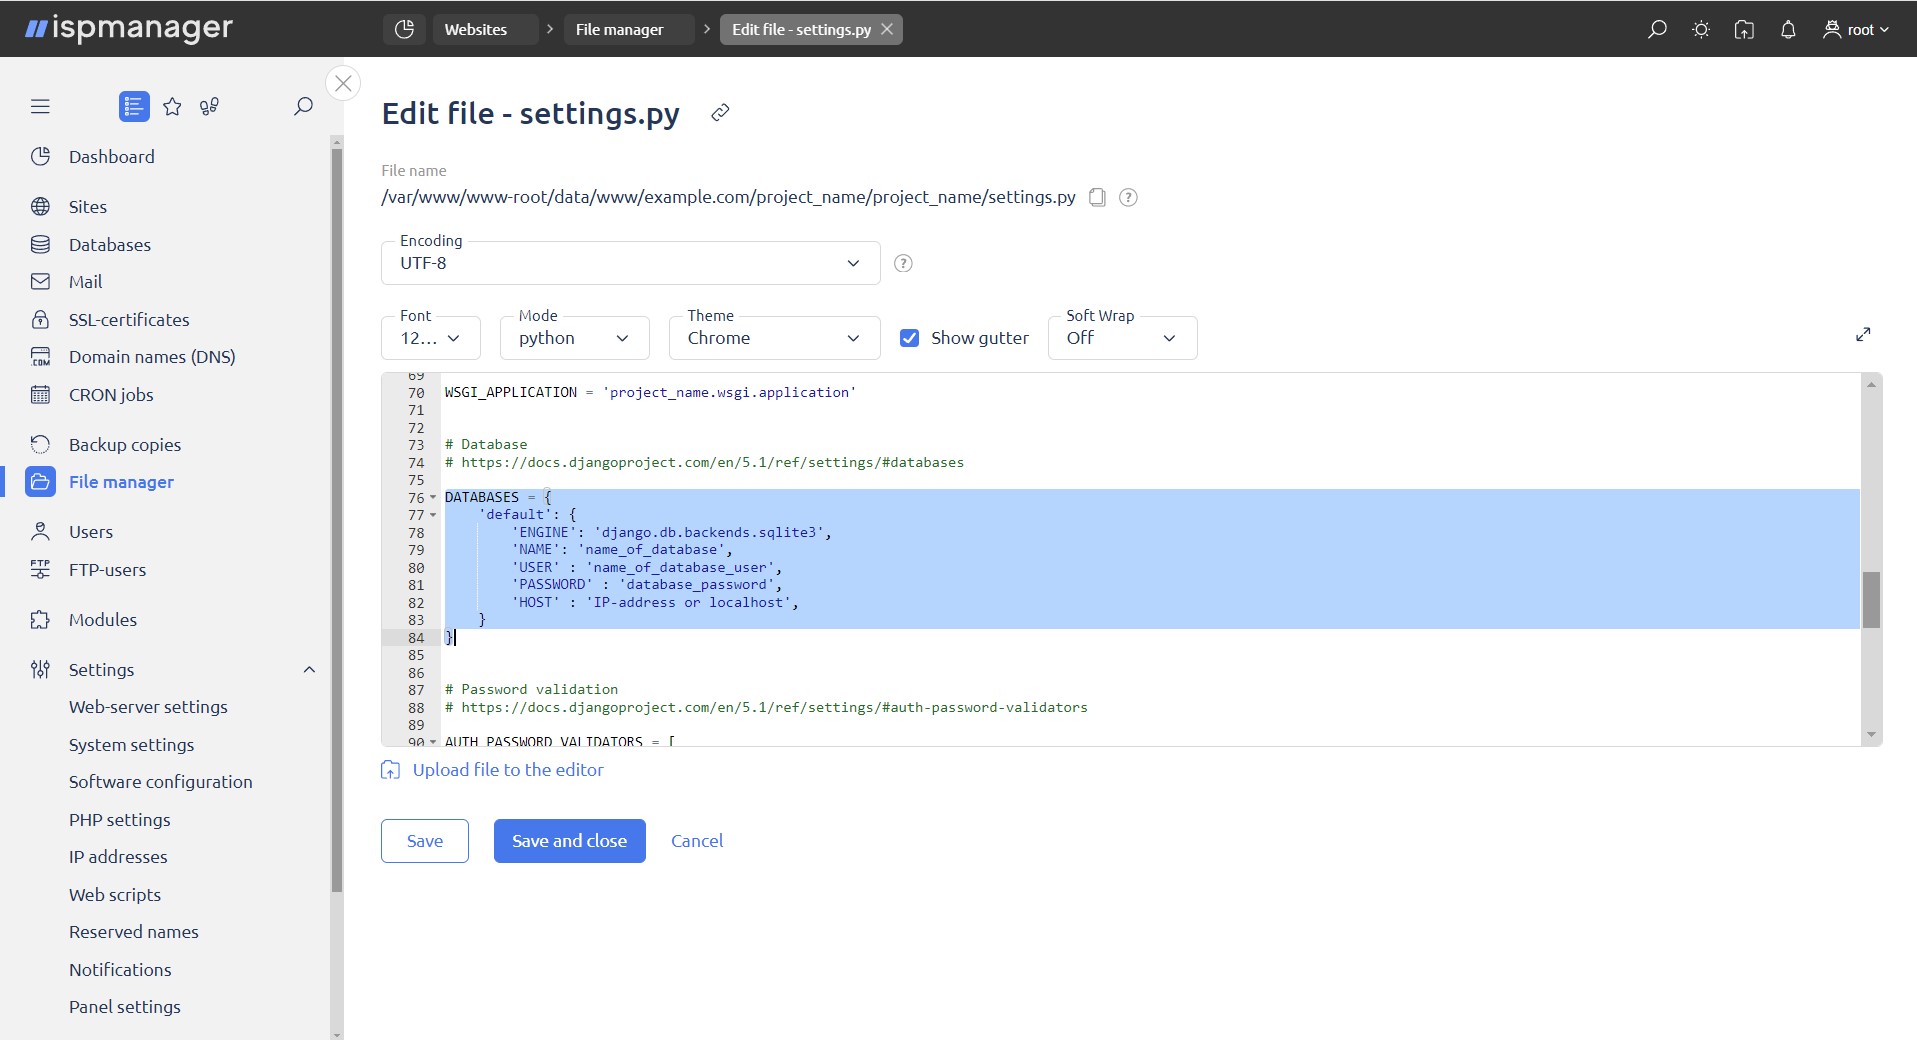
DATABASES = {
    'default': {
        'ENGINE': 'django.db.backends.mysql',
        'NAME': 'database_name',
        'USER': 'database_username',
        'PASSWORD': 'database_password',
        'HOST': '<ip_address or localhost>',
    }
}
If the database doesn't exist, create one.
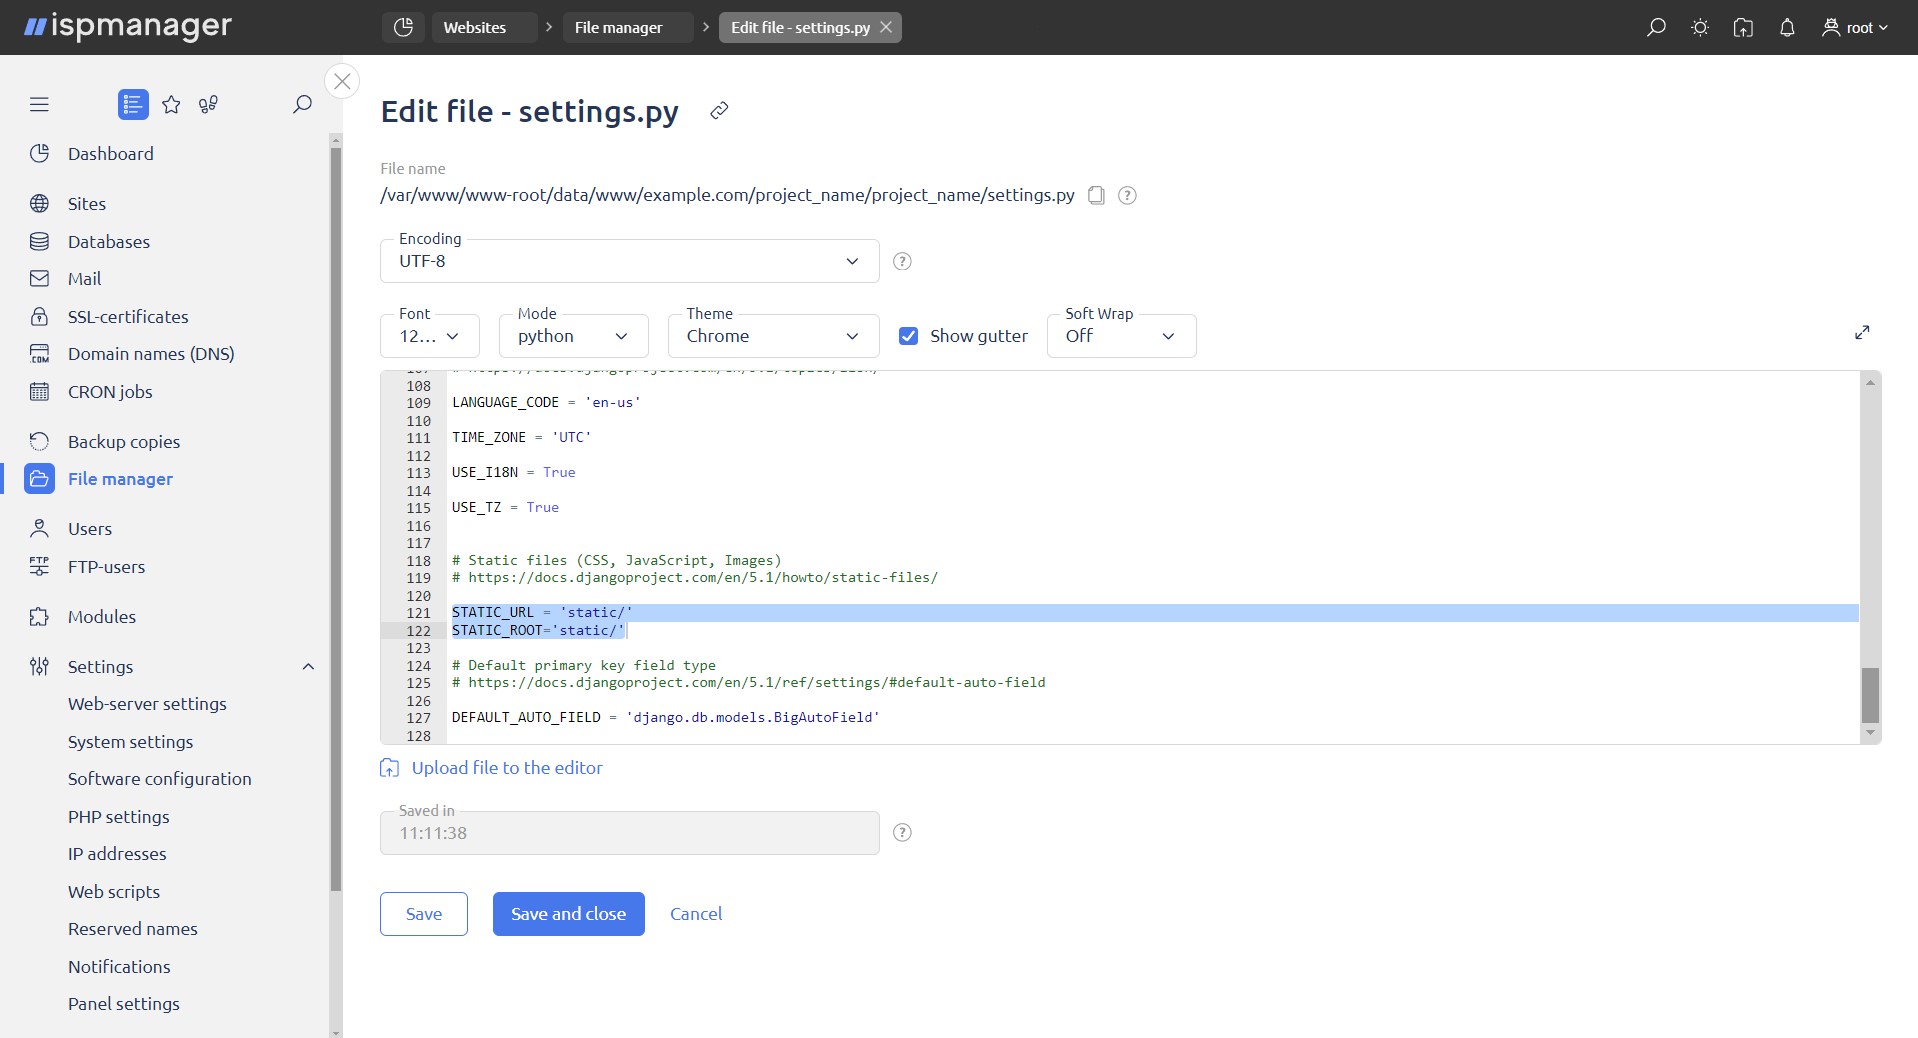
Follow the steps below:
- scroll down to the STATIC_URL section
- add a new section STATIC_ROOT='static/'
- click the Save and close button.
Create a directory for static files.
- go to the Sites section
- go to the context menu
- select Shell client
- create a directory with static files
- run the commands below:
source .venv/bin/activate

python project_name/manage.py collectstatic (where project_name is the name of your Django project)
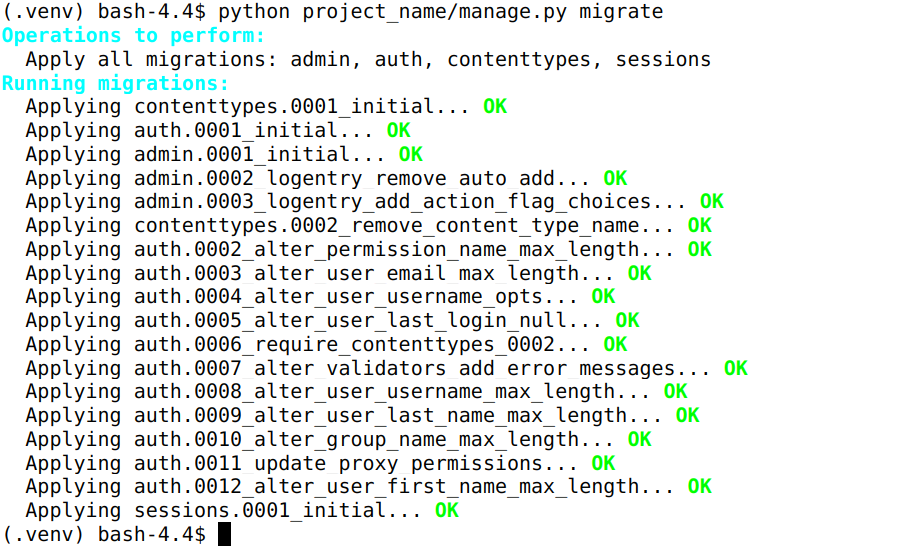
Migrate the MySQL project:
- run the command:
python project_name/manage.py migrate (where project_name is the name of your Django project)- Click Save and close.
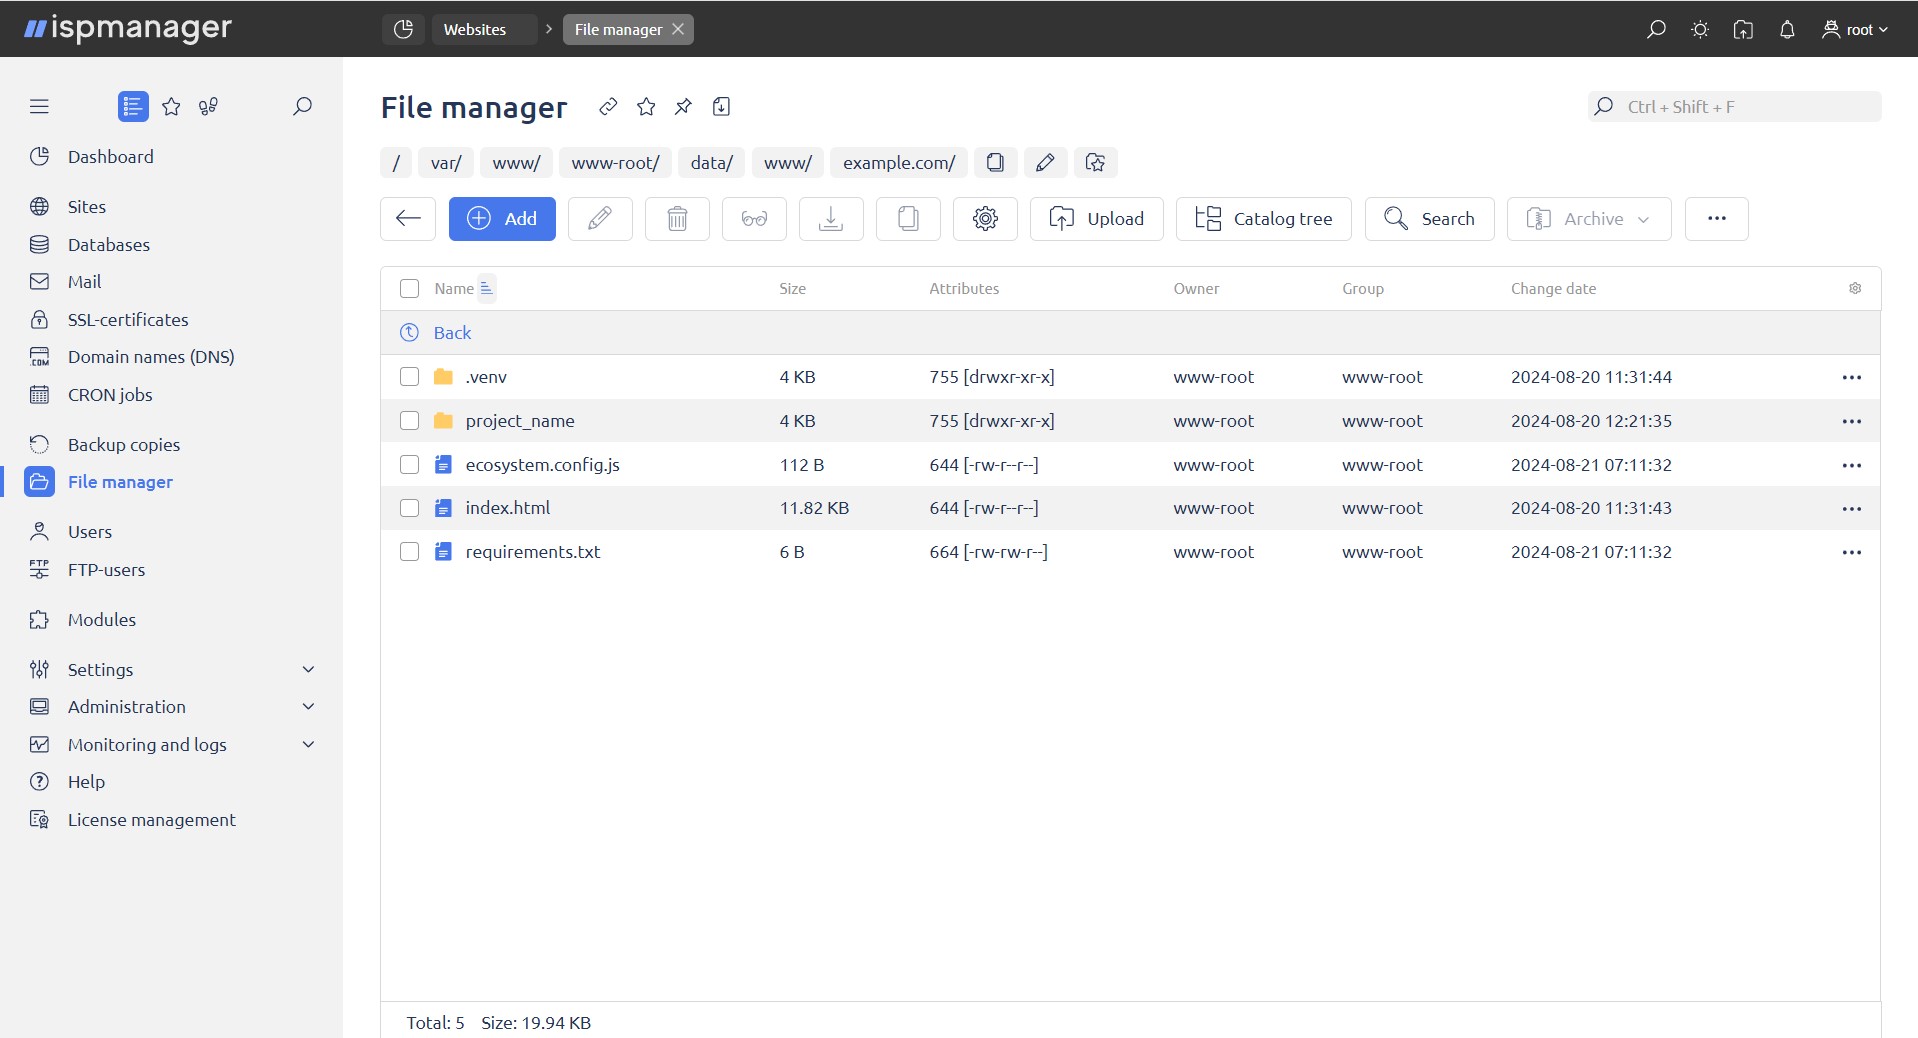
Create a configuration file in the root directory.
- go to the Sites section
- select a site
- select Site files
- click the Create button
Fill in the fields as below:
- Type — file
- Name — enter passenger_wsgi.py
- click the Add button
Follow the steps below:
- go to the Sites section
- select a site
- select Site files
- select the file passenger_wsgi.py
- click the Edit button
- click the Open button
- in the file passenger_wsgi.py run the commands below
- once all commands are executed, click Save and close
# -*- coding: utf-8 -*-
import os, sys
sys.path.insert(0, '/var/www/<имя пользователя панели>/data/www/<имя сайта>/project_name')
sys.path.insert(1, '/var/www/<имя пользователя панели>/data/www/<имя сайта>/.venv/lib/python<номер версии>/site-packages')
os.environ['DJANGO_SETTINGS_MODULE'] = 'project_name.settings'
from django.core.wsgi import get_wsgi_application
application = get_wsgi_application() 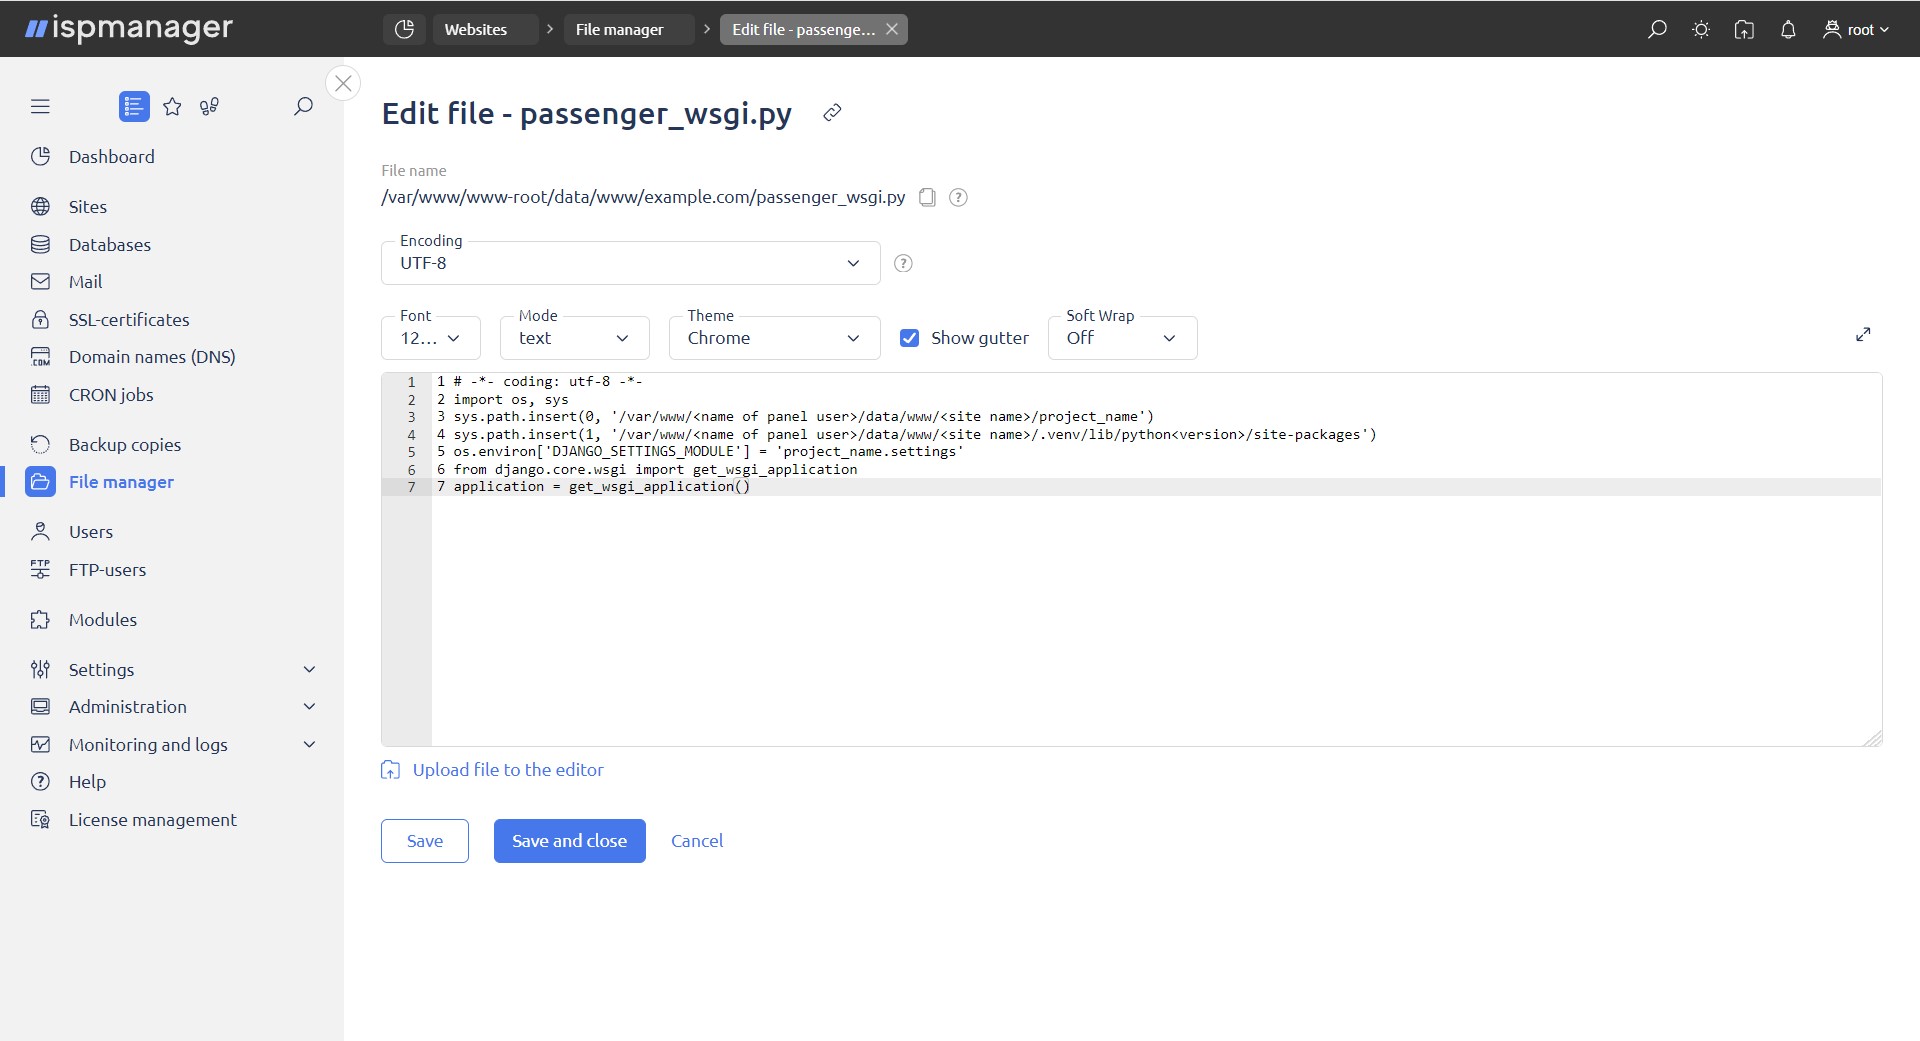
1. In line sys.path.insert(0, '/var/www/<name of panel user>/data/www/<site name>/project_name') specify the path to your project.

2. In line sys.path.insert(1, '/var/www/<name of panel user>/data/www/<site name>/.venv/lib/python<номер версии>/site-packages') specify the version of Python you selected when creating the site.

3. In line os.environ['DJANGO_SETTINGS_MODULE'] = 'project_name.settings' change project_name to the name of your project.
Restart Python.
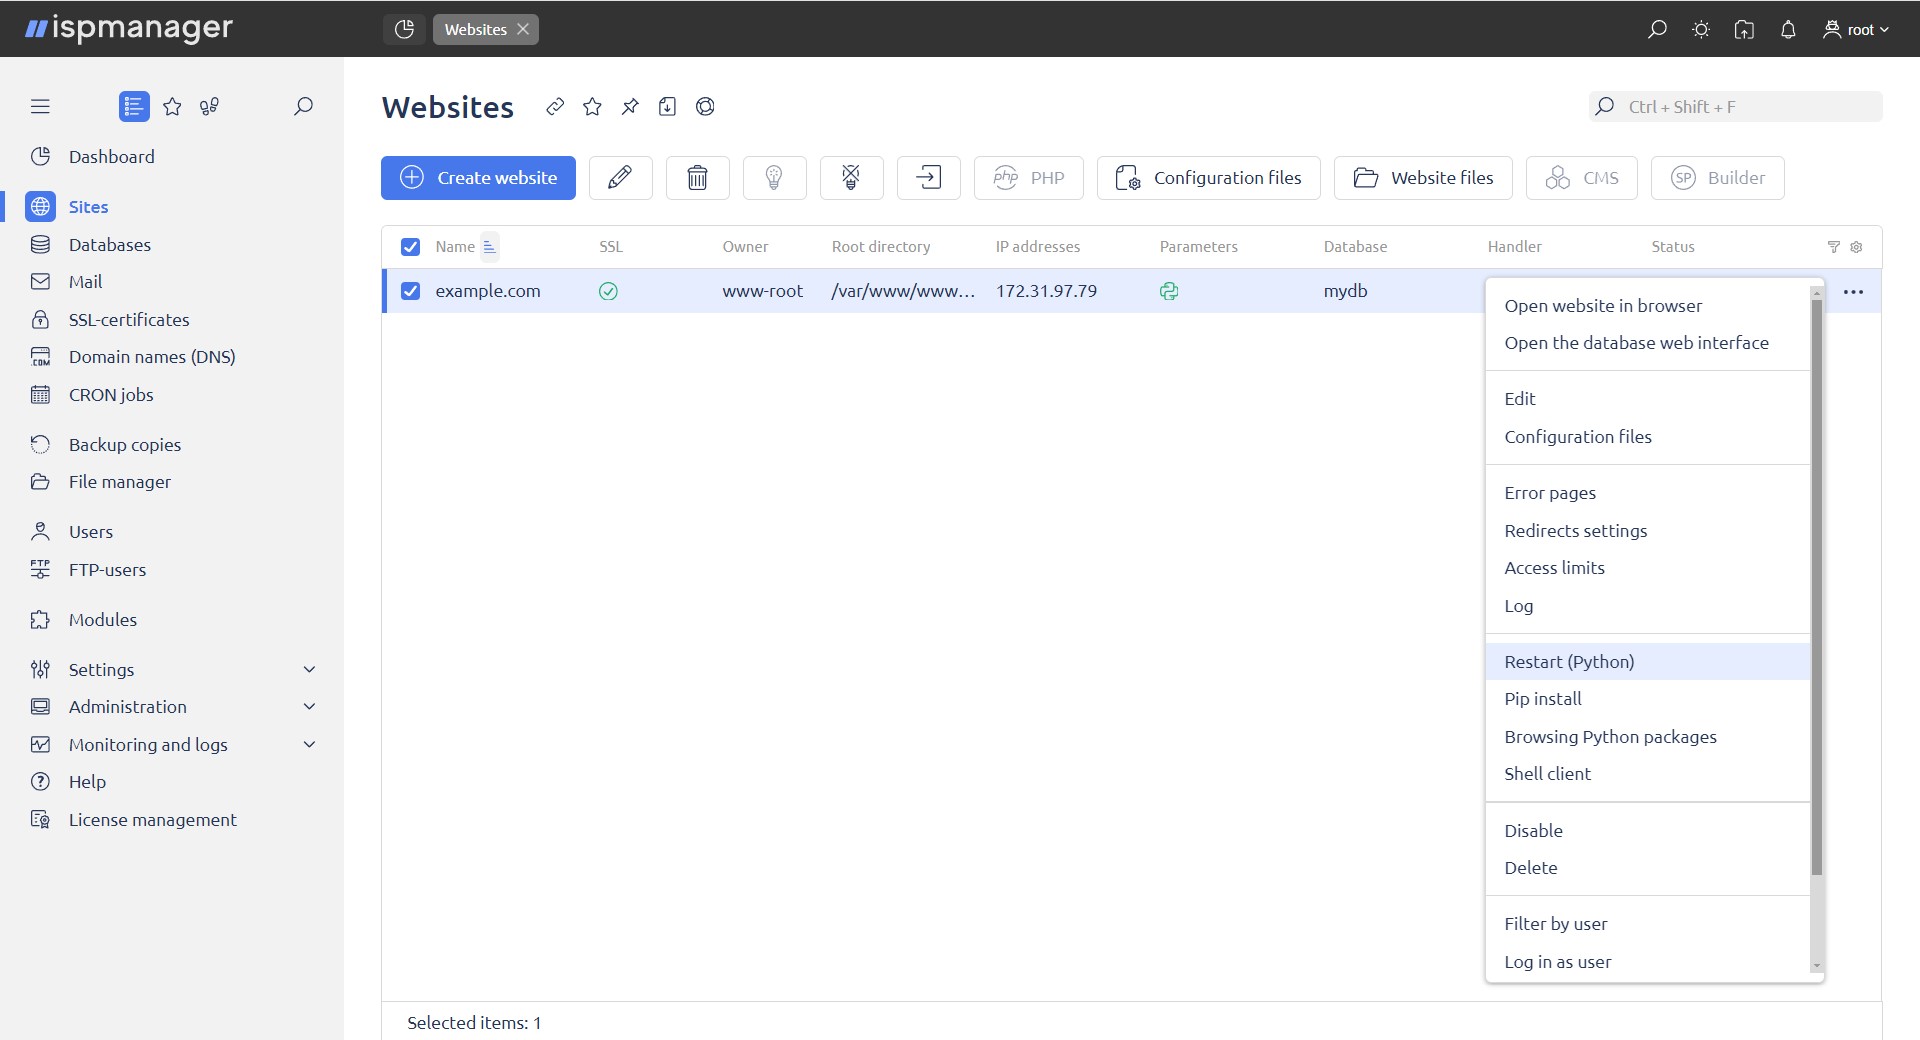
- go to Sites
- select a site
- click on the context menu
- click the Restart (Python) button
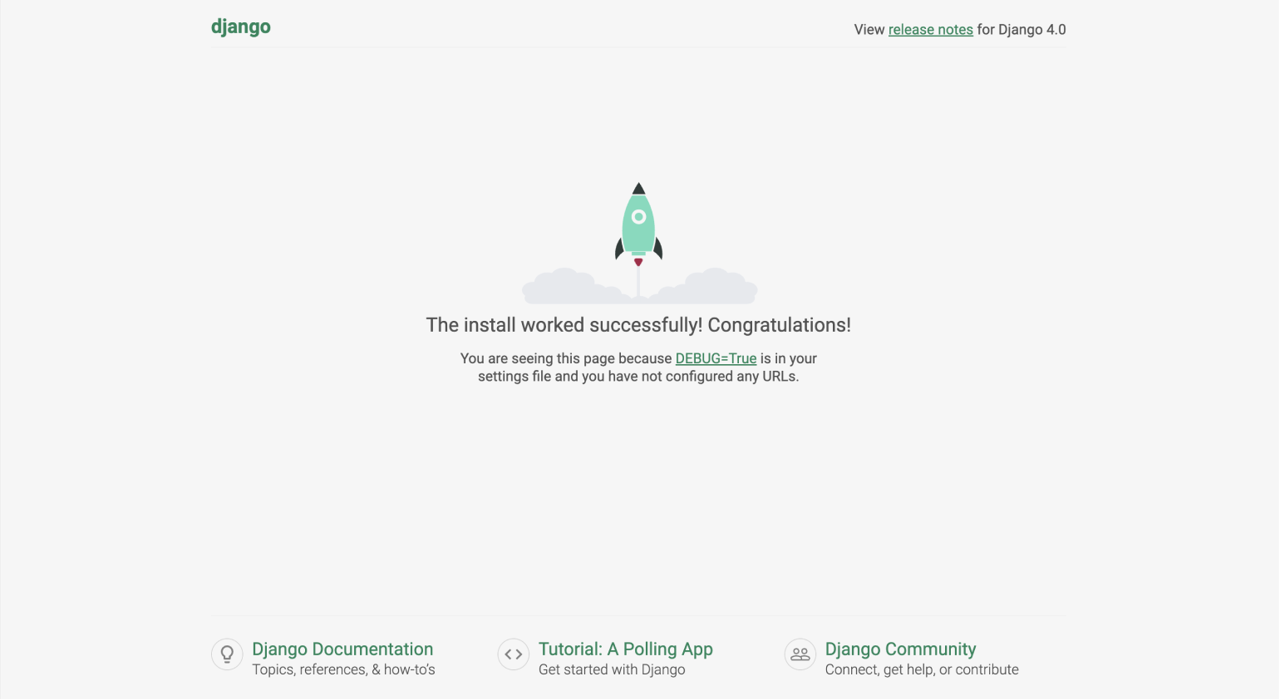
You will see the Django starting page in your browser.