CMS Installation
In the ispmanager panel, CMS is a ready-to-install program that can be added to websites in the Websites or CMS sections.
The CMS catalog features CRM and other useful website support applications, such as Bitrix and Laravel. This offers users an opportunity to quickly find and configure ready-made solutions for their websites.
CMS installation
There are two ways to install a CMS, each with a different purpose:
- when creating a website: the panel automatically uploads files, creates a database, configures access rights, and starts the installation. Applicable for quick launch of a new project.
- after creating a website: the panel installs the CMS to an existing website. Applicable for creating test websites or copying projects.
New website
To install the CMS when creating a website, fill in the following fields:
- Public directory — The folder containing the website contents, accessible to users in the browser. For Laravel, the
/publicfolder is automatically installed and cannot be edited. Specify the folder for other CMSs if necessary. - Handler — PHP. CMS installation is not available for Python and Node.js.
- CMS — WordPress, HostCMS, Bitrix, Joomla 4, Joomla 5, or Laravel
- Use PHP Composer — located in the Extended settings tab; used only for Laravel. If this option is not available, configure access for the appropriate site owner user.
Complete the site setup by selecting the remaining options you need.
Existing website
Laravel can be installed only when creating a new site.
To install the script after the site has been created:
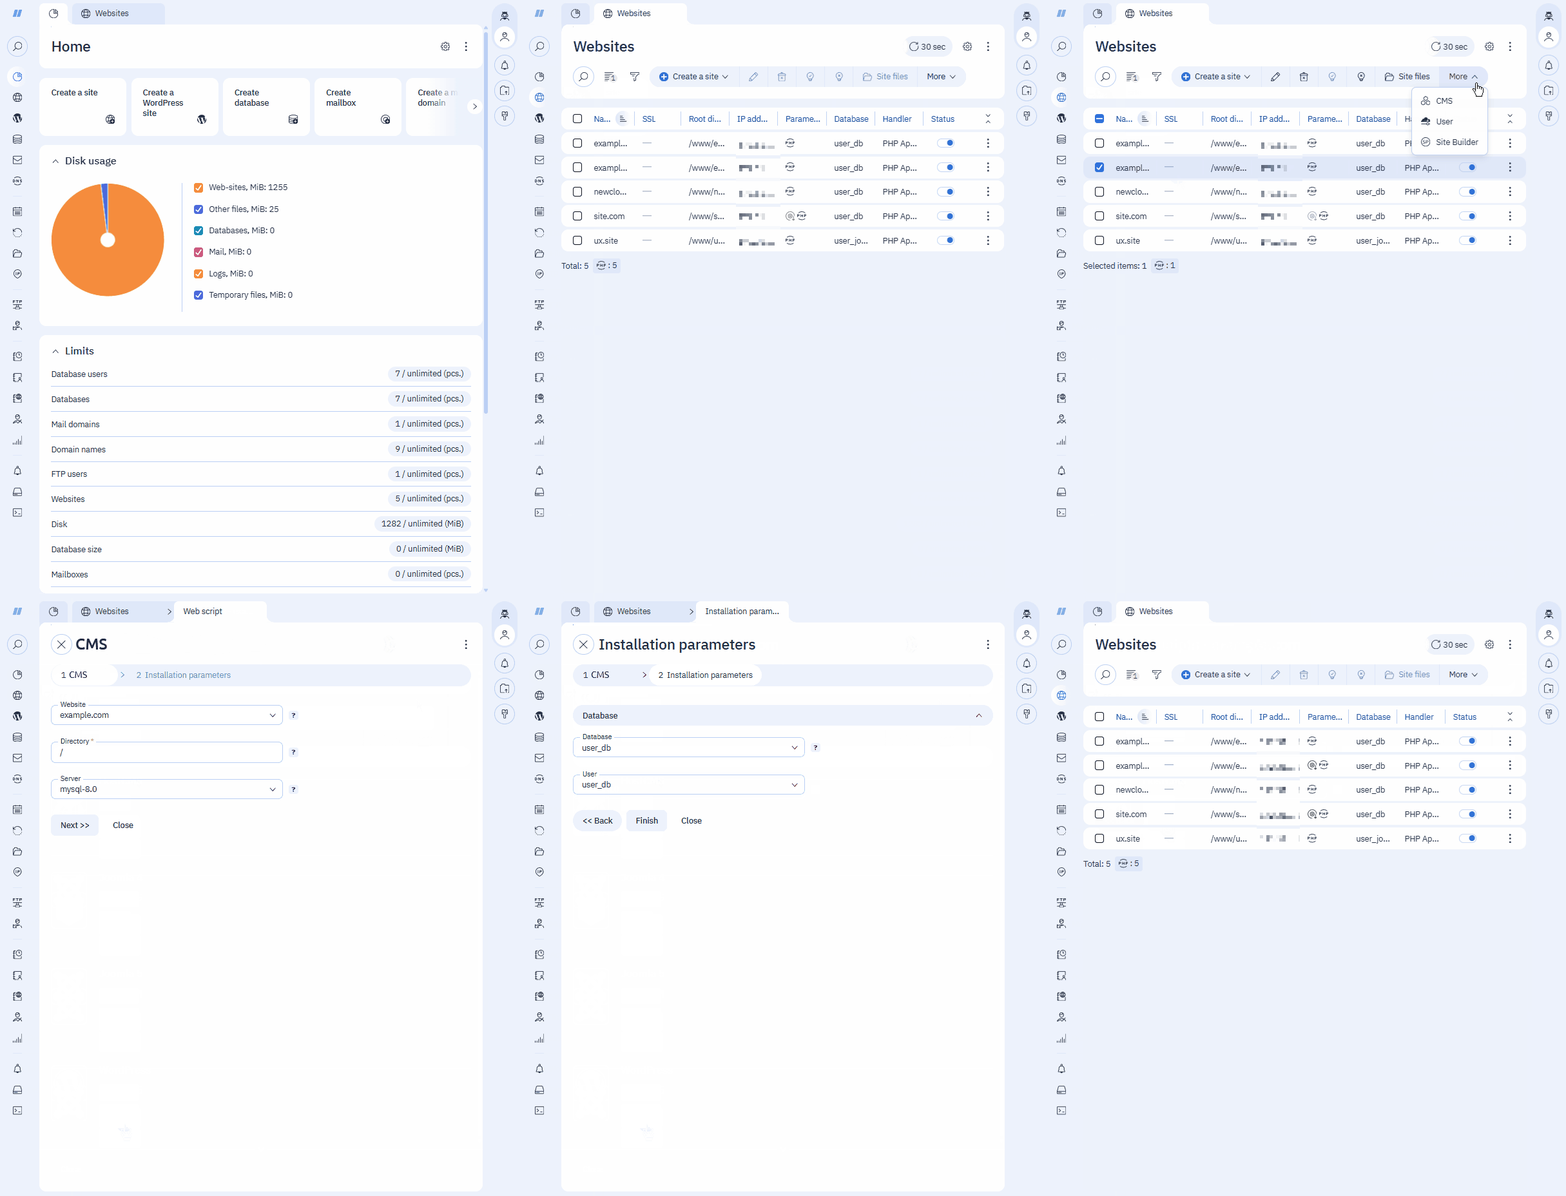
- Log in to ispmanager with the required account.
- Go to the Sites section.
- Select the desired site from the list.
- On the toolbar, click
 CMS.
CMS. - In the Available for installation section, select CMS.
- Click Install.
- In Step 1, CMS, select the site, server, and CMS installation directory.
- Click Next >>.
In Step 2, Installation parameters, select or create a database with its user.
How to create a database with a user- Database — select to create a new database
- Database name — name of the database
- User — select to create a new database user
- Username — name of the user
- Password — password of the user
- Confirm — confirm the password
- Database — select to create a new database
- Click Finish.
Troubleshooting during CMS installation
Error: "
 Unable to install CMS: the following modes are enabled on the MySQL server: NO_ZERO_DATE, NO_ZERO_IN_DATE, ONLY_FULL_GROUP_BY. Disabling them automatically may lead to the failure of other websites. Disable these modes manually or select a different MySQL server."
 Specify an earlier version of MySQL and try installing the CMS again.
Error: "
Database query failed." Check that the database was specified or create a separate database with its username, then link the existing database.
After CMS installation
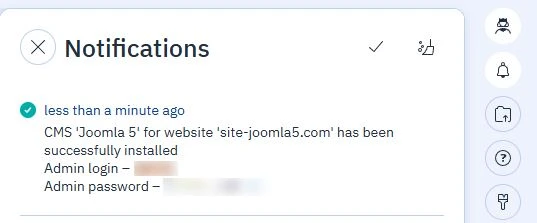
If the CMS was successfully installed, a notification appears in the control panel: " CMS 'CMS_NAME' for site 'SITE_NAME' installed successfully." For WordPress, Joomla 4, and Joomla 5, the notification will also provide login information for the admin panel.
Save your login and password for logging into the Joomla 4 and Joomla 5 admin panels, as the data is only displayed in the notification and is not stored in the panel.
After installing WordPress, you will be able to manage your database, plugins, and WordPress versions in the corresponding section.
When attempting to install an additional CMS on a site, an error message will be displayed: " An error occurred while installing the CMS 'CMS_NAME' for site 'SITE_NAME'." The CMS directory may display multiple installed CMSs. To change the CMS, delete the previous one using any convenient method.
Administrative credentials
Administrative credentials are generated in the control panel only for three CMSs:
When a site is successfully created or a CMS is installed, a notification will be displayed in the control panel stating that WordPress has been installed. The notification also shows credentials for logging into the WordPress admin panel and database.
In ispmanager, you can change the password for logging into the admin panel. The password is stored in an internal wordpress table. When changing credentials in the admin panel, the username and password generated in the control panel are not updated.
When creating a site or installing Joomla 4 or Joomla 5 on an already existing site, a username and password for the admin panel are generated. The credentials are included in the notification text but are not stored in the ispmanager control panel. When changing credentials in the admin panel, the username and password from the ispmanager control panel are not updated.
To access the admin panel, use the link in a separate browser tab: http://SITE/administrator. If you're using a secure connection, enter https:// at the beginning of the link.
For the remaining CMSs, the panel does not generate login credentials for the admin panel.
After creating a website or installing a CMS on an existing website, the login and password are registered in the /usr/local/mgr5/var/webscripts.log log.
Deleting a CMS
There are two ways to delete a CMS in the control panel:
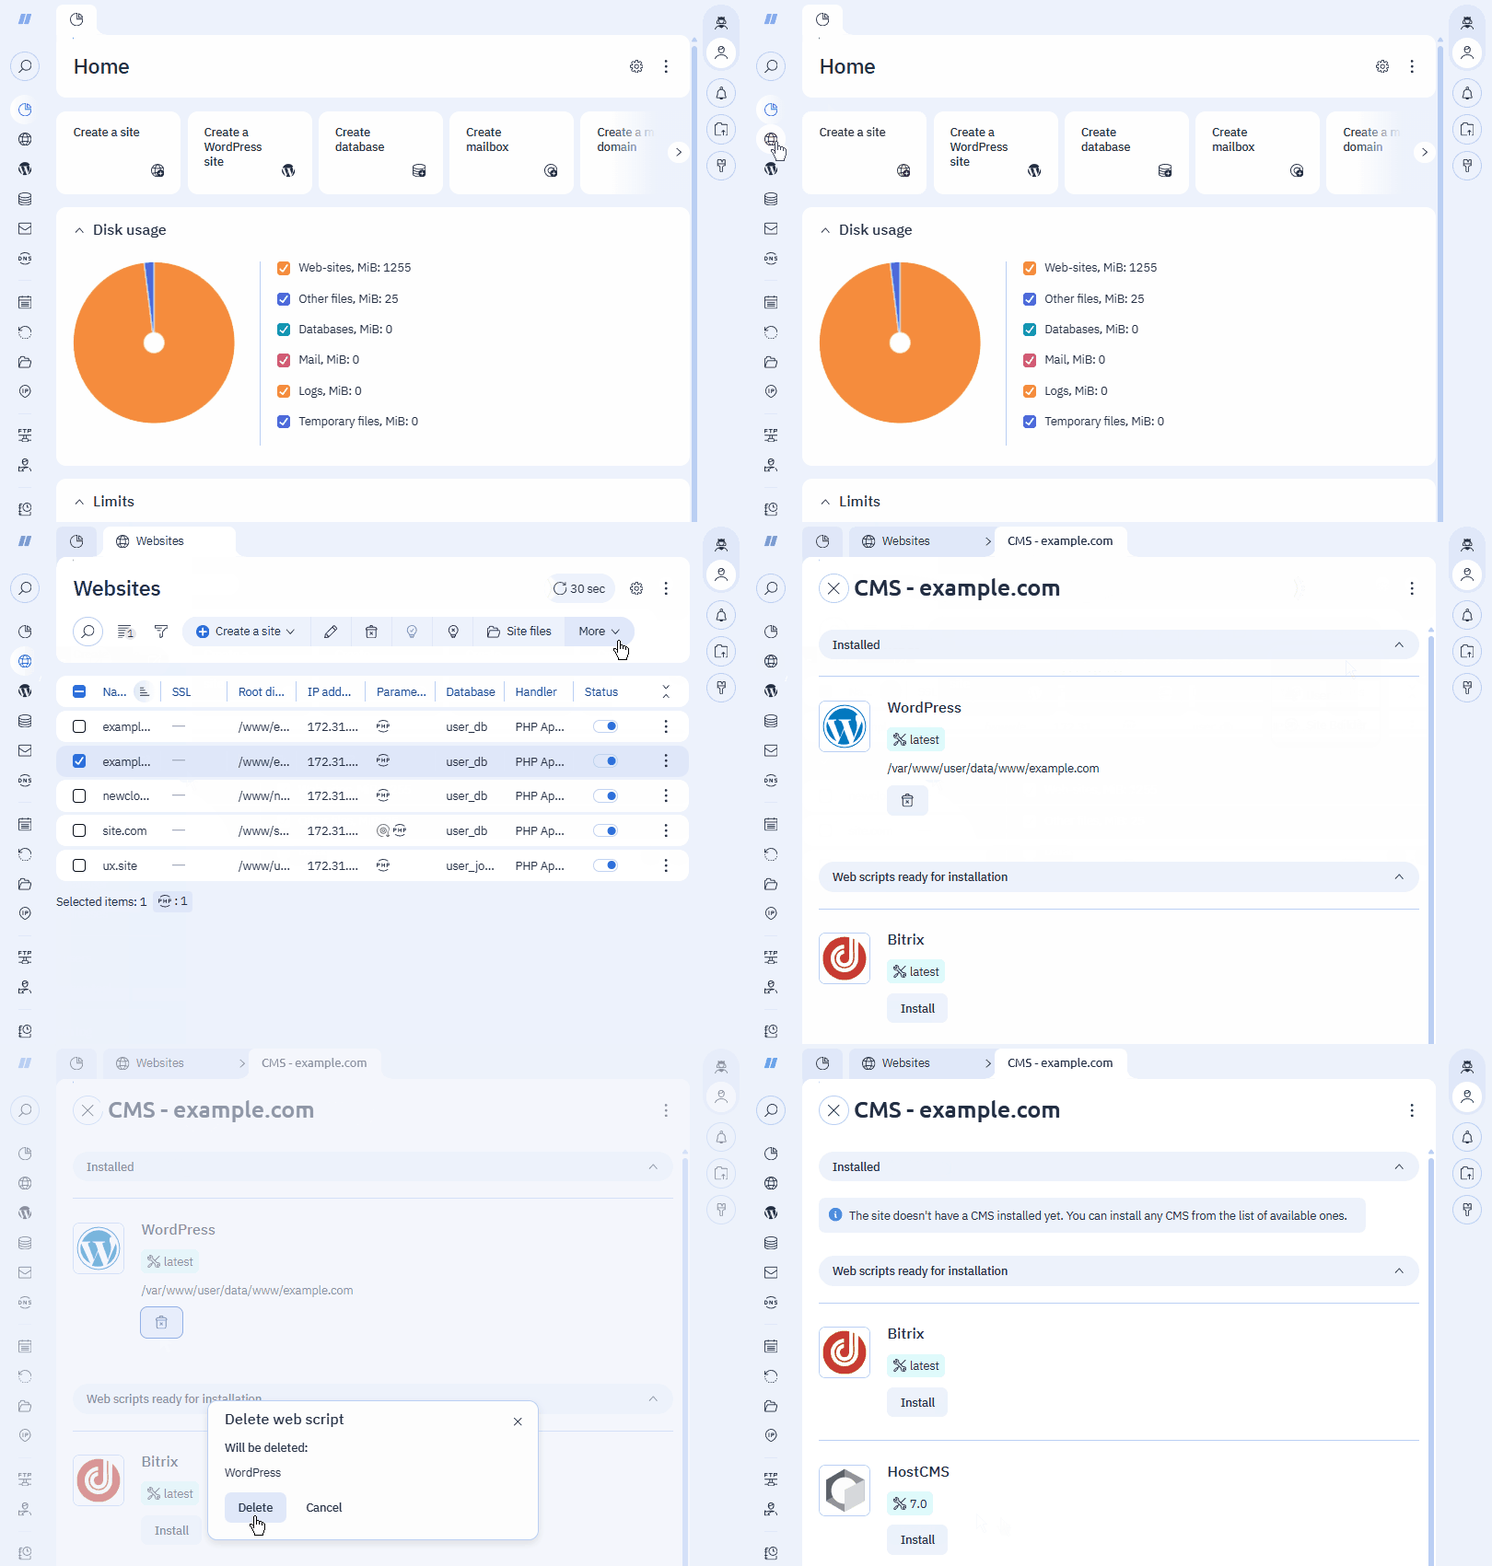
- Log in to ispmanager with the required account.
- Go to the Sites section.
- Select the desired site from the list.
- On the toolbar, click CMS.
- In the Installed section, click
 for the selected script.
 - Confirm the script deletion.
- Log in to ispmanager with the required account.
- Go to the Sites section.
- Select the desired site from the list.
- On the toolbar, click
 Site files.
 - Select the files or folder containing the script.
- Click on the toolbar.
- Confirm the deletion.
After deleting the installed CMS for a site, the interface no longer displays the installed CMS, but its files remain in the site files. This simplifies restoring the CMS after replacing or deleting it.
Exception: themes, plugins, and CMS versions installed for the site are deleted in the WordPress section.
Technical details
The control panel automatically checks system requirements before installing the CMS and installs the latest version. If any issues are detected, a notification is displayed.
When the CMS is first installed, the required package is uploaded to the server and installed in the site's root directory or the one specified by the user. If the directory does not exist yet, it is created. The script replaces directory contents.
CMS configuration files
By default, the path to the CMS configuration files is /var/www/USER/data/www/USER_SITE.
CMS files:
wp-*— WordPress files. Example:wp-login.php,wp-config.php,wp-adminhostcmsfiels— folder containing HostCMS filesbitrix— folder containing Bitrix files- all except
index.htmlorindex.php— for Laravel, Joomla 4 and Joomla 5