DNS cluster ispmanager + ispmanager
For faster and more reliable DNS hosting, it is recommended to use a cluster of master and slave (or several slave servers) servers rather than a single name server. Domain zones are managed on the master name server, and information is replicated from the master server to the slave servers. This way, if the master name server is unavailable, the slave server will provide domain information.
DNSManager or another ispmanager can be used as slave name servers in the ispmanager panel. This article describes setting up and using a slave ispmanager.
Requirements
- A minimum of two ispmanager servers, each with at least one public IP address: one for the master name server, one or more for slaves.
- master: a server with sufficient resources to support websites and DNS
- slave: a server with at least 4 GB of RAM and 20 GB of disk space
- A registered domain accessible to global DNS for setting up name servers.
Step 1. Configuring the slave ispmanager
- Install the ispmanager control panel on a separate server using the "Recommended software" or "DNS only" option.
- Log in to the control panel with a reseller-level account or above.
- Create an integration account and remember the password.
We recommend using user-level accounts and disallowing different owners for domain names in policies.
In this case, if multiple master servers connect to a slave ispmanager, a domain existing on one server cannot be created on another.
Step 2. Configuring master ispmanager
- Log in to the master ispmanager control panel as a superuser.
- Install a DNS server if one isn't already installed (BIND or PowerDNS).
Configure the name server.
Details- Go to the DNS management section.
- On the toolbar, click
 .
. - In the Name servers field, enter the master server first, then the slave server, separated by a space and followed by a period, for example:
ns1.example.com,ns2.example.com. - Leave the IP addresses for name servers field blank, or manually enter the master and slave ispmanager IP addresses in that order.
- Fill in the remaining fields according to the instructions.
- Save the changes.
Add A/AAAA records for the master and slave name servers in the domain zone of your domain
example.com.Details- In your personal account at the
example.comdomain registrar, go to the domain zone management section. - Create a new A record if you're using an IPv4 address, or an AAAA record if you're using an IPv6 address:
- in the Subdomain field, enter the name of the master nameserver, for example,
ns1.example.com - in the IP address field, enter the IP address of the master ispmanager
- in the Subdomain field, enter the name of the master nameserver, for example,
- Do the same for the slave nameserver.
- In your personal account at the
If necessary, delegate your
example.comdomain to your own nameservers.Details- In your personal account at the
example.comdomain registrar, go to the DNS servers section. - Replace the registrar's nameservers with your own:
- in the Server name field, enter the name of the master nameserver, for example,
ns1.example.com - in the IP address field, enter the IP address of the master ispmanager
- in the Server name field, enter the name of the master nameserver, for example,
- Do the same for the slave nameserver.
- In your personal account at the
In this case, the example.com domain will also need to be created in ispmanager. Delegating the domain to the nameservers can take 24-48 hours.
Step 3. Configuring ispmanager + ispmanager integration
- Log in to the master ispmanager with an administrator-level account or above.
- Go to DNS management.
- On the toolbar, click Slave servers.
- Click Add server.
- Fill in the fields:
- Control panel URL — enter the URL of the control panel with the slave ispmanager in the format
https://PANEL_ADDRESS:PORT/ispmgr - User — login for the slave ispmanager account
- Password — password for the slave ispmanager account
- Synchronize — check the box to transfer domains from the master ispmanager to the slave ispmanager.
- Control panel URL — enter the URL of the control panel with the slave ispmanager in the format
- Save the changes.
The domains will appear on the slave ispmanager in the DNS management section with the "slave" type:
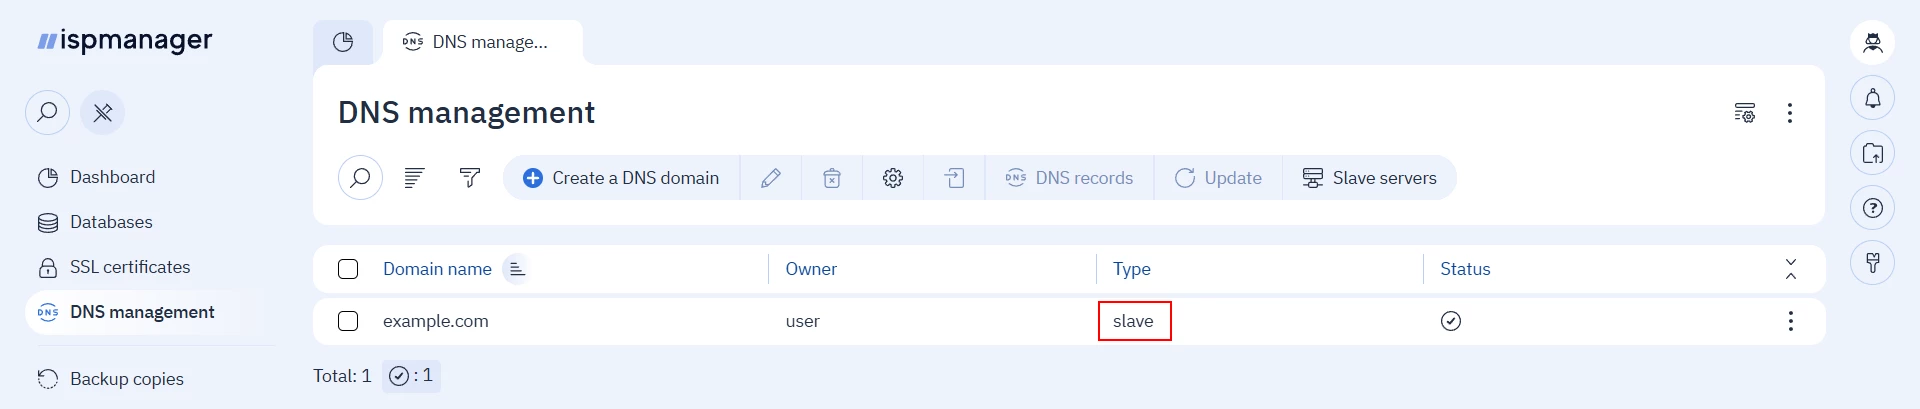
Domain management
The following are available on the master ispmanager:
- creating domains
- editing domain records
- deleting domains
The following are available on the slave ispmanager:
- viewing domain DNS records
- adding comments to domains
- deleting domains
Adding a comment on the slave ispmanager will not be reflected on the master, as data is replicated only from the master ispmanager to the slave panel, not vice versa.
Synchronization between servers
When the domain on the master ispmanager changes, the information is automatically replicated to the slave server.
If necessary, synchronize information manually:
- Log in to ispmanager with an administrator-level account or above.
- Go to the DNS management section.
- Select the domains which data you want to synchronize.
- On the toolbar, click
 Send to slave servers.
- Log in to ispmanager with an administrator-level account or above.
- Go to the DNS Management section.
- Select the domains which data you want to synchronize.
- On the toolbar, click
 Update.